


How are the templates installed?
Installing a template is a fairly simple process to follow..
Step 1: A theme can be installed using WordPress Administrator by following these steps.
First, access your WordPress admin panel..
Proceed to the "Appearance" menu and select "Themes."
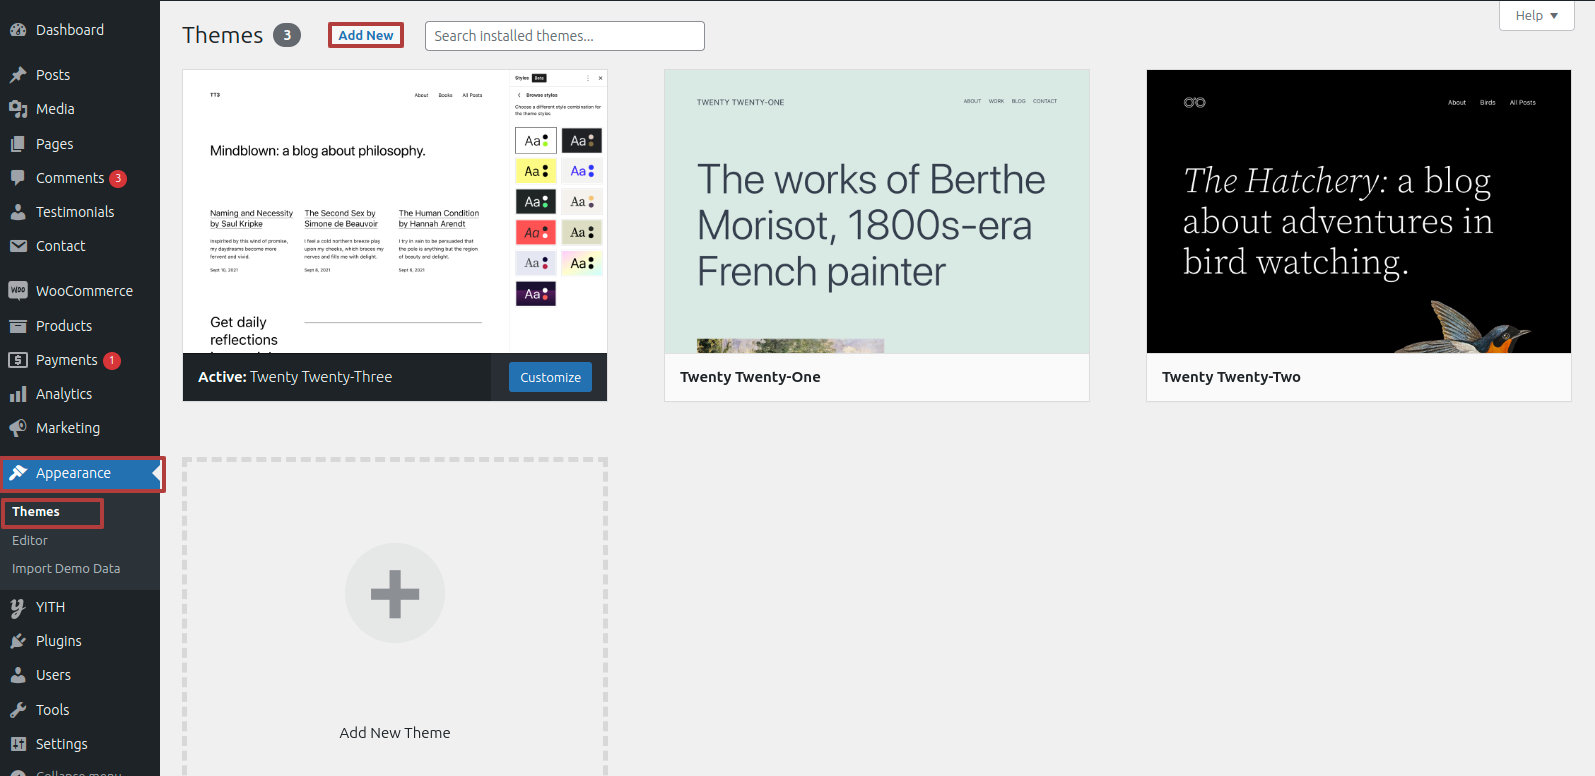
Once on the themes page, select"Add New" from the menu at the top of the page.
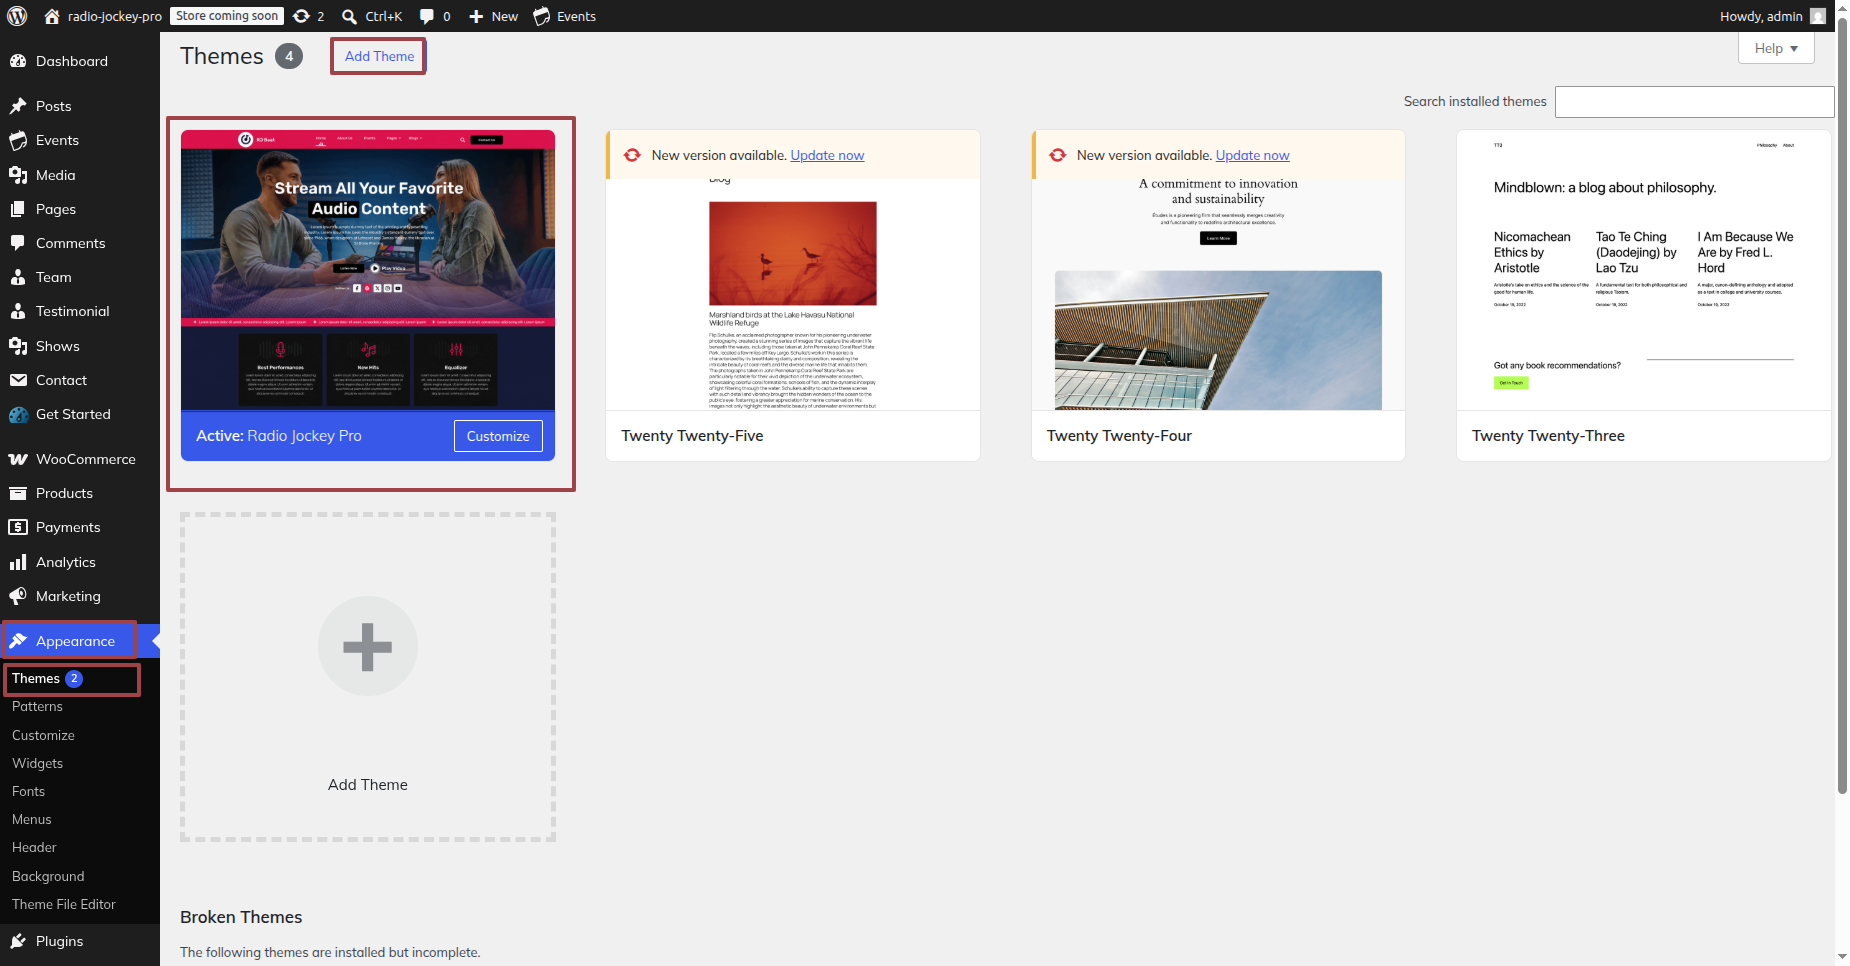
Clicking the "Upload Theme". button is necessary.
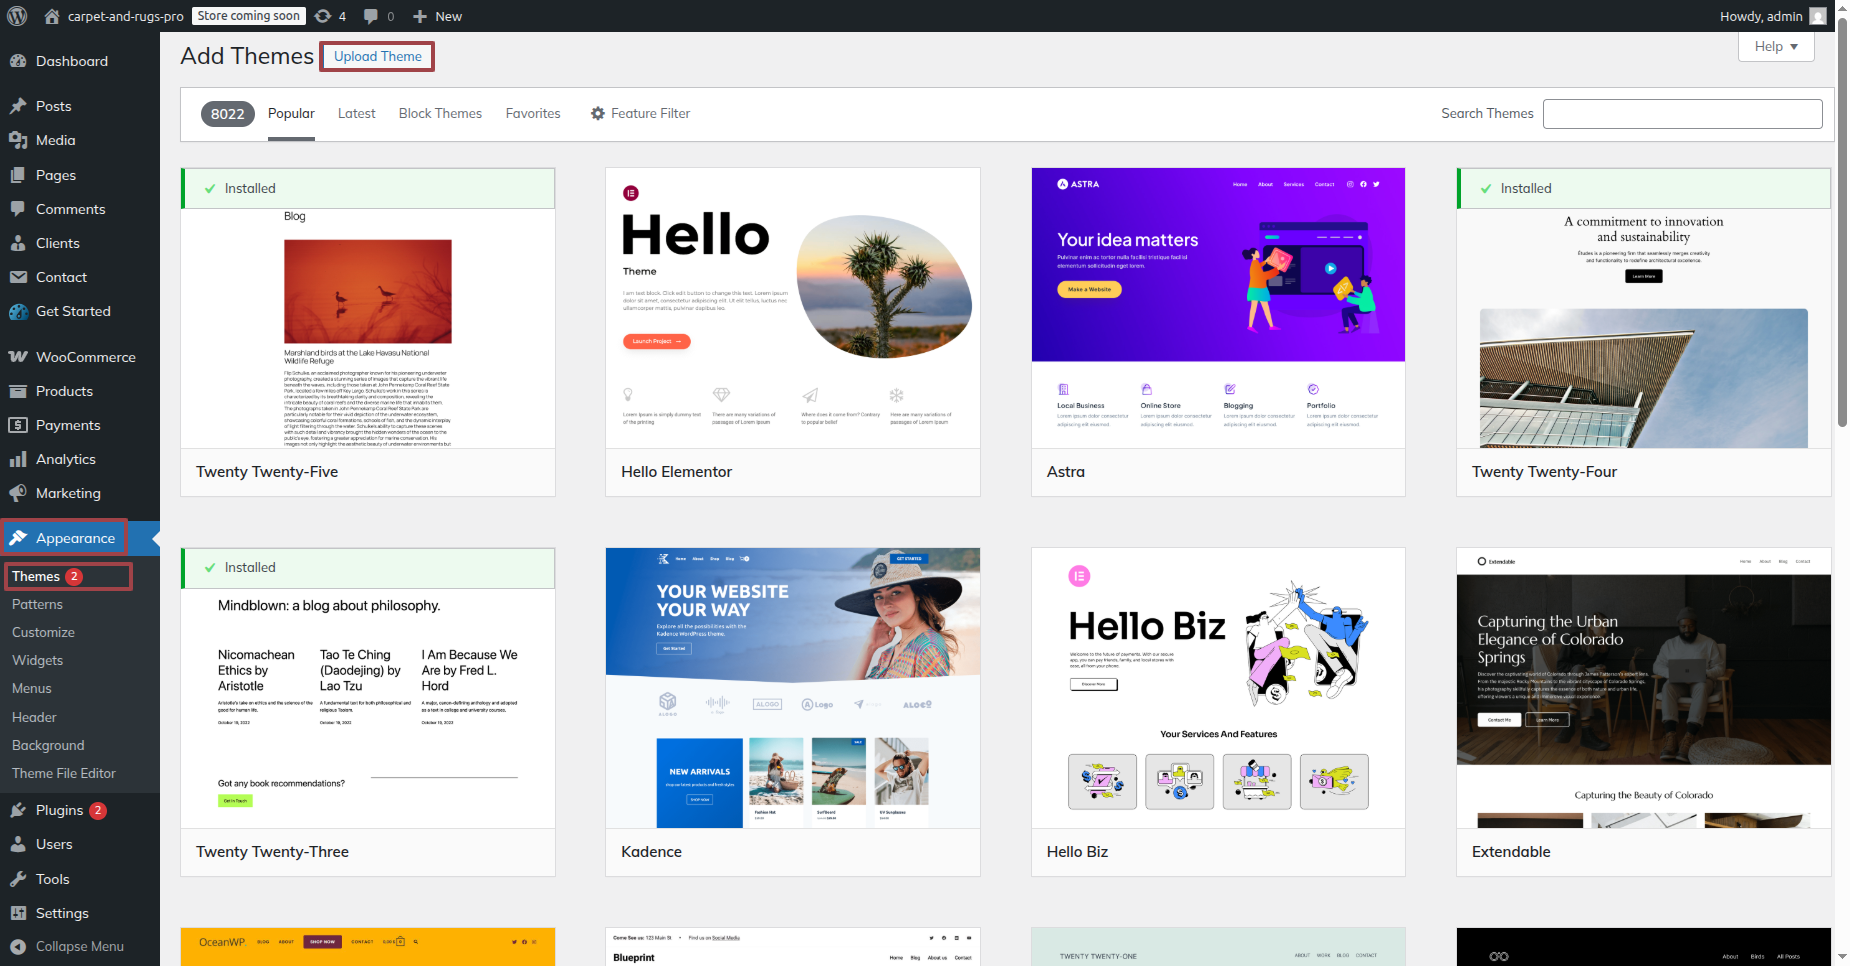
After choosing your preferred radio-jockey-pro.zip theme, click the Browse button and click the Now Installing button.
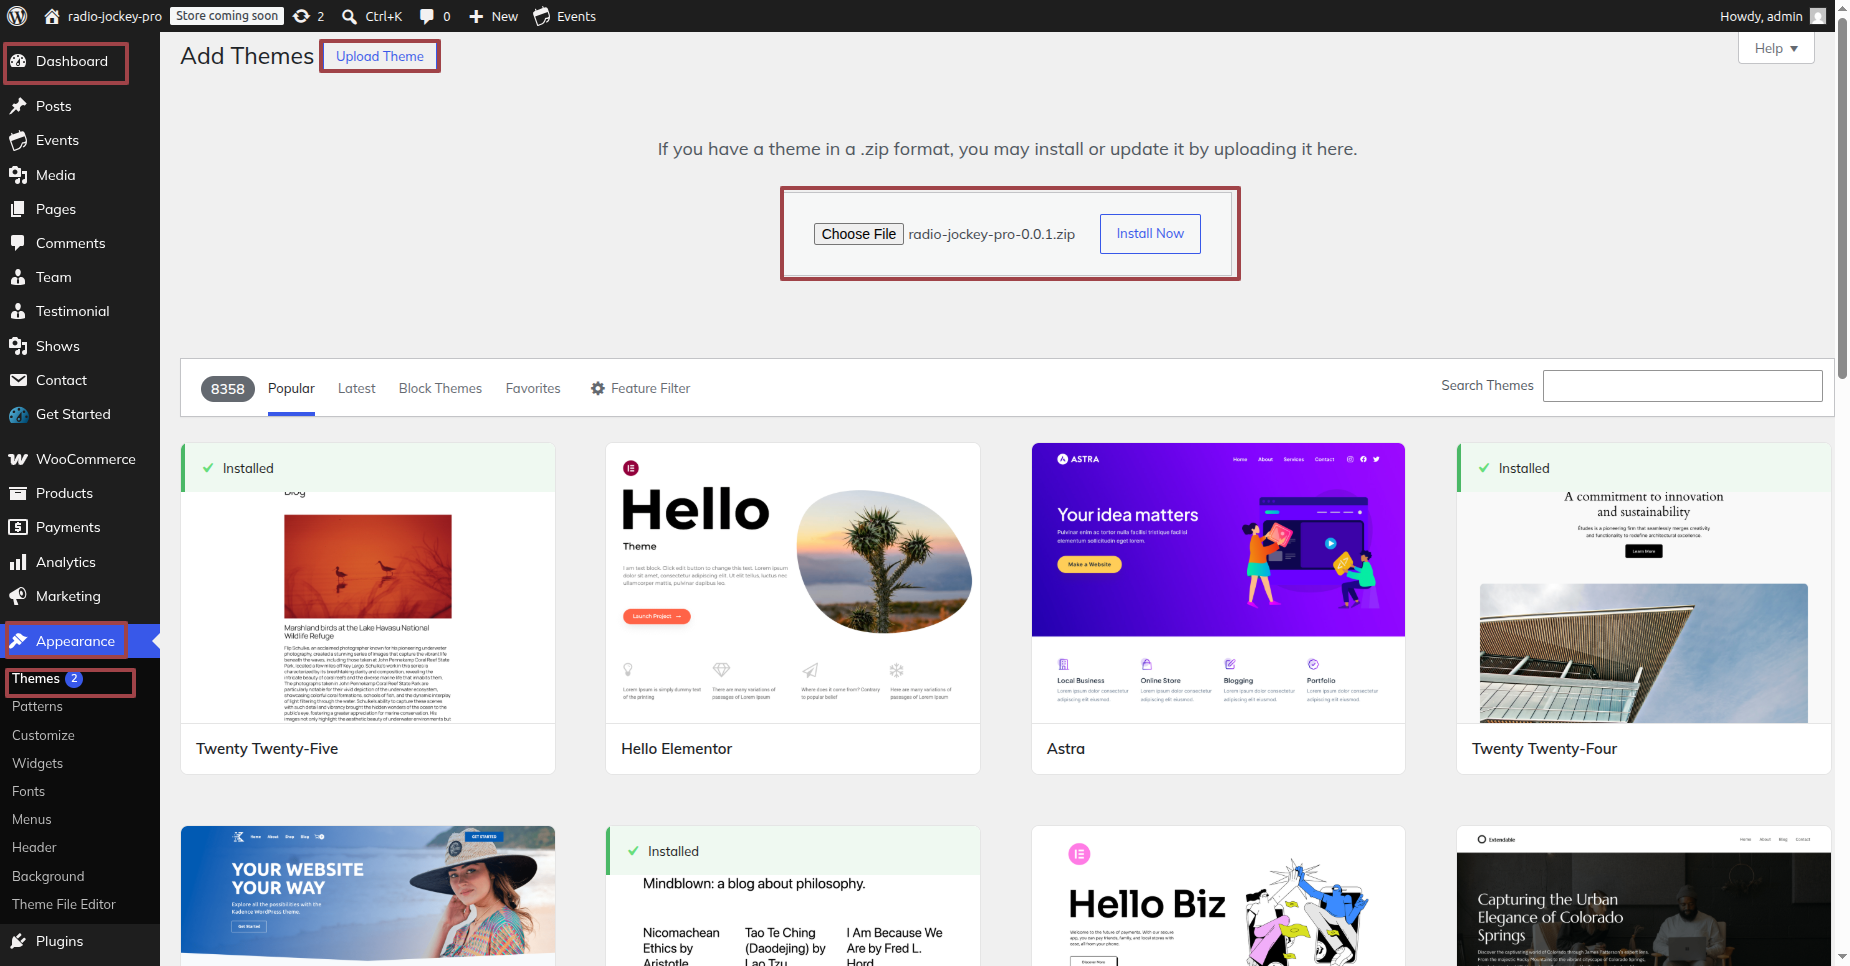
At this point, WordPress will install the theme of your choice and display a success message with options to activate or view a live preview of the theme.
STEP 2. INSTALL A THEME THROUGH FTP
The theme can also be uploaded via FTP as an additional installation method. Using this method requires that you first use FTP to access your website and navigate to the wp-content/themes folder. To get started, just download the theme file to your server, then extract the Total folder.
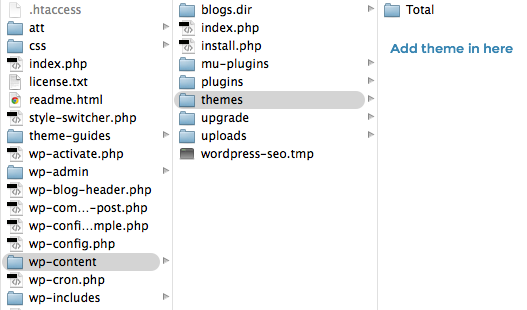
Next, sign into WordPress and go to the "Appearance" page. By selecting "Themes" under Appearance, you can activate the entire folder
INSTAL ALL NEEDED PLUGIN
Using plugins, you can increase WordPress's functionality.
The Way Plugins Are Enabled Activating the plugin is required if you want these features in your theme. Use the procedures listed below to activate the plugin in your theme.
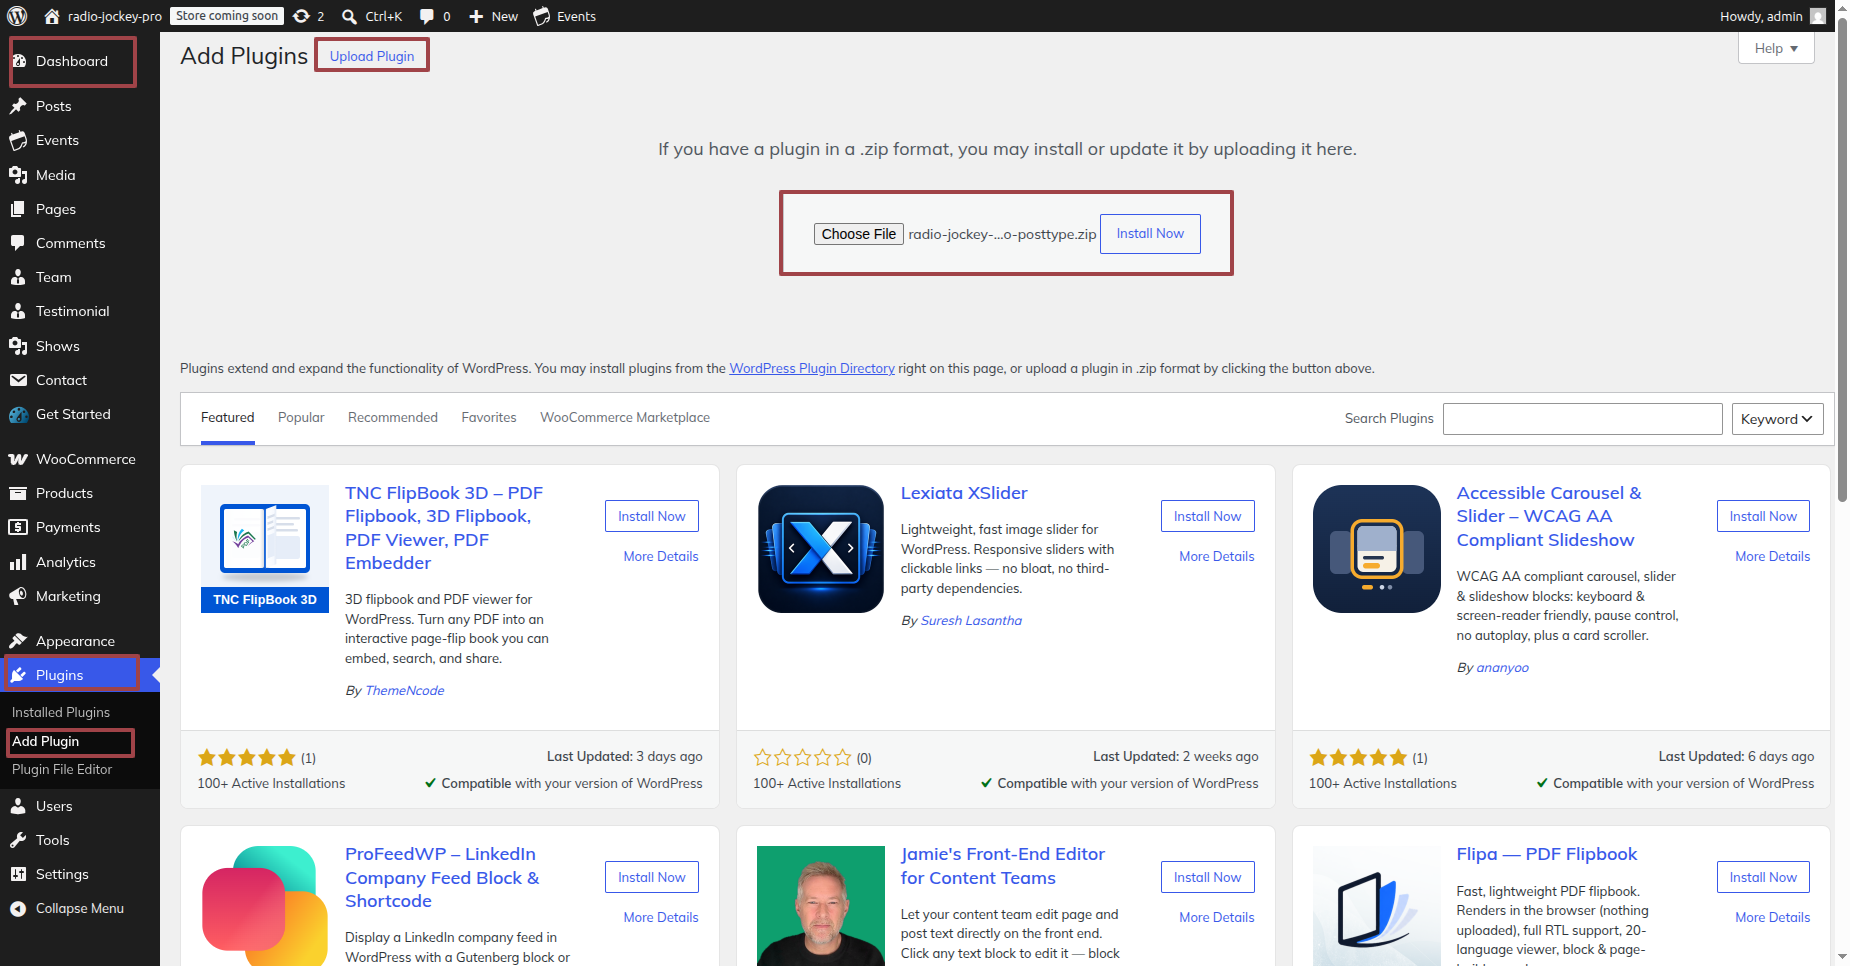
The methods described below can be used to manually install a WordPress plugin from a.zip file.
1. Add Plugin : Visit the Dashboard By going to Plugin Head over to Add New Proceed to Upload plugin .
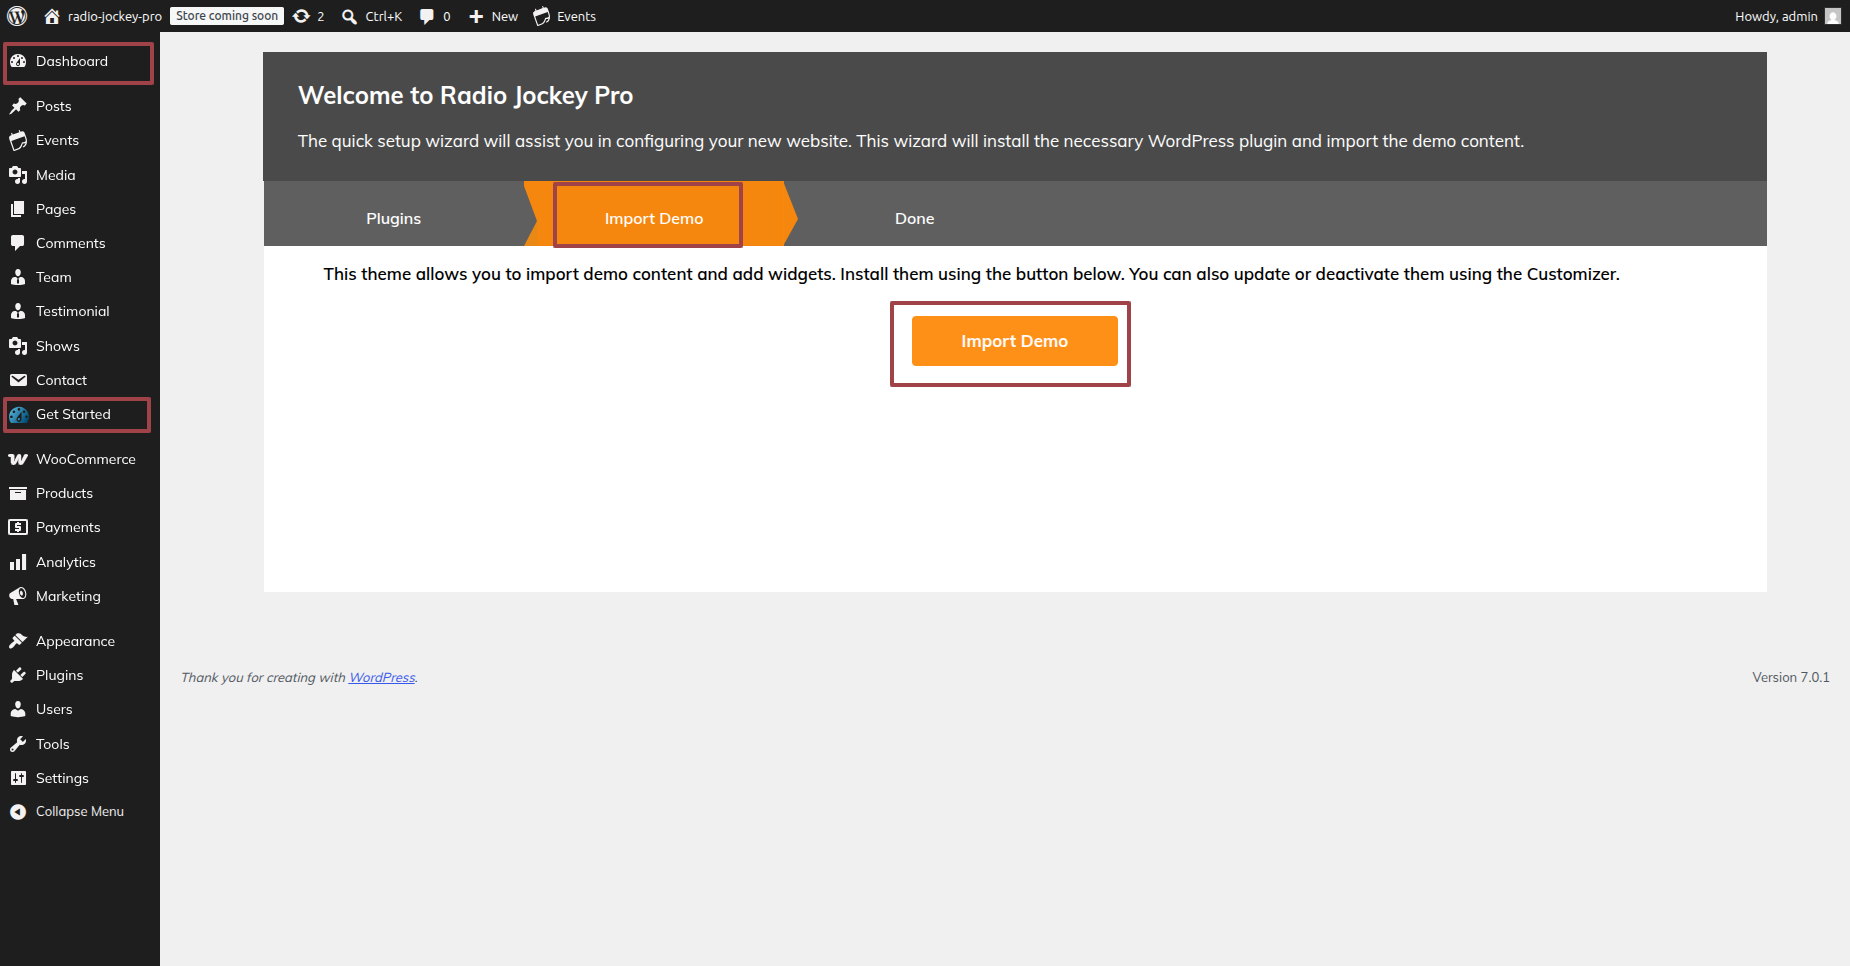
Upon selecting"Import Demo," proceed to activate.
Demo Importer Plugin installation is required.
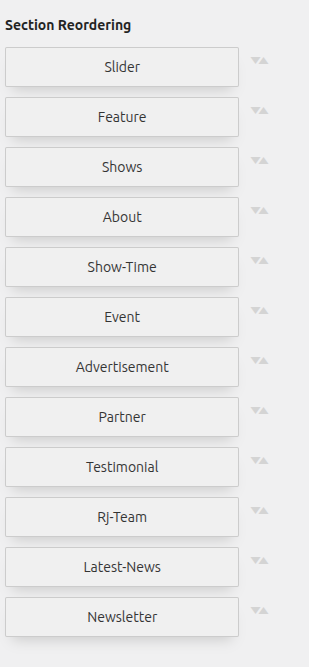
Establishing Section Ordering
The term "section reordering" refers to moving the sections around to better suit our needs. When moving a piece to the top or bottom, make sure to select it first. Whatever piece you drape will change your front view based on your selection.
Section Ordering can be found under"Appearance" By going to "Customizing" Head over to "Theme Settings" Proceed to "Section Ordering" .
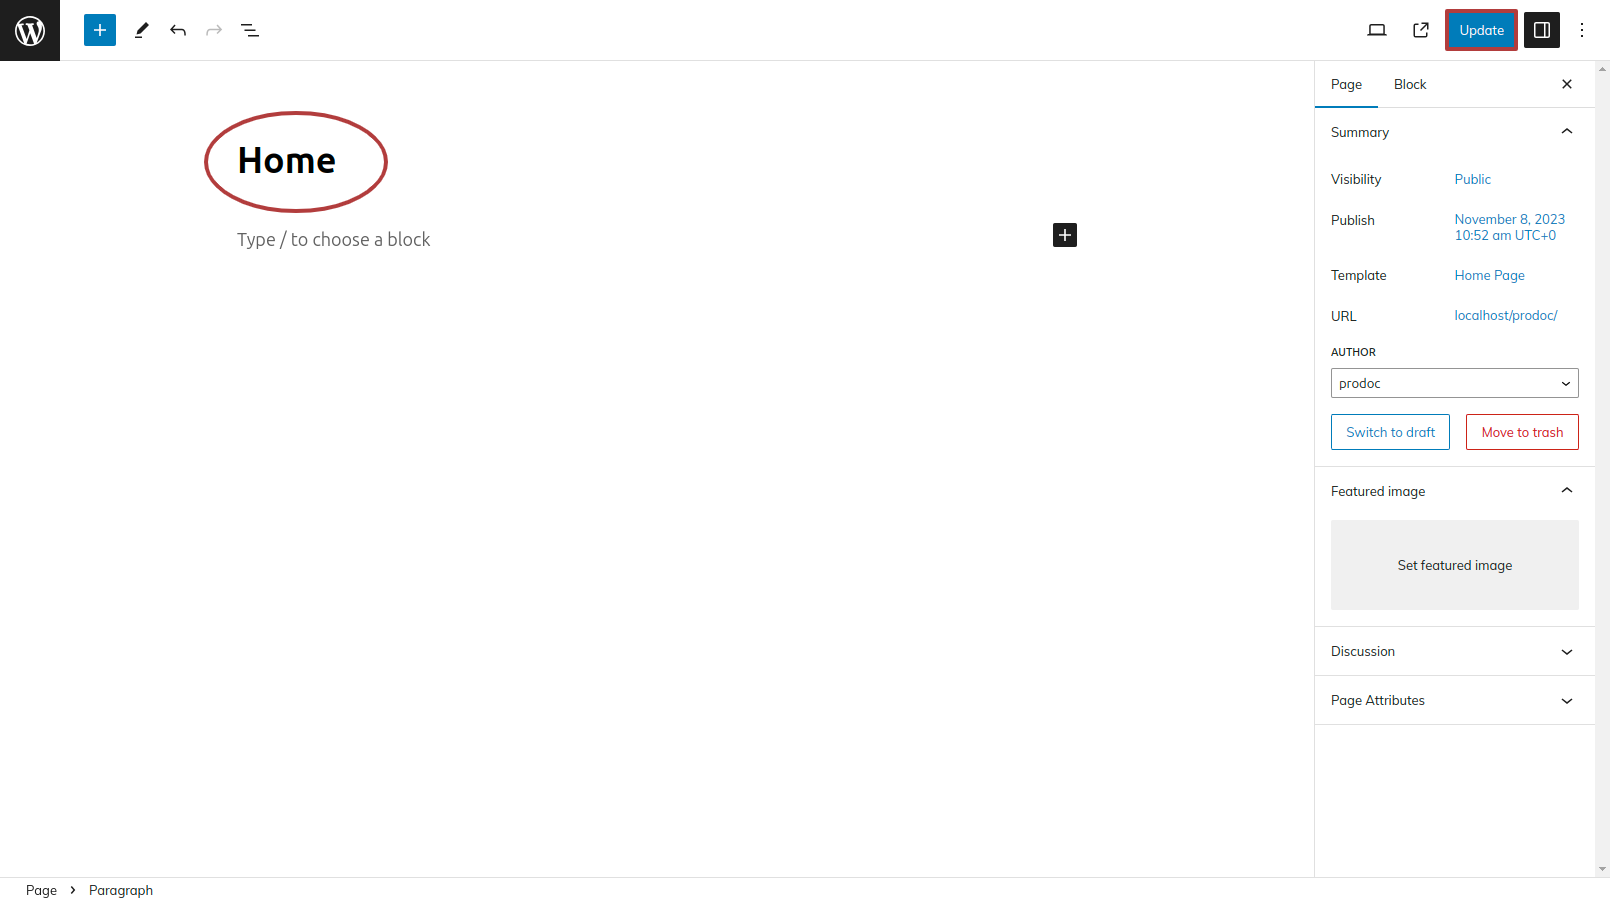
How To Set Static Page
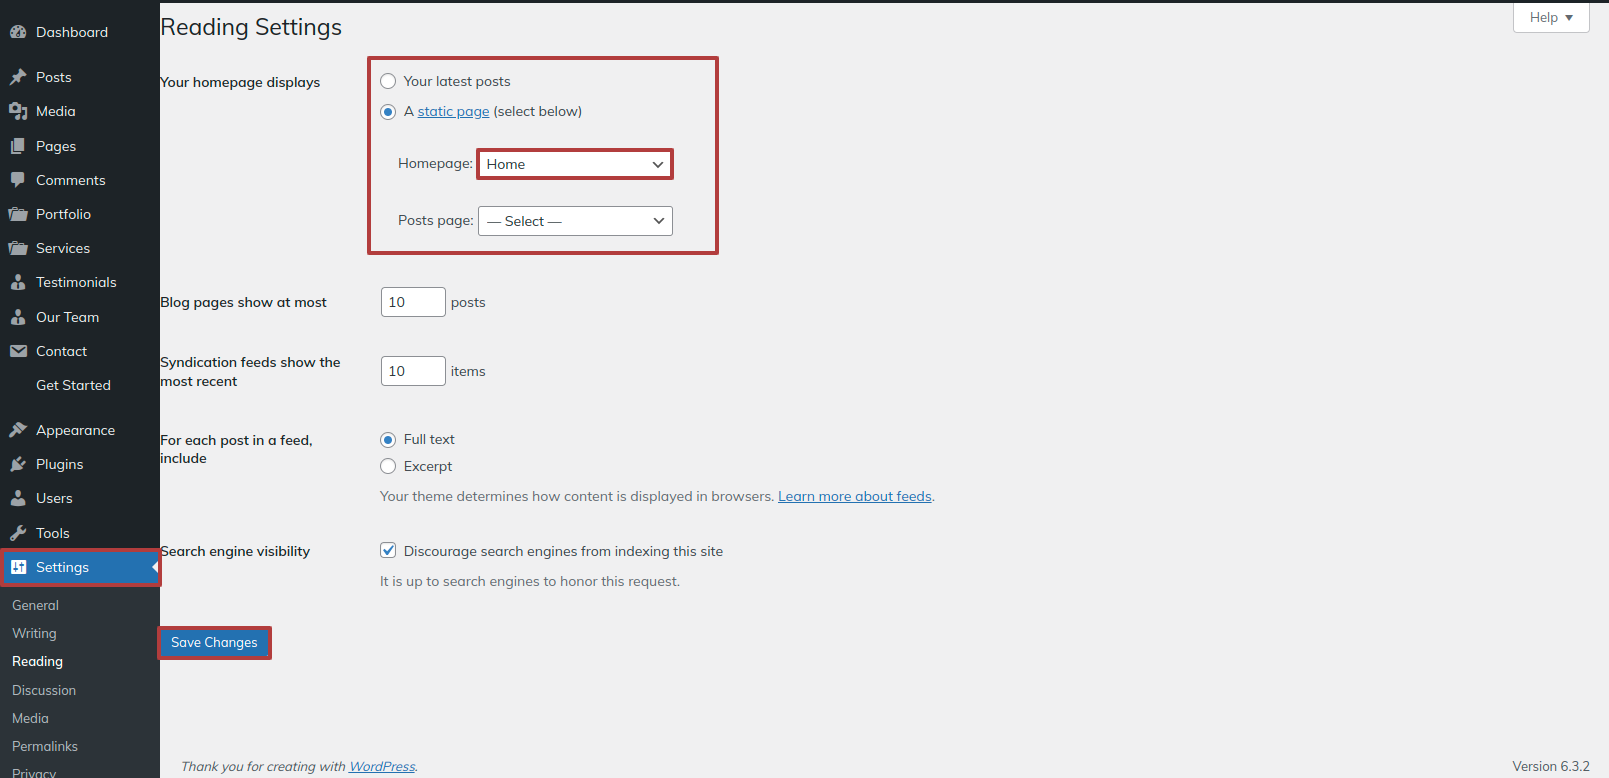
Either identify your home page as such or provide the name of your parent website. Next, modify the static template to the home page by selecting Reading from the settings menu.
To establish a template, make a page.Navigate to the "Dashboard"'s Pages. I'd like a Home Page..
Choose the page you recently created to function as your homepage right now by selecting the Static Page option under Your Homepage Display setting.
Section on Developing The Navigation
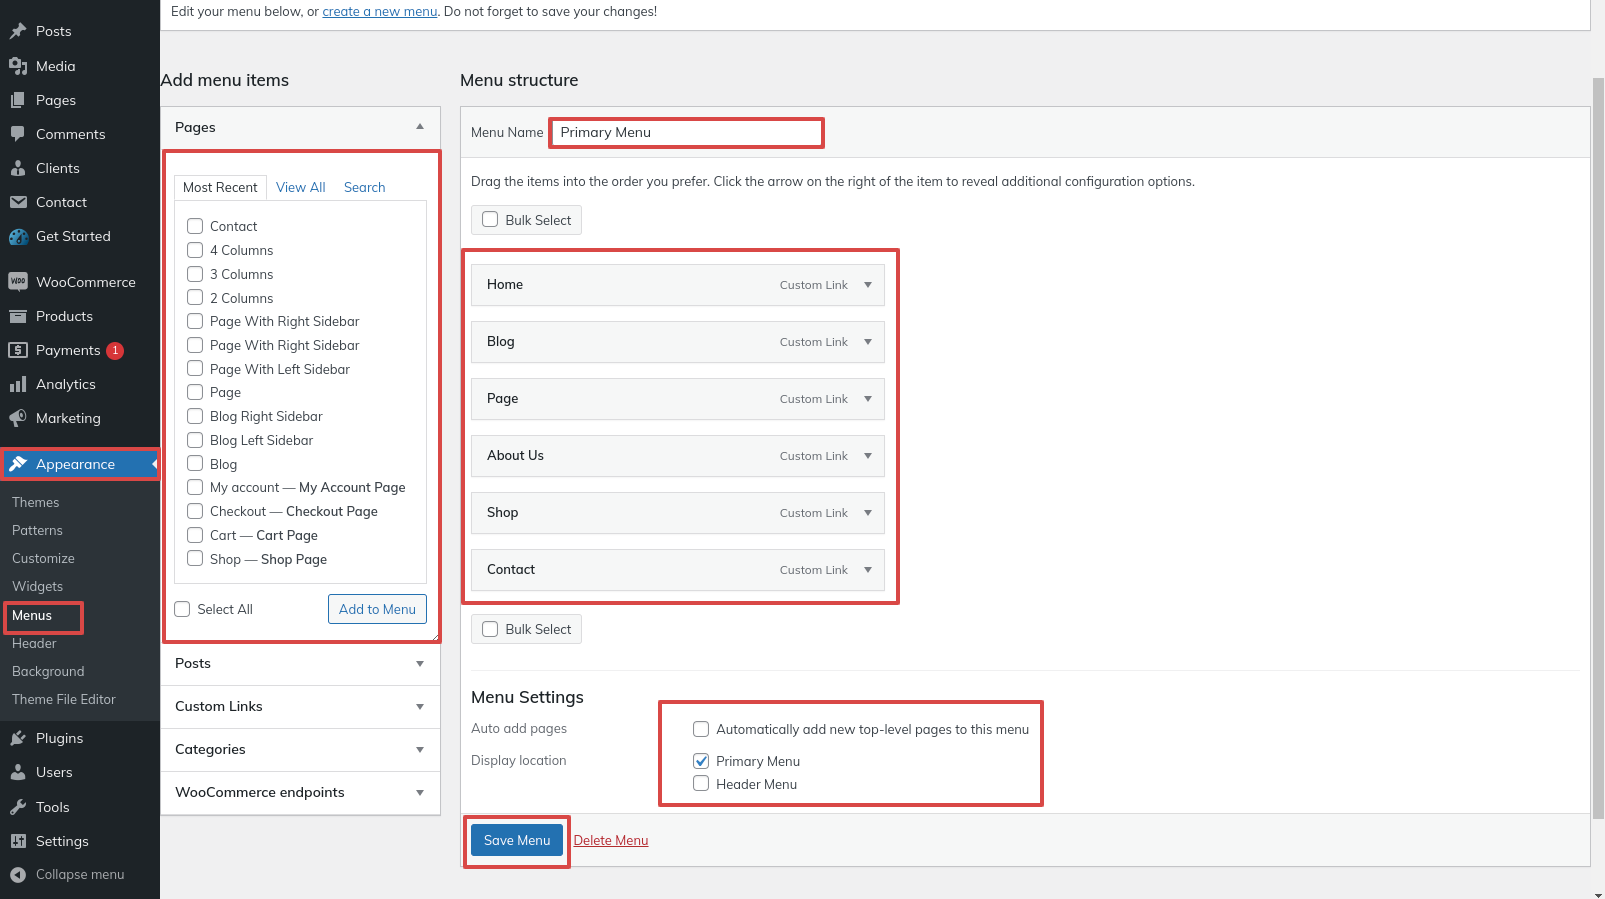
- Go to the Dashbord, choose Pages, and then click Add new page to start the process of creating a new page.
- Proceed to Appearance and select Menu
- By selecting New Menu, you can create a menu.
- Name the menu and press the Save button in the Menu Name column.
- Once the menu has been created, check the boxes next to the pages you wish to add. You must drag the necessary section to change the order of the sections.
- From the boxes with checks, choose the menu location on the footer.
- The Primary Menu checkbox causes Menu Stars to appear on the header if it is selected.
For a clearer understanding, view this screenshot.
Section on Developing The Site Identity
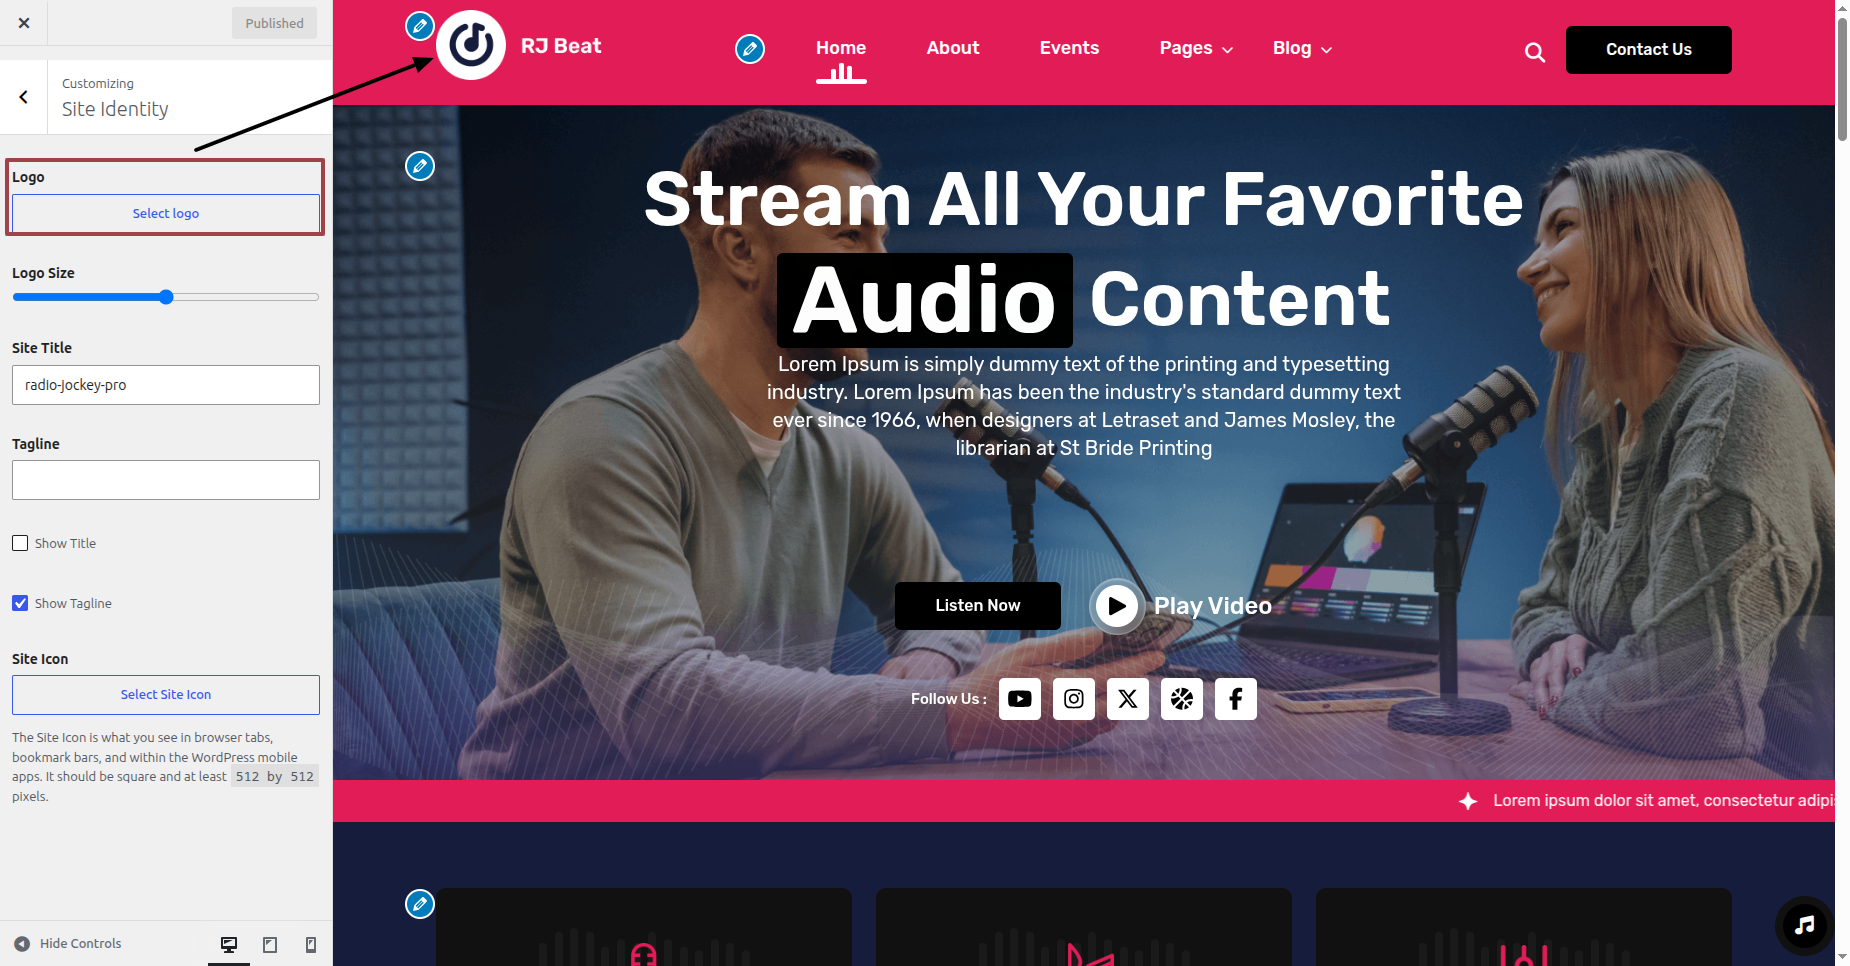
Putting the logo in the header.
To modify your theme options open"Appearance" By going to "Customizing" Proceed to"Site Identity".
Section on Developing The Content Header
Regarding Content Header Configuration.
To modify your theme options open"Appearance" By going to "Customizing" Head over to "Theme Settings" Proceed to "Header" .
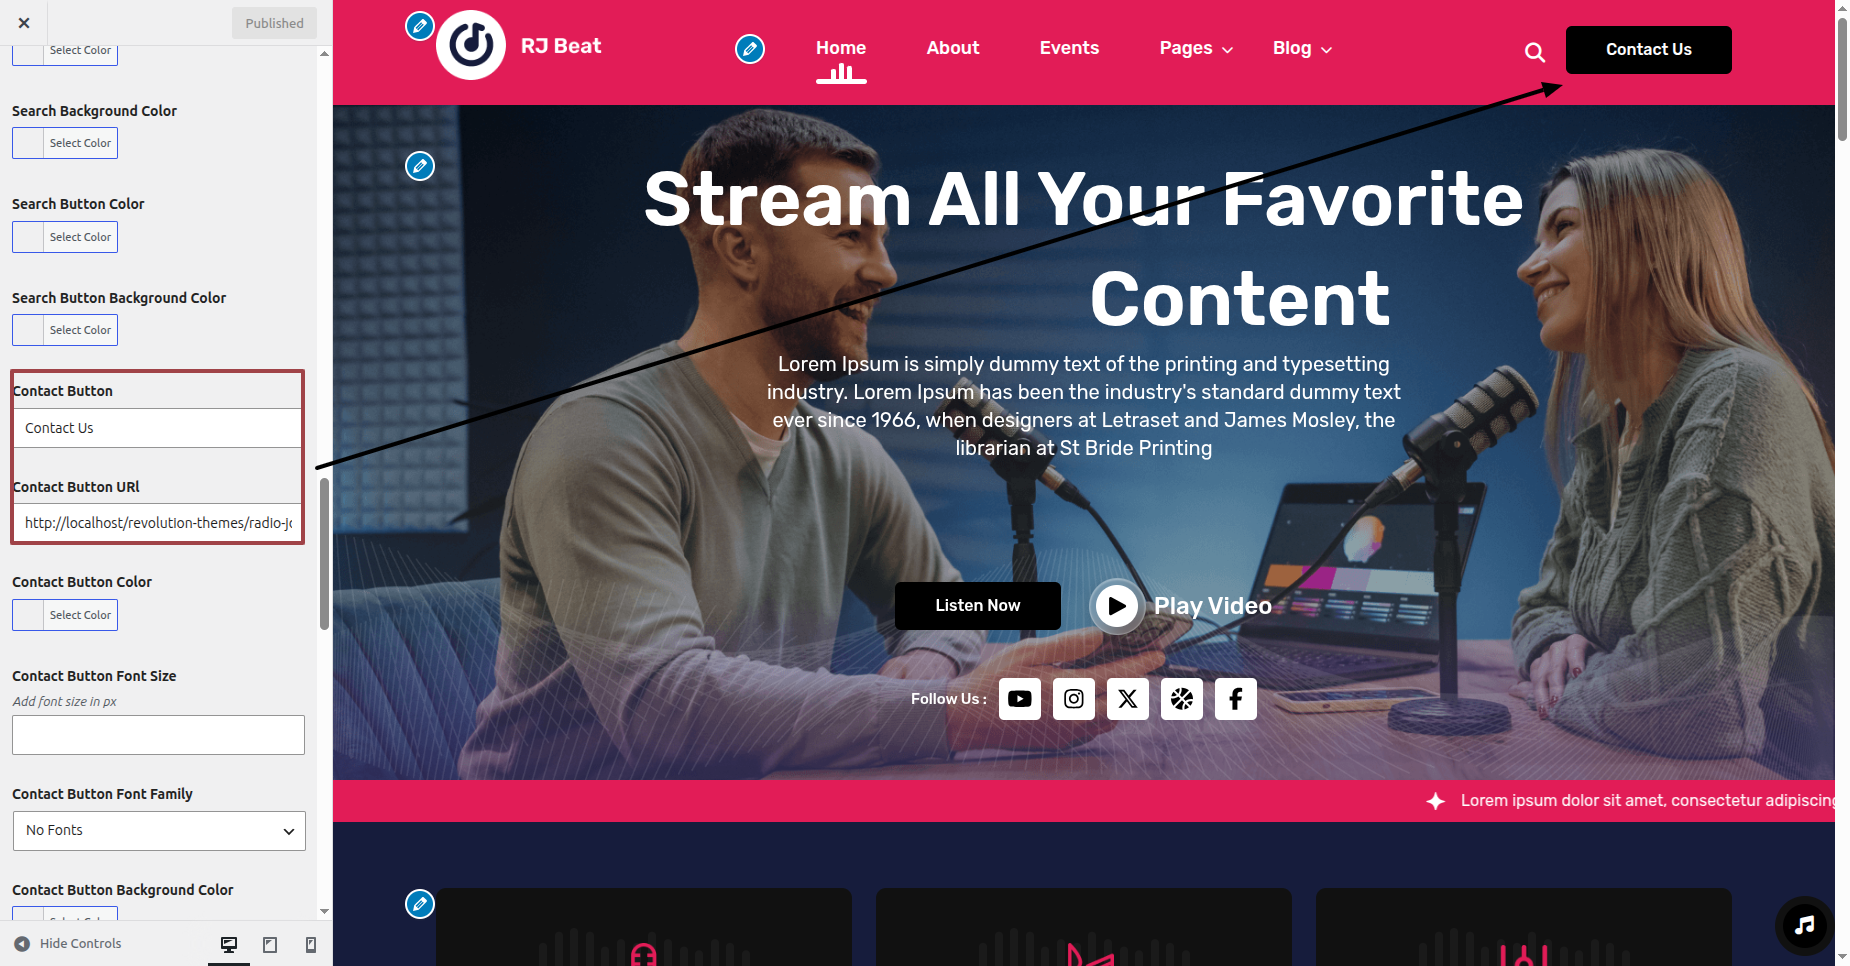
This is how the Content Header section will display it.

Section on Developing The Slider
Regarding Slider Configuration.
To modify your theme options open"Appearance" By going to "Customizing" Head over to "Theme Settings" Proceed to "Slider Settings" .
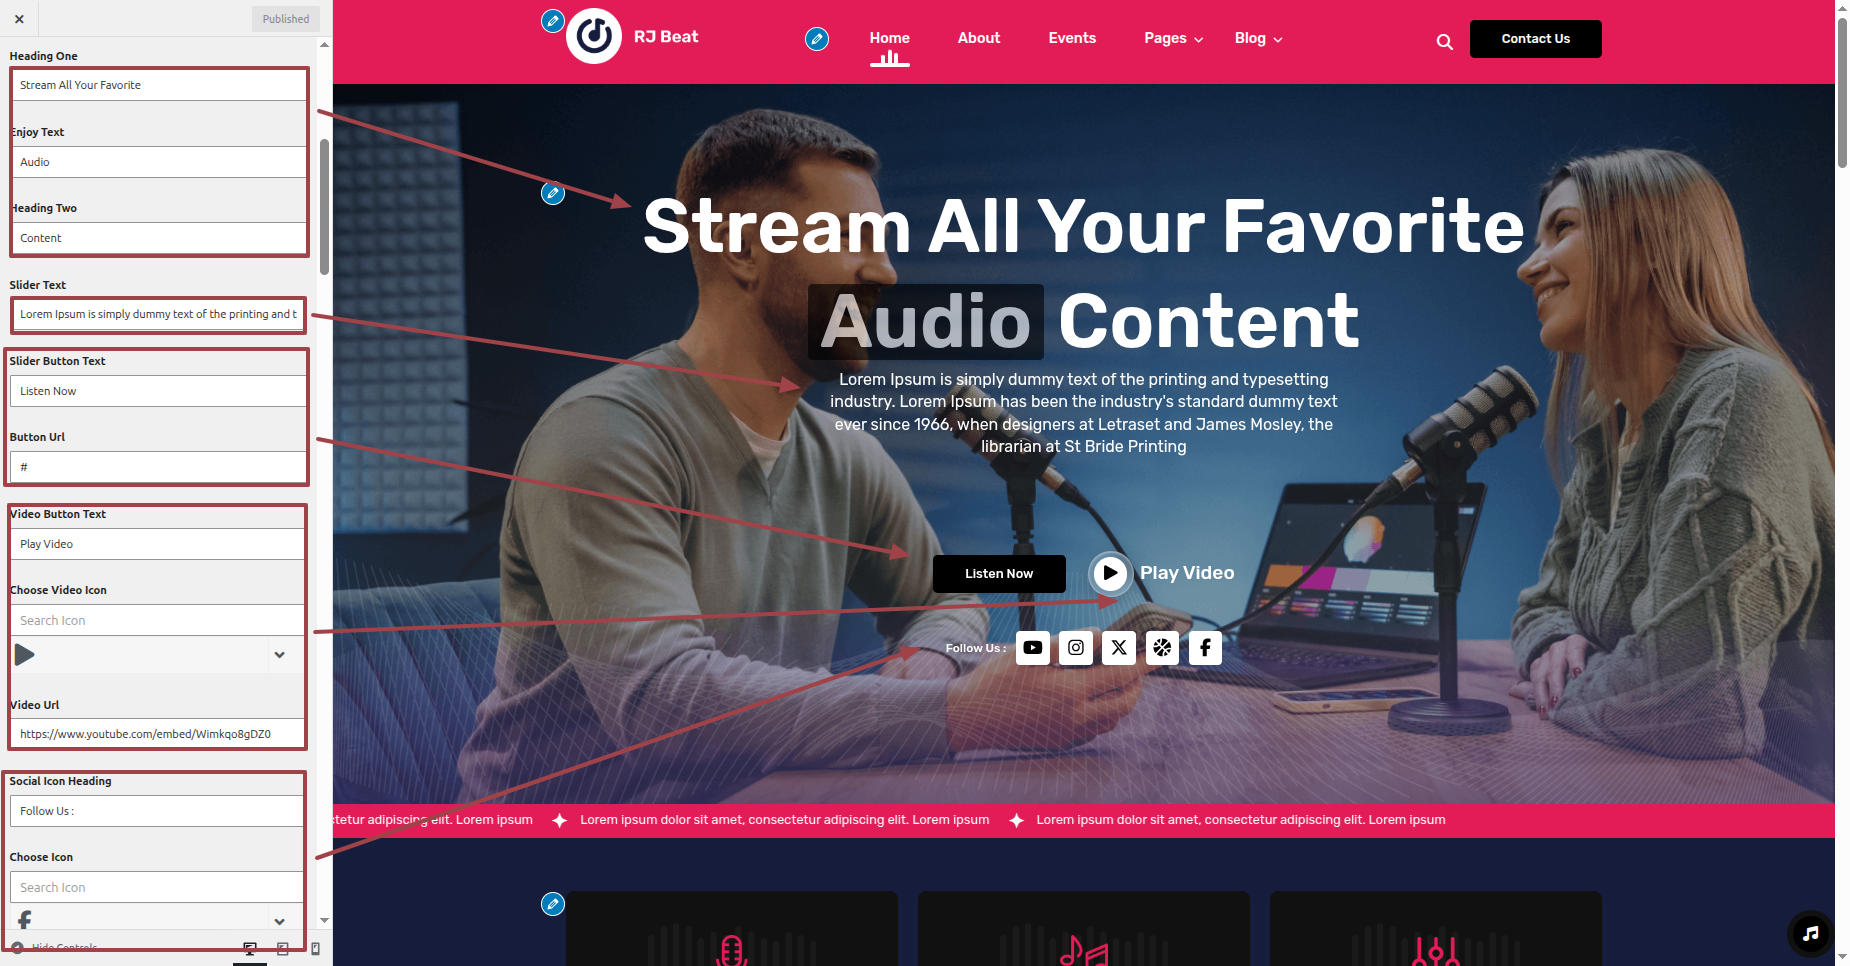
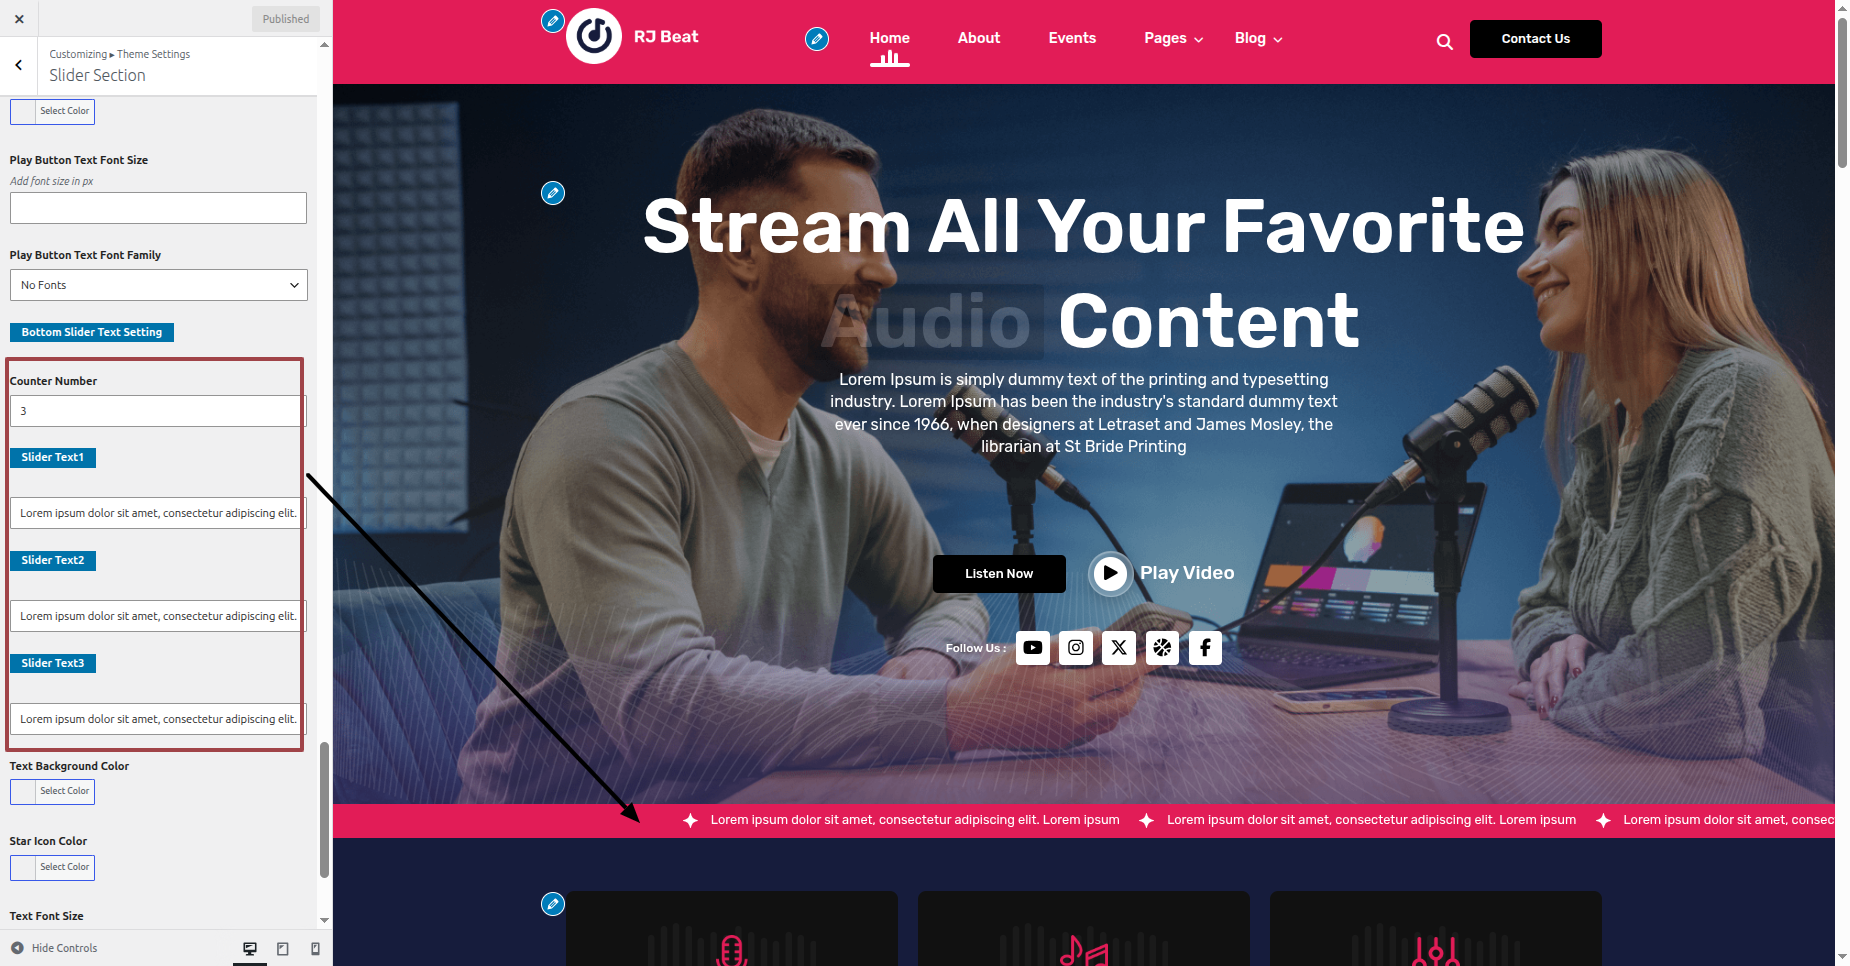
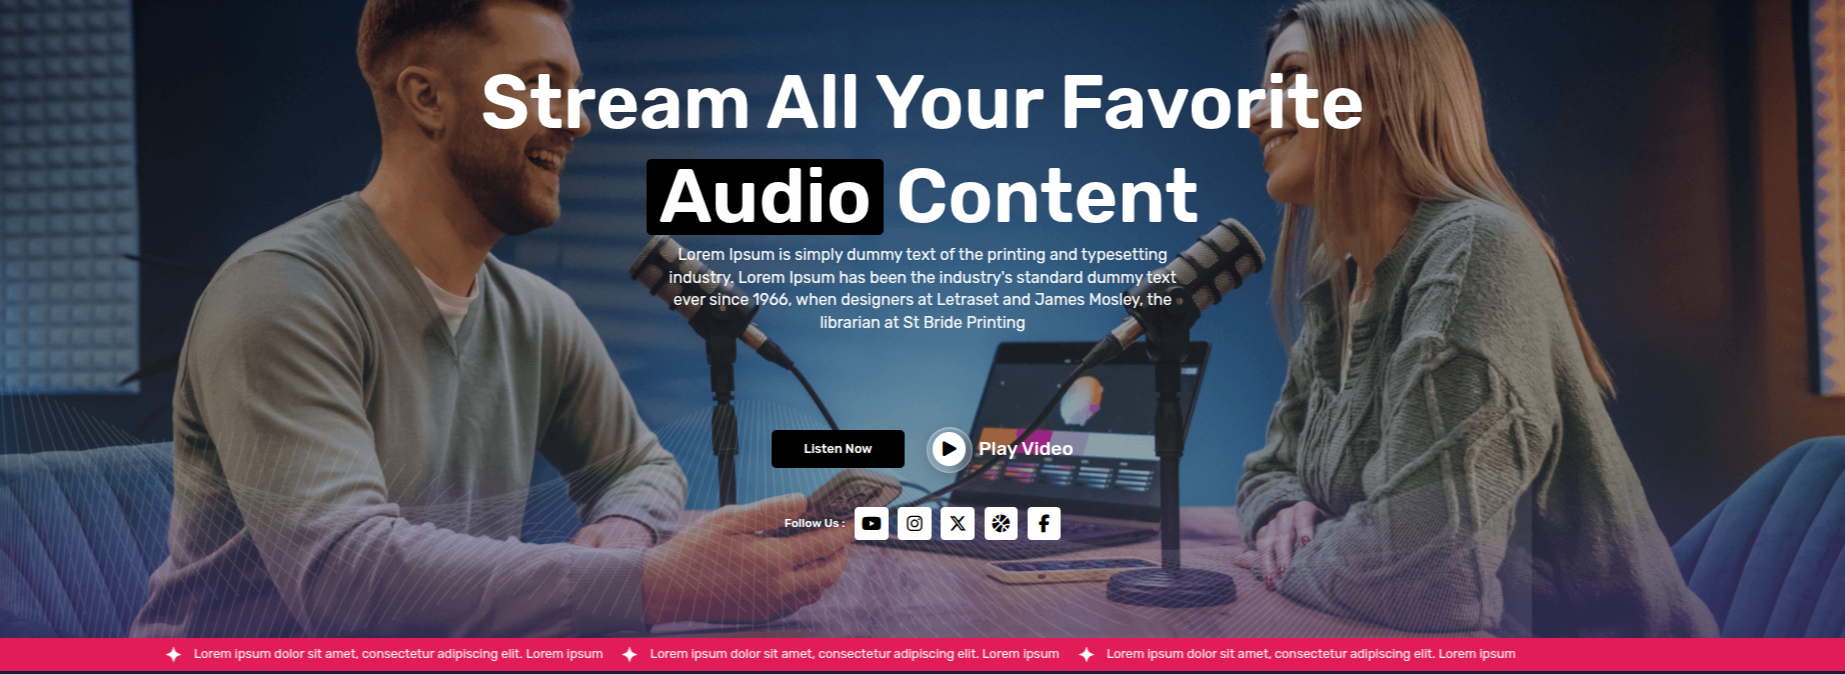
This is how the Slider section will display it.
Section on Developing Features Section
Regarding Features Section Configuration.
To modify your theme options open"Appearance" By going to "Customizing" Head over to "Theme Settings" Proceed to " Features Section" .
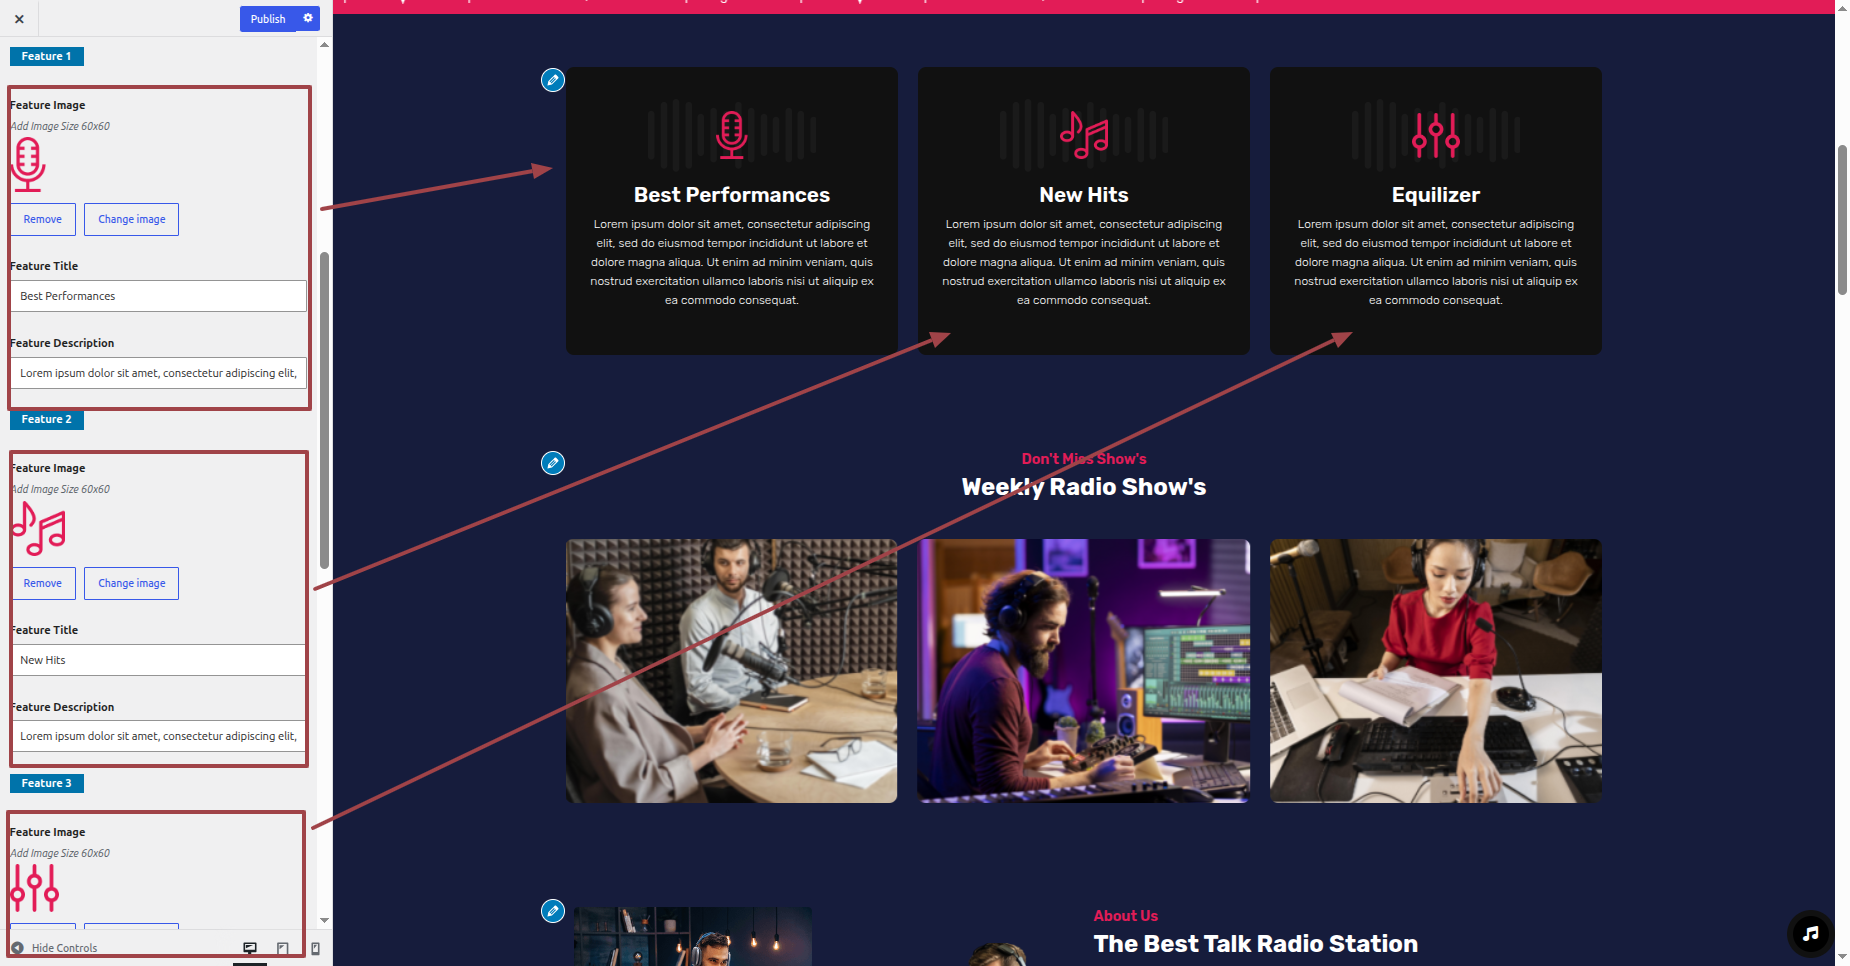
This is how the Features Section will display it.

Section on Developing On Shows
Regarding On Shows Configuration.
Radio Jockey Pro Postype Plugin installation and activation are prerequisites, Your dashboard will have a Shows Section once the plugin has been enabled.
To modify your theme options open"Dashboard" By going to "Shows" Head over to "Add New".
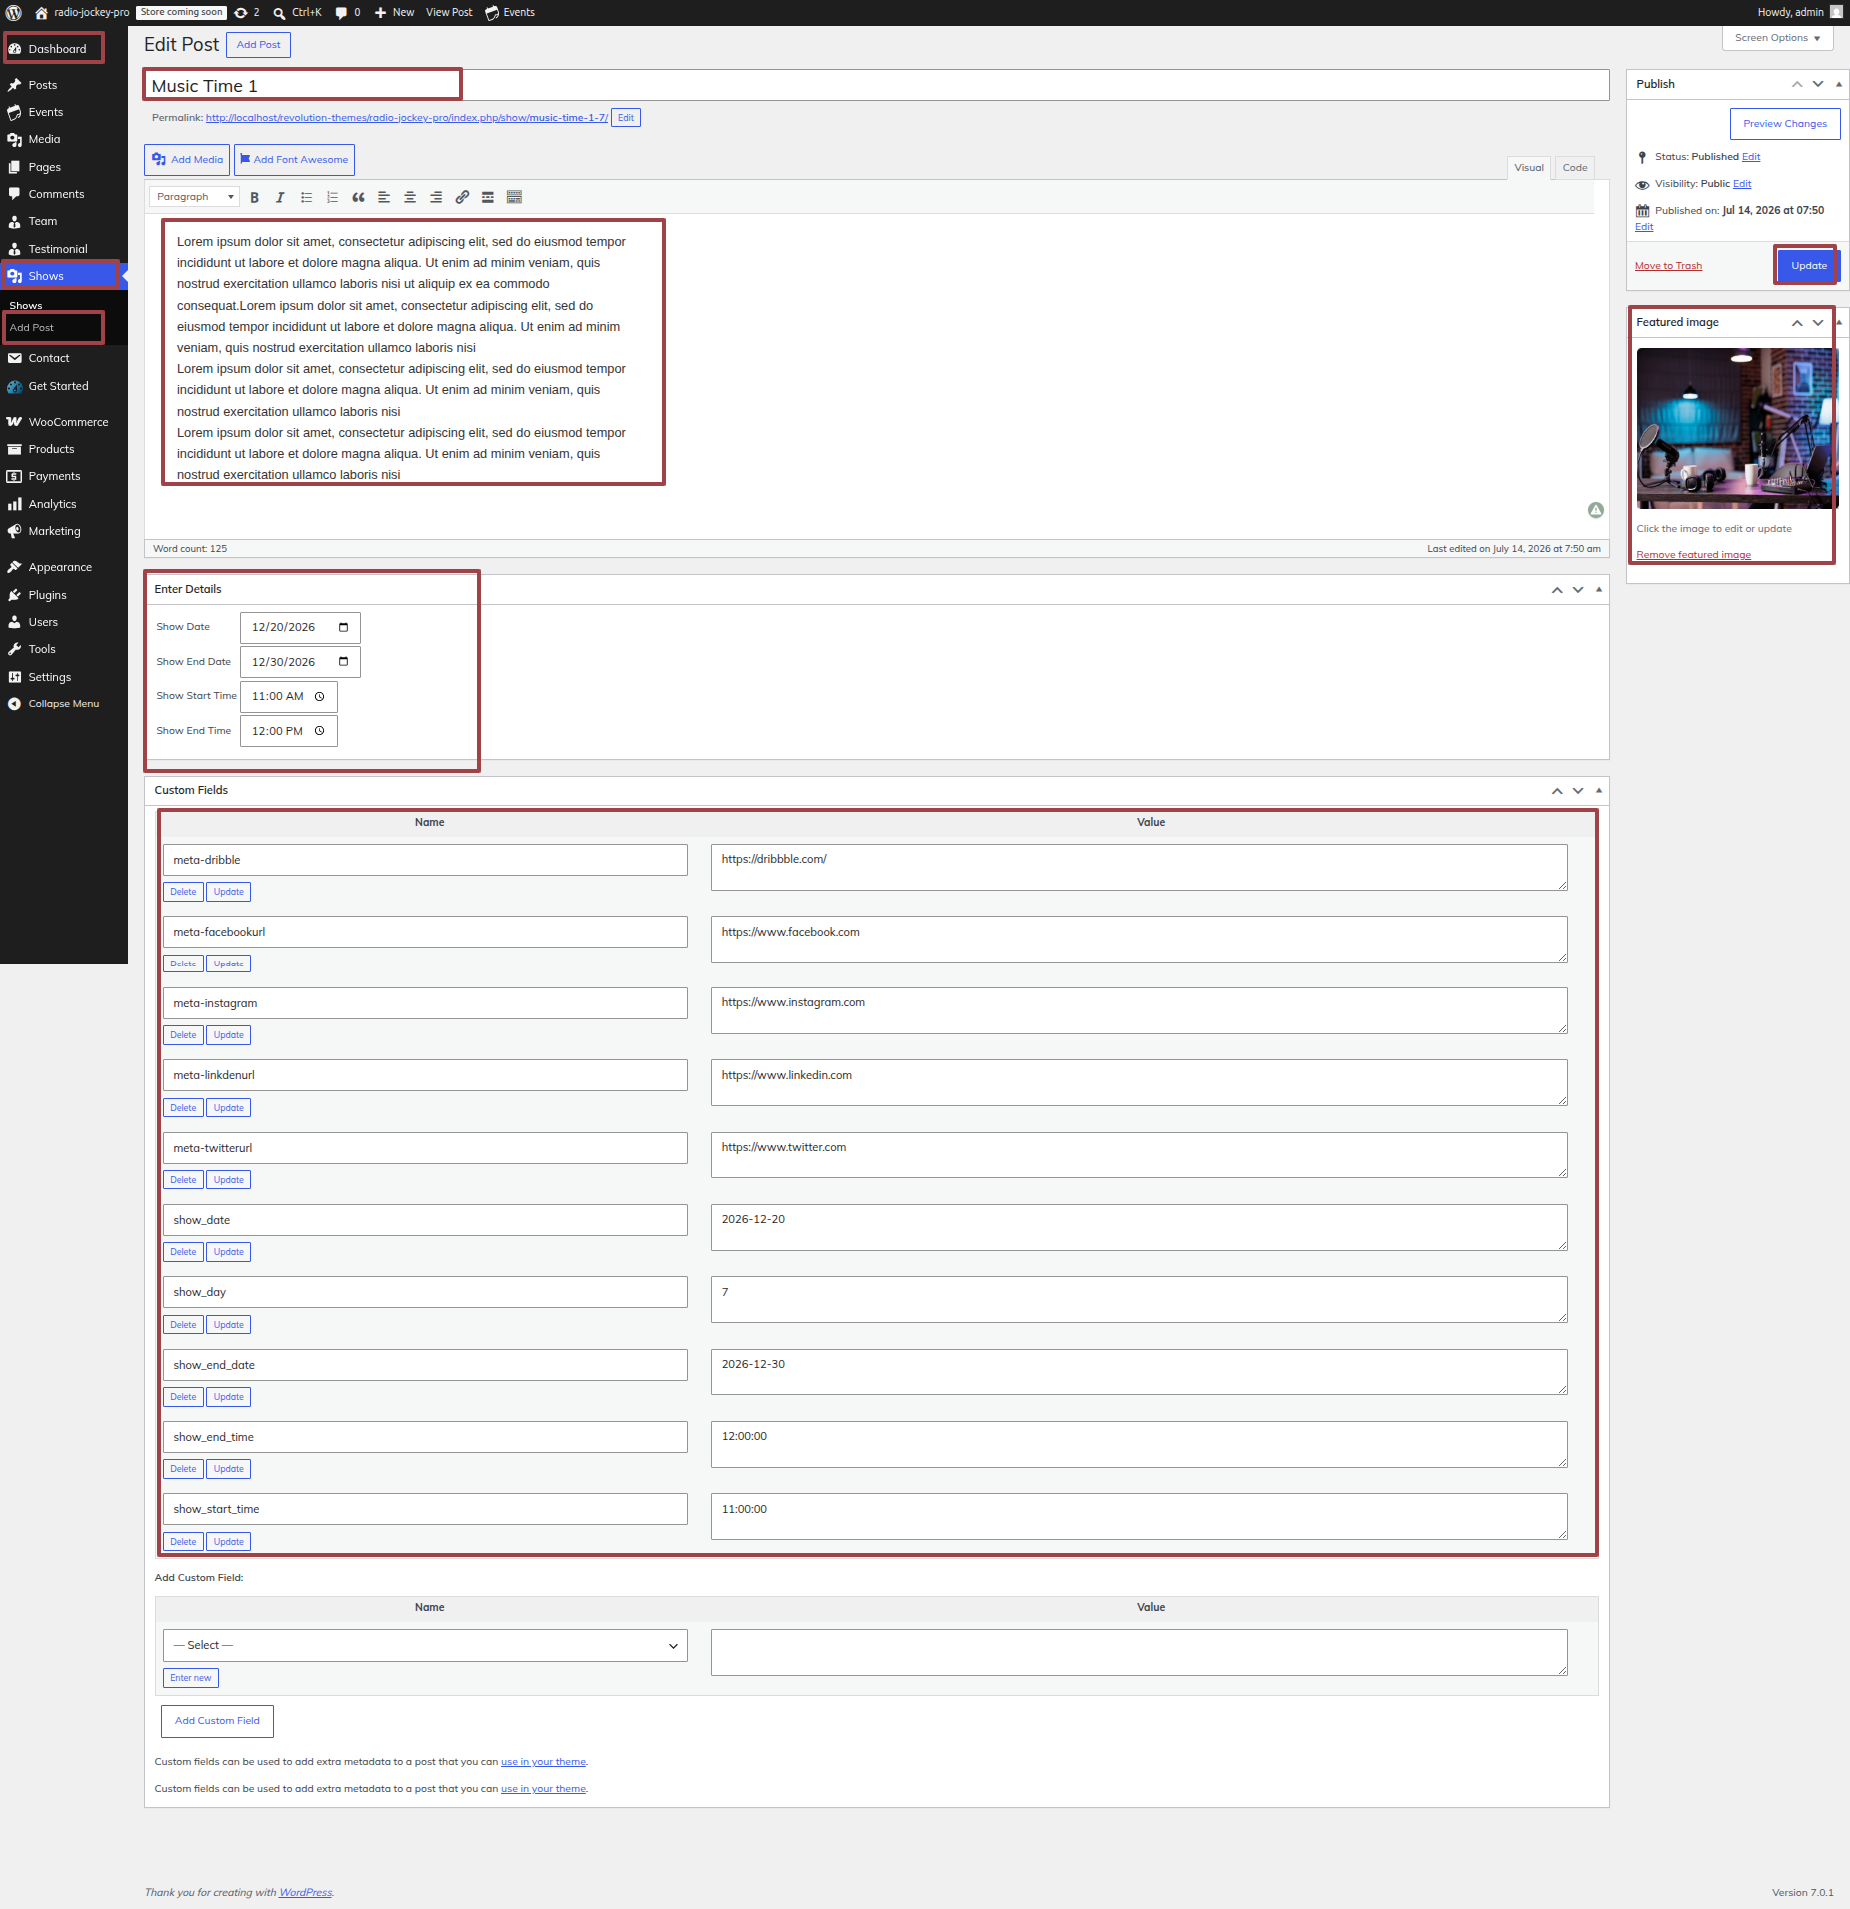
To modify your theme options open"Appearance" By going to "Customizing" Head over to "Theme Settings" Proceed to "On Shows Section" .
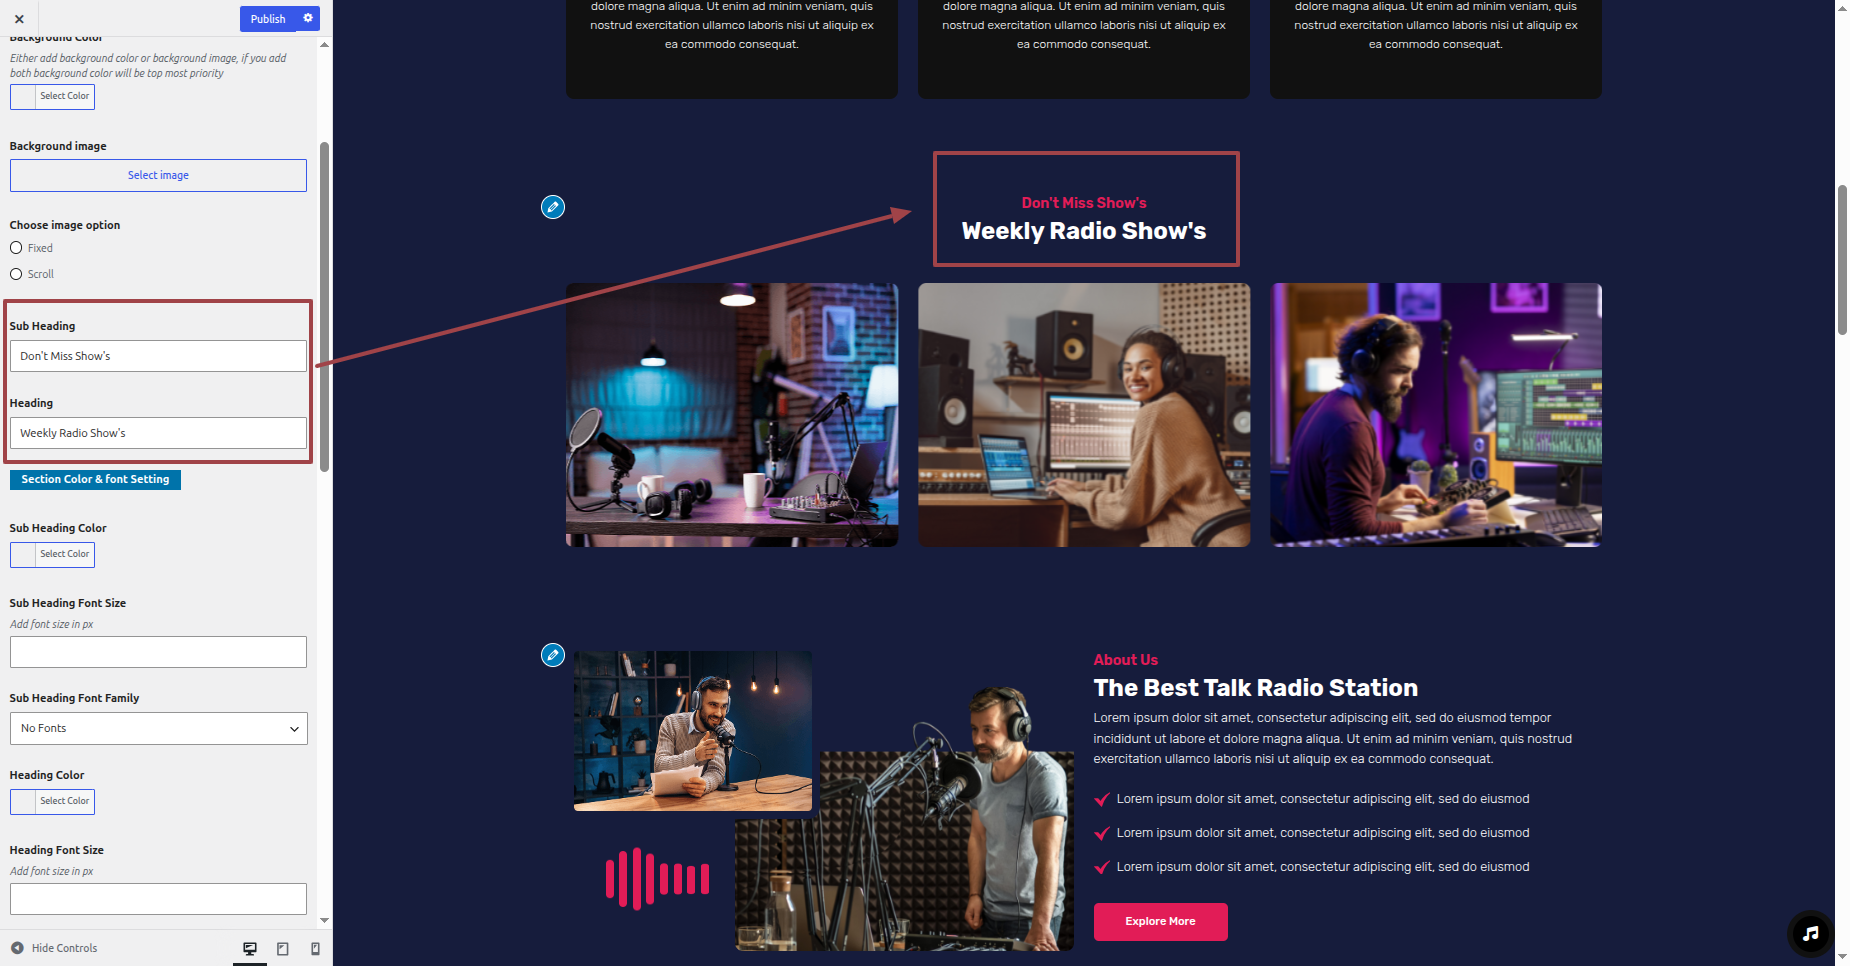
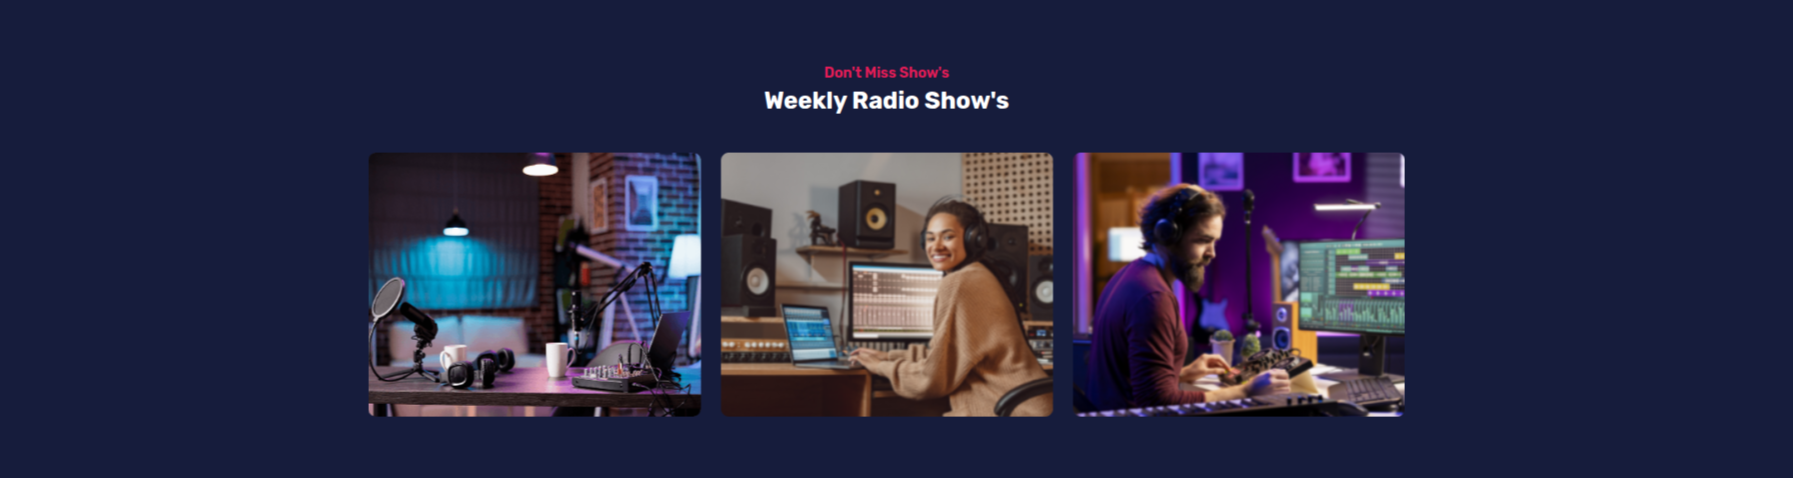
This is how the On Shows section will display it.
Section on Developing About Us Section
Regarding About Us Configuration.
To modify your theme options open"Appearance" By going to "Customizing" Head over to "Theme Settings" Proceed to "About Section" .
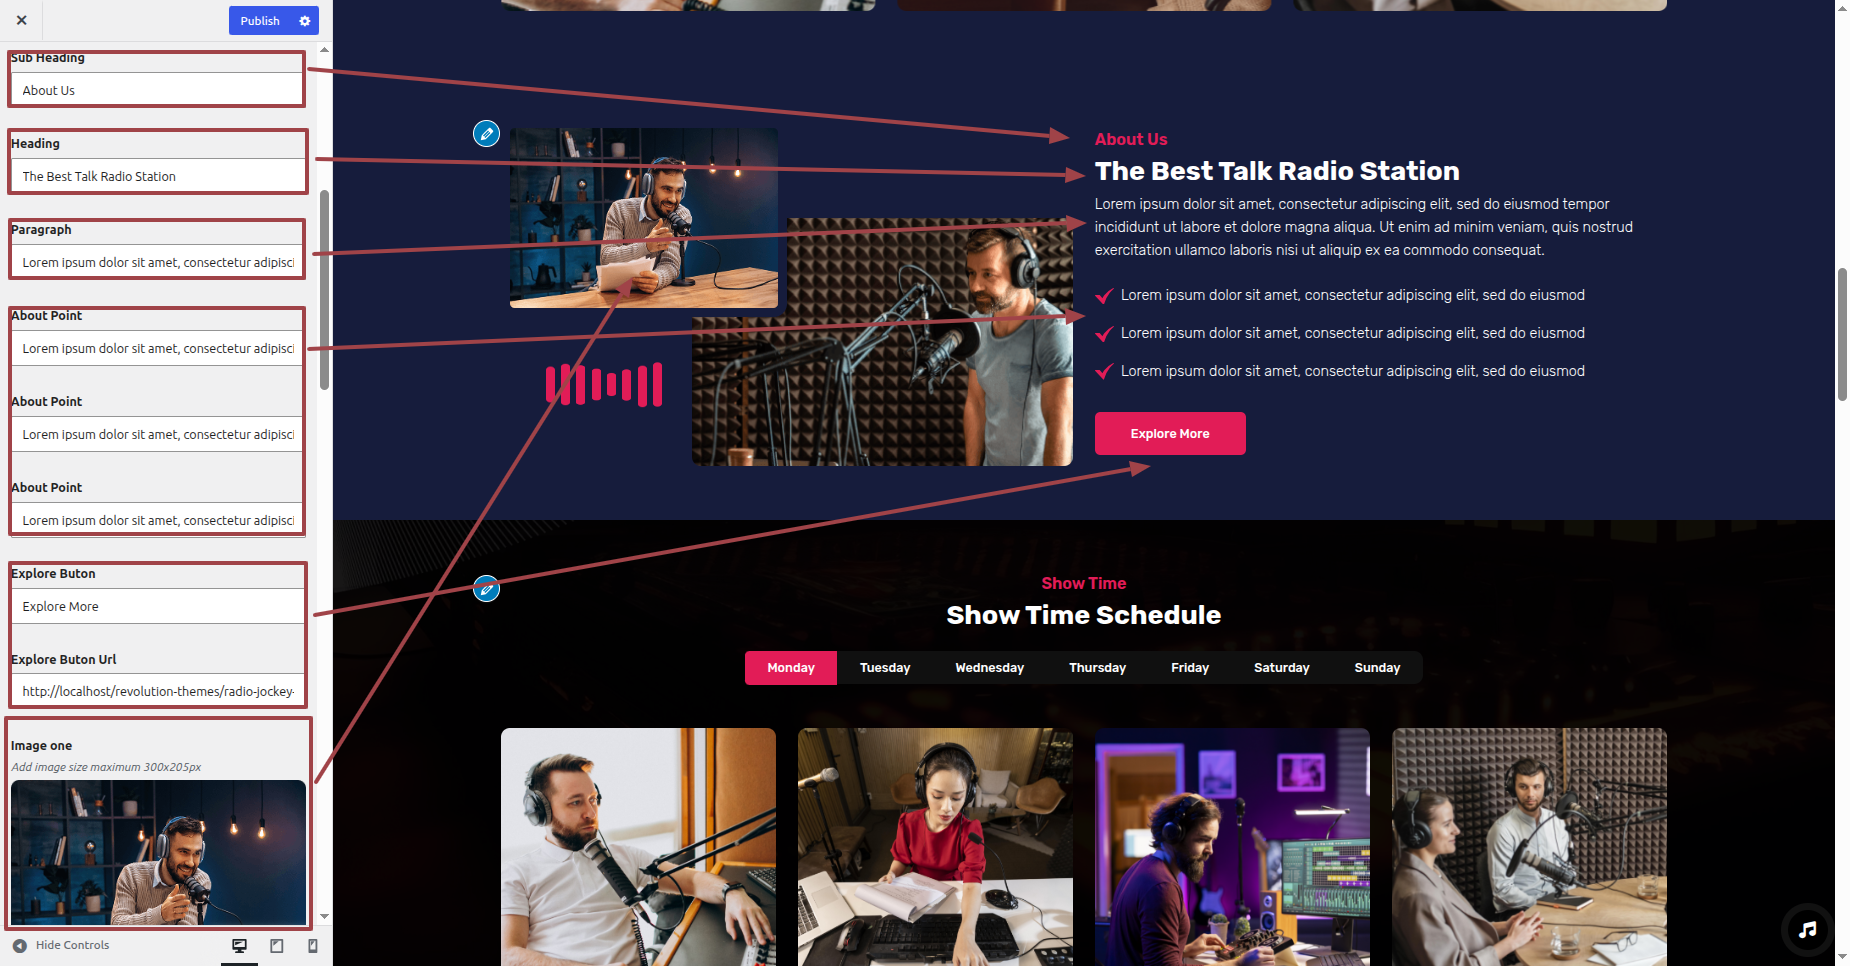
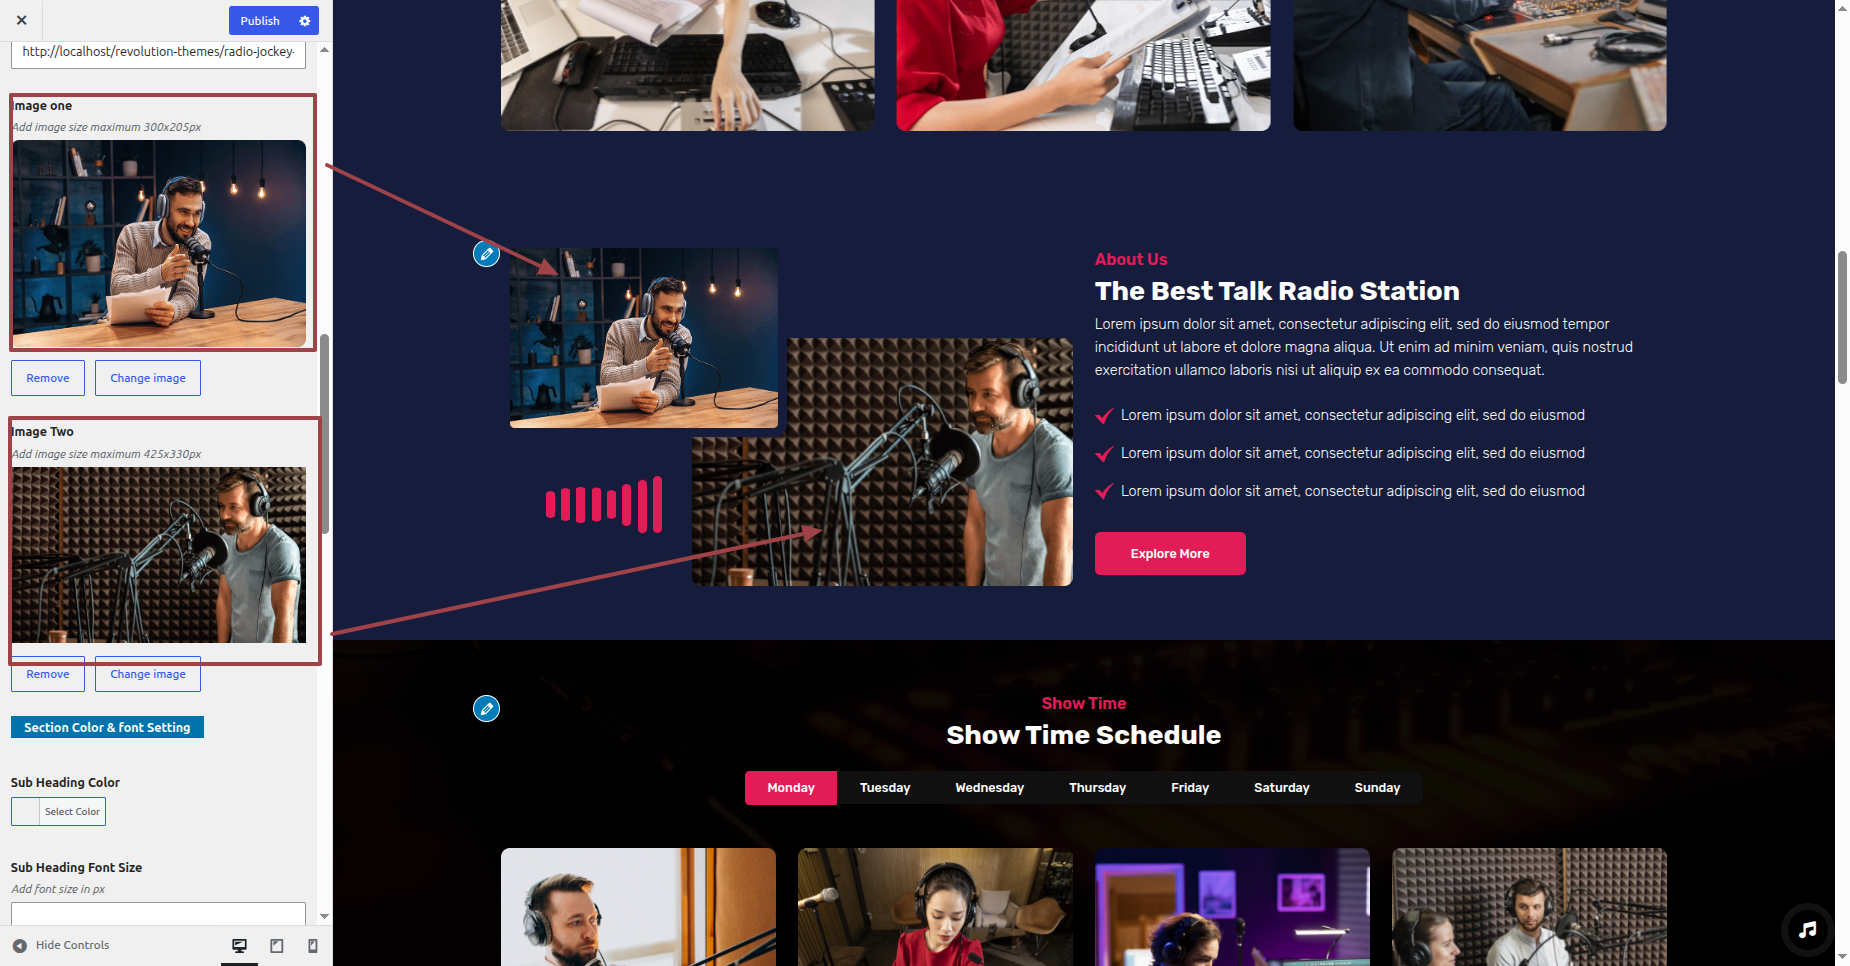
This is how the About Us section will display it.
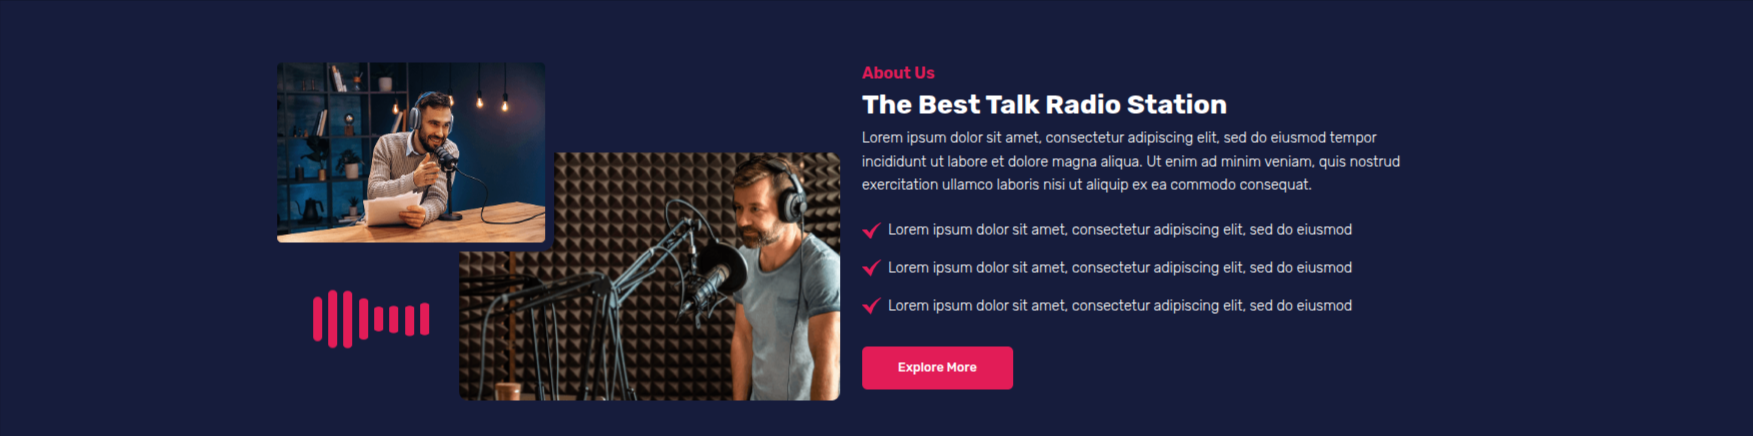
Section on Developing On Show Time
Regarding On Show Time Configuration.
Radio Jockey Pro Postype Plugin installation and activation are prerequisites, Your dashboard will have a Shows Section once the plugin has been enabled.
To modify your theme options open"Dashboard" By going to "Shows" Head over to "Add New".
To modify your theme options open"Appearance" By going to "Customizing" Head over to "Theme Settings" Proceed to "On Show Time Section" .
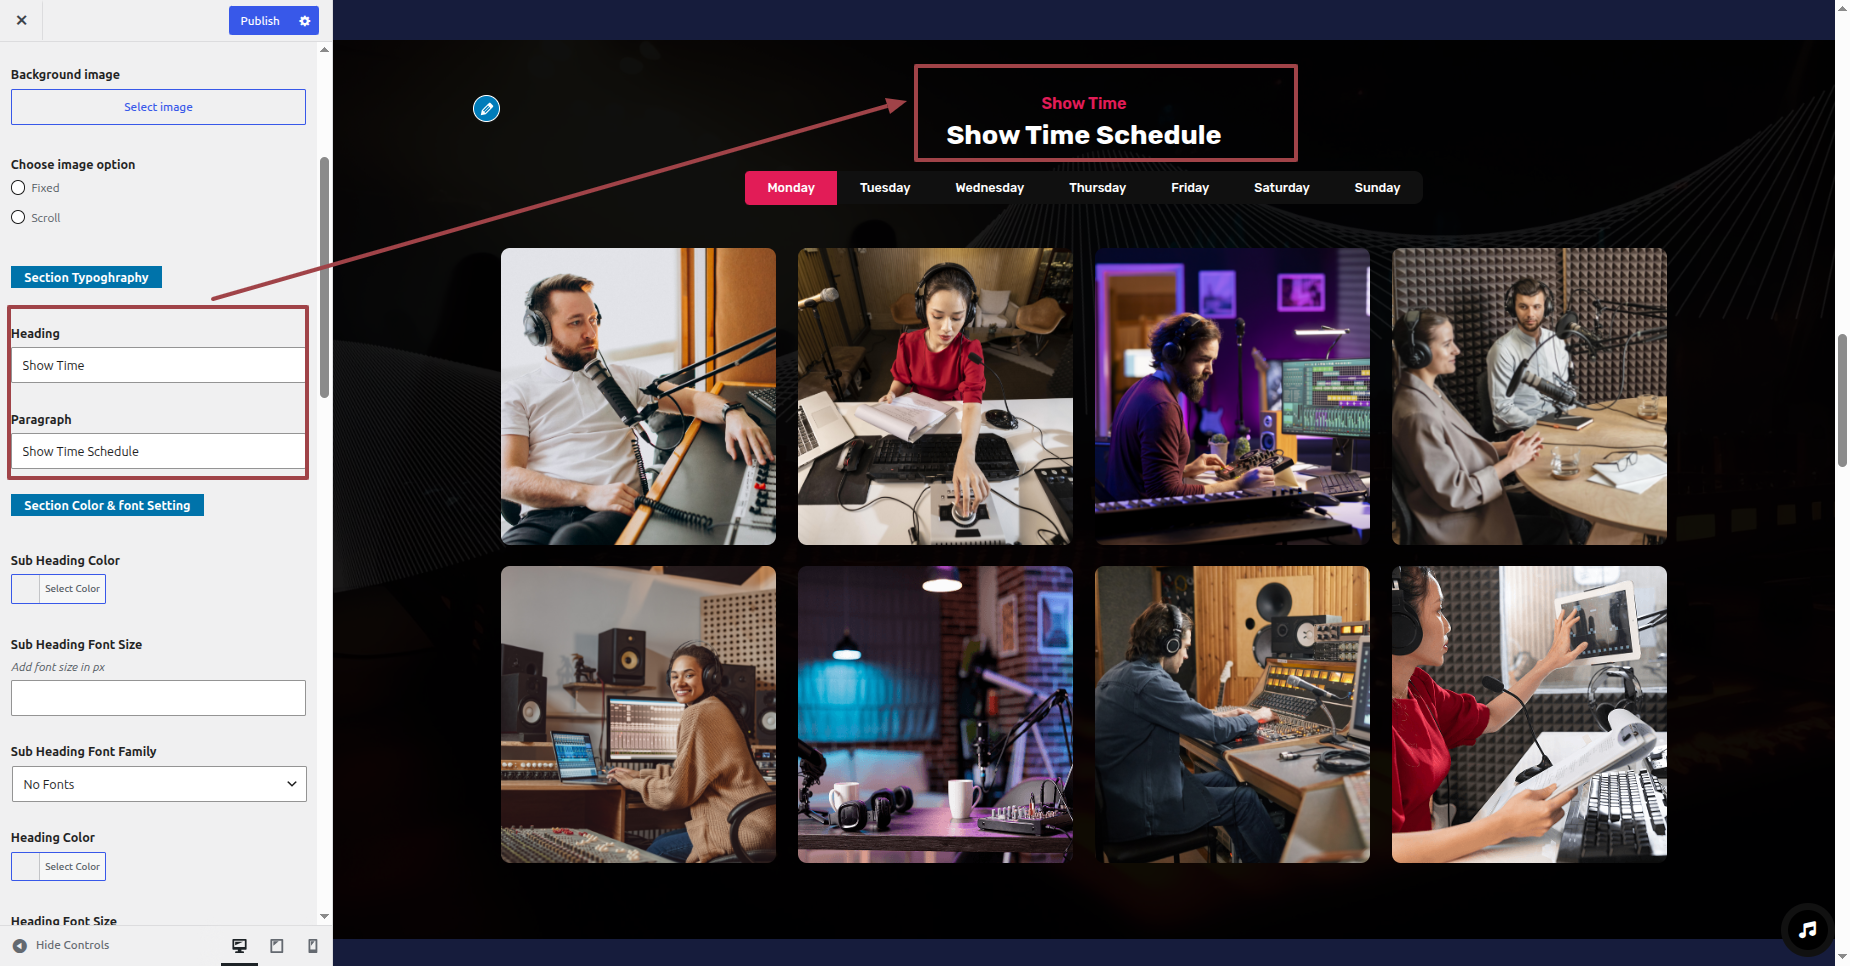
This is how the On Show Time section will display it.
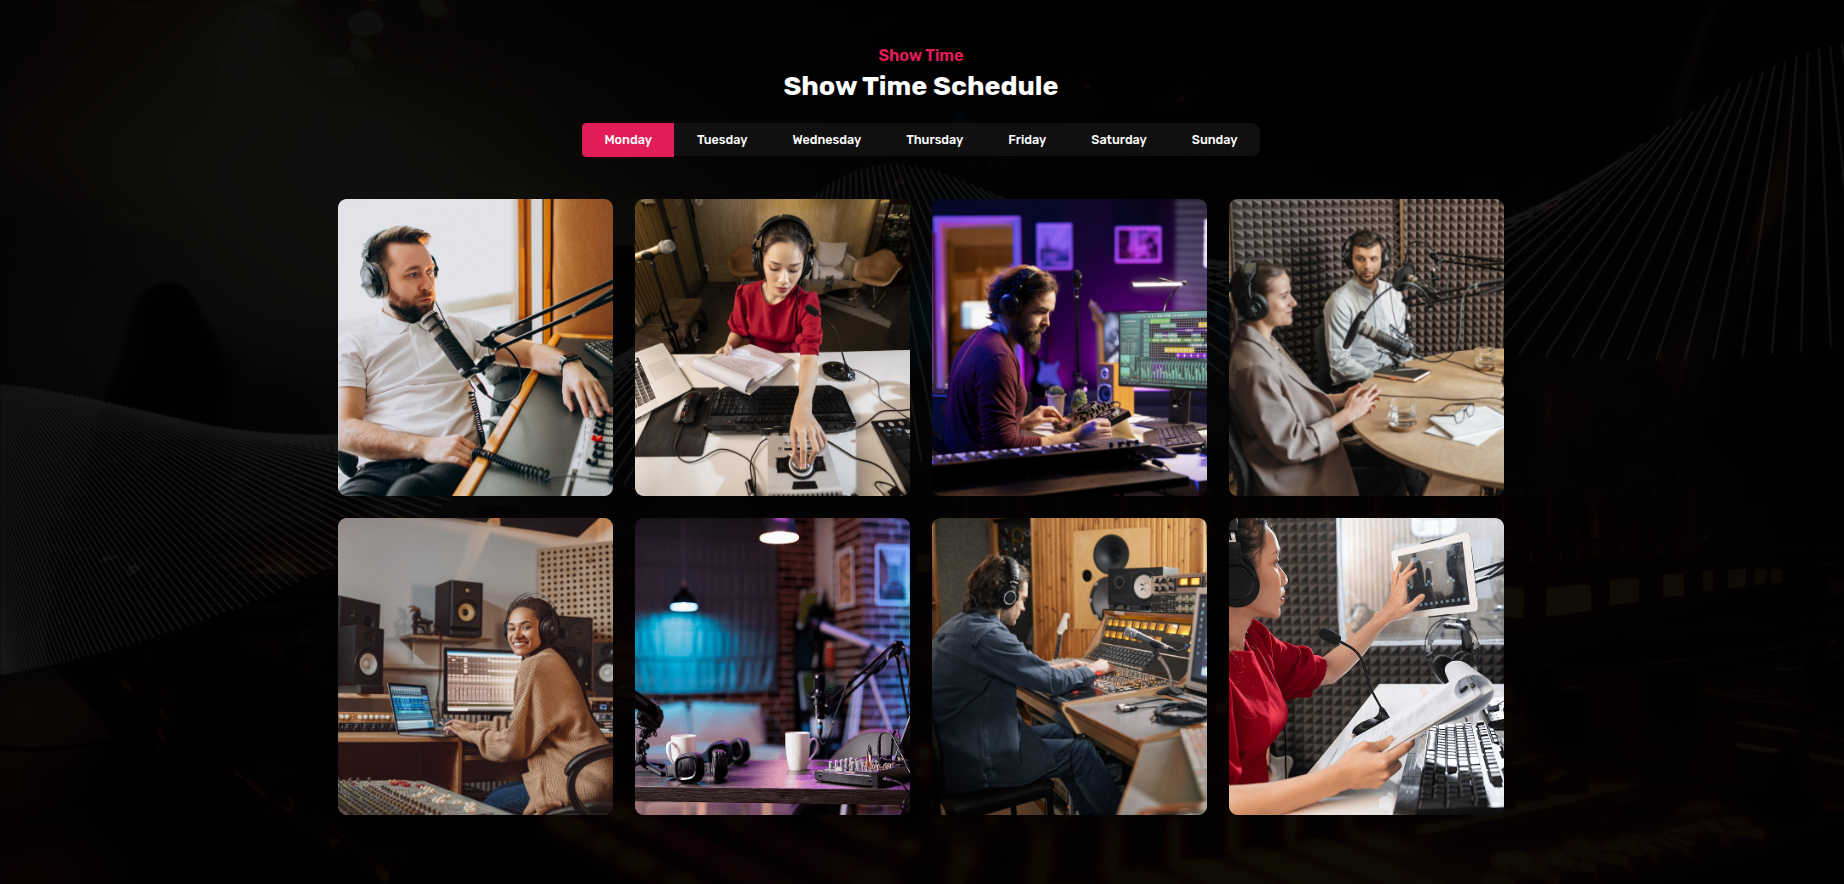
Section on Developing Events Section
Regarding Events Section Configuration.
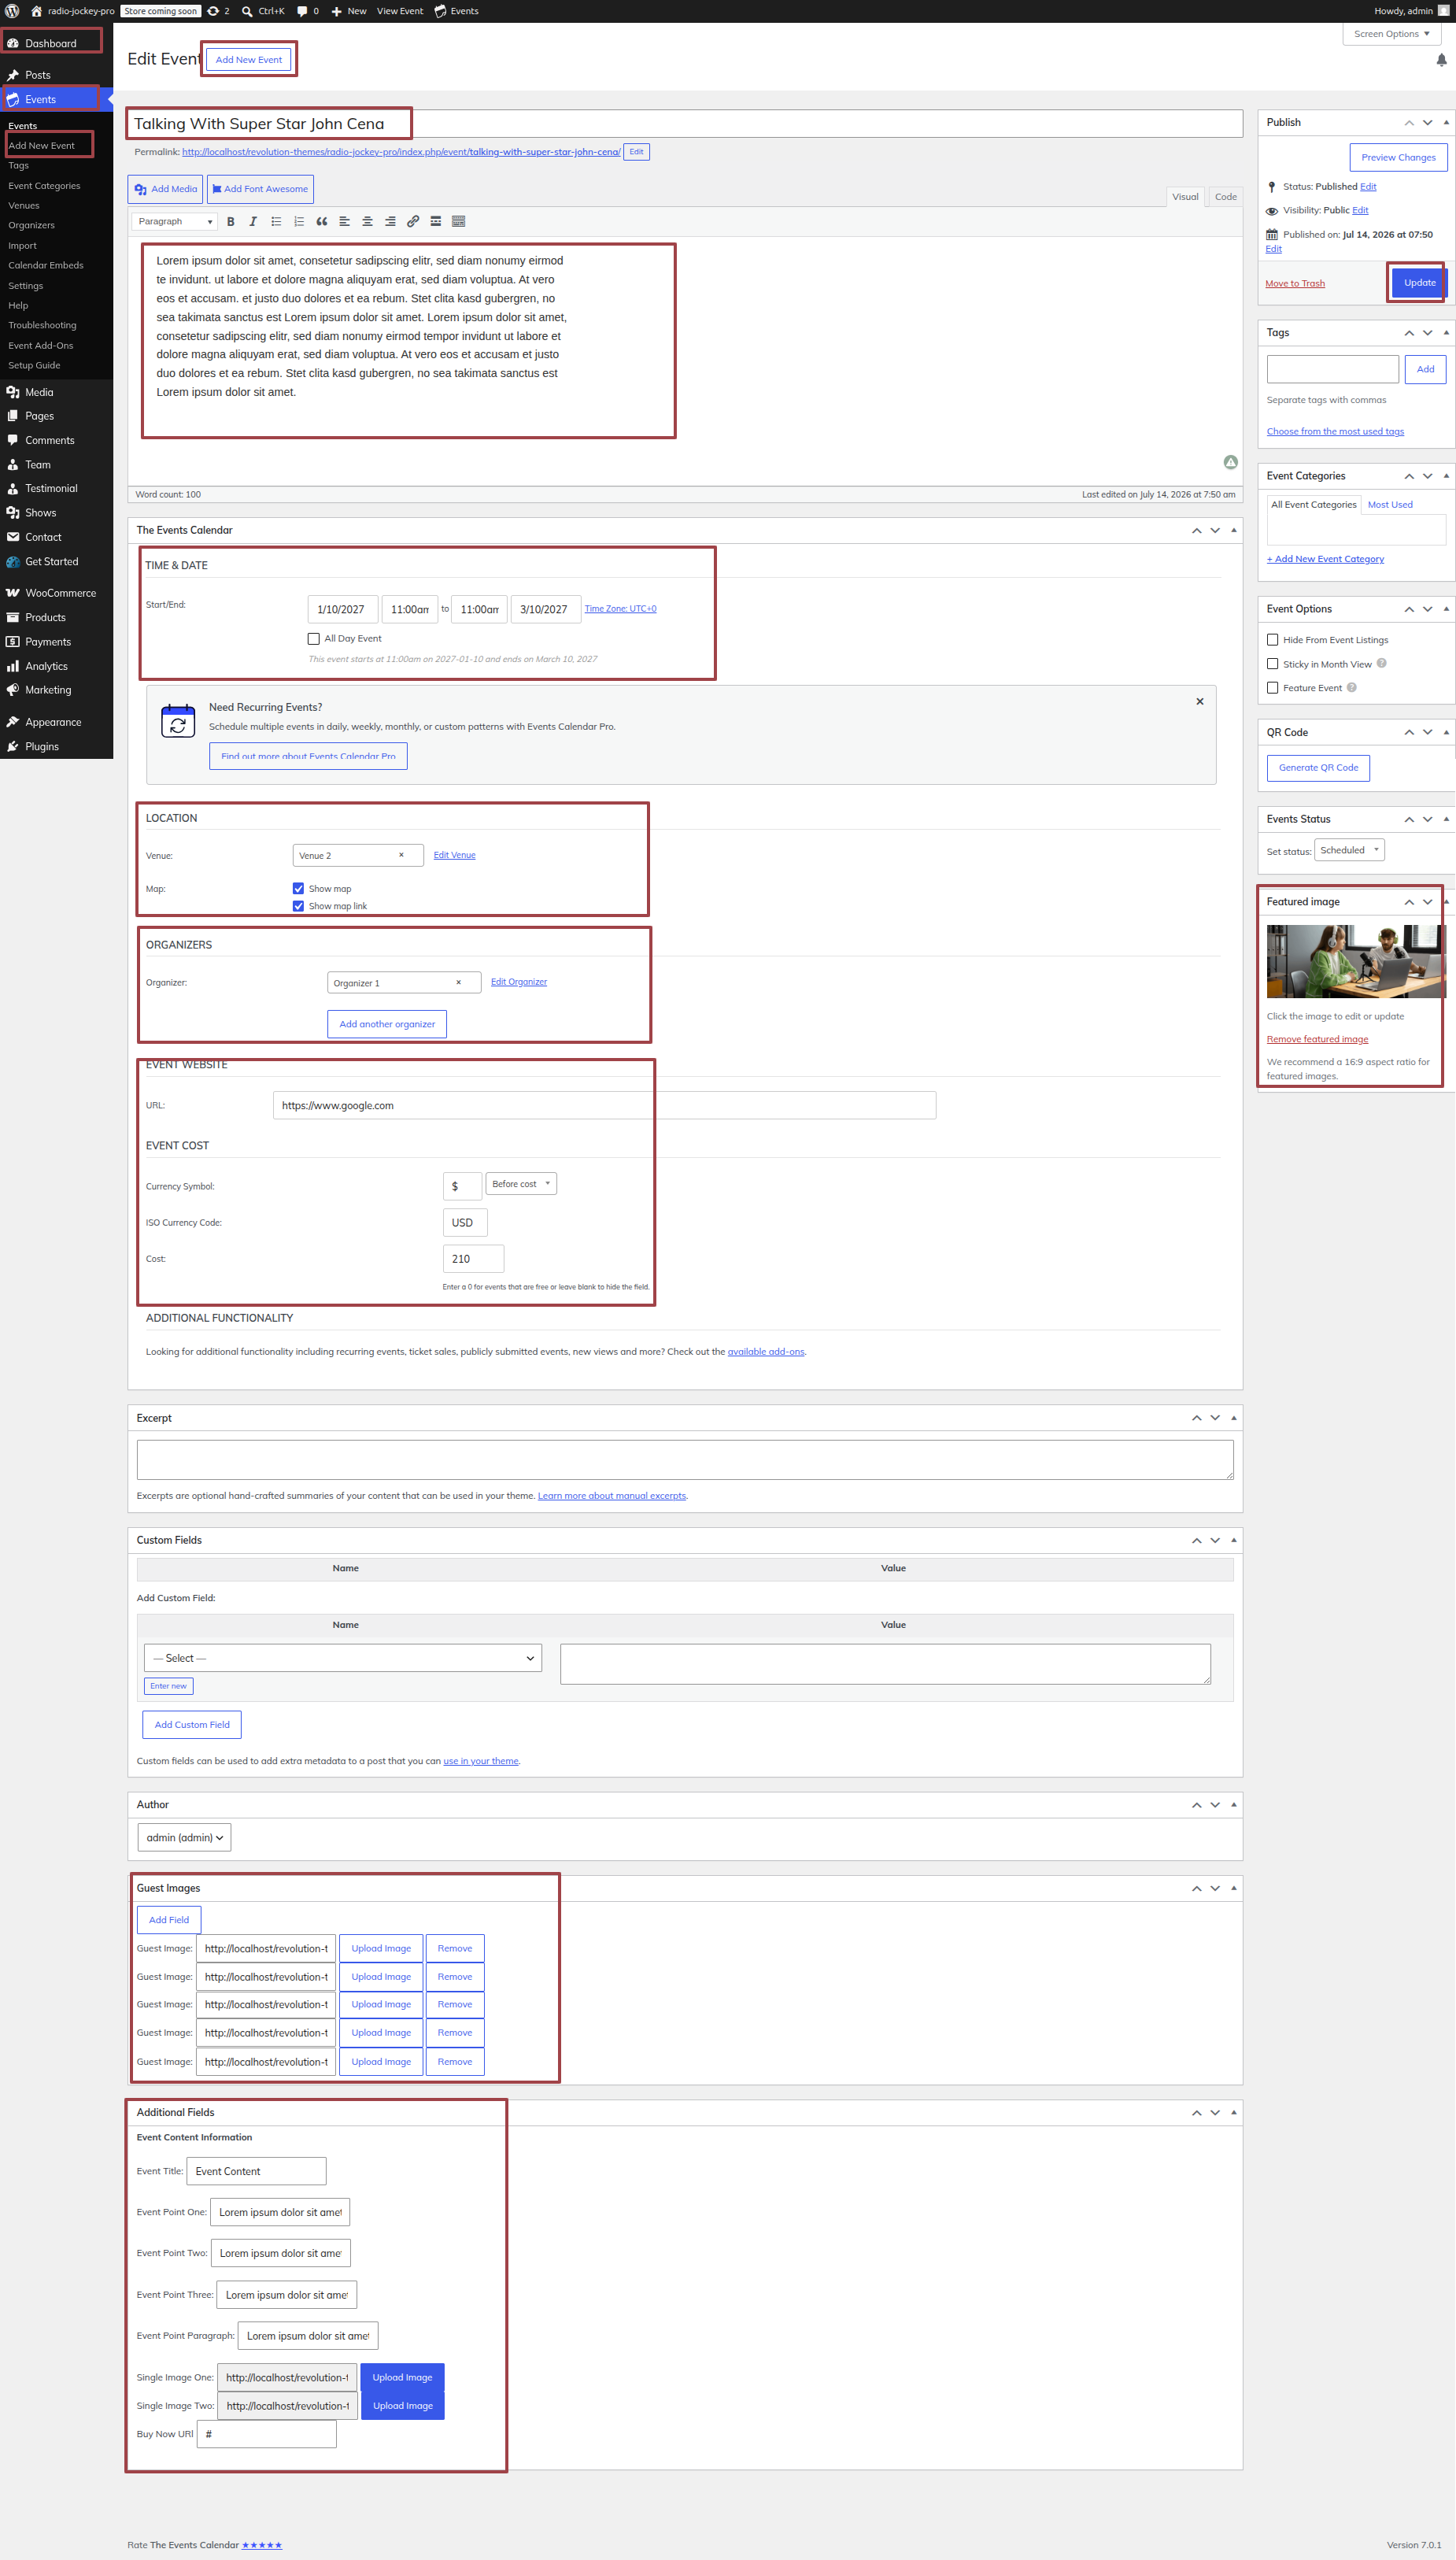
The Events Calendar Plugin installation and activation are prerequisites, Your dashboard will have a Events Section once the plugin has been enabled.
To modify your theme options open"Dashboard" By going to "Events" Head over to "Add New Event". Add Details of Event and Save The Changes.
To modify your theme options open"Appearance" By going to "Customizing" Head over to "Theme Settings" Proceed to "Events Section".
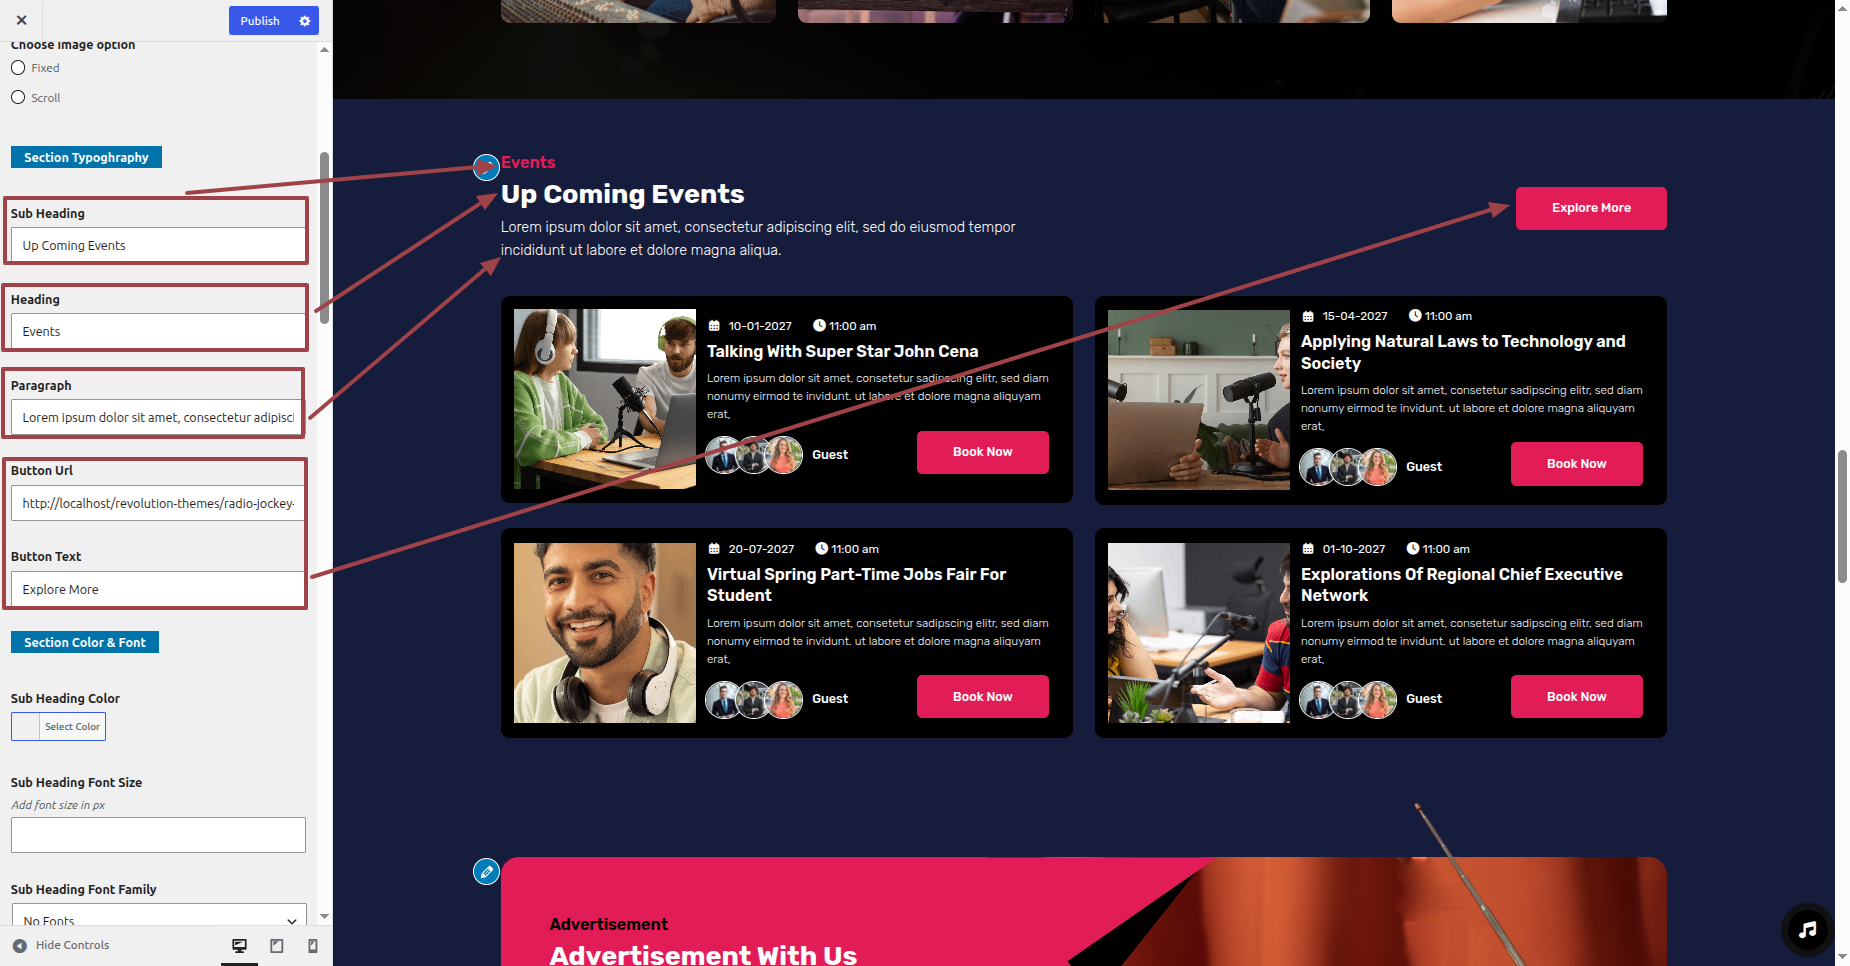
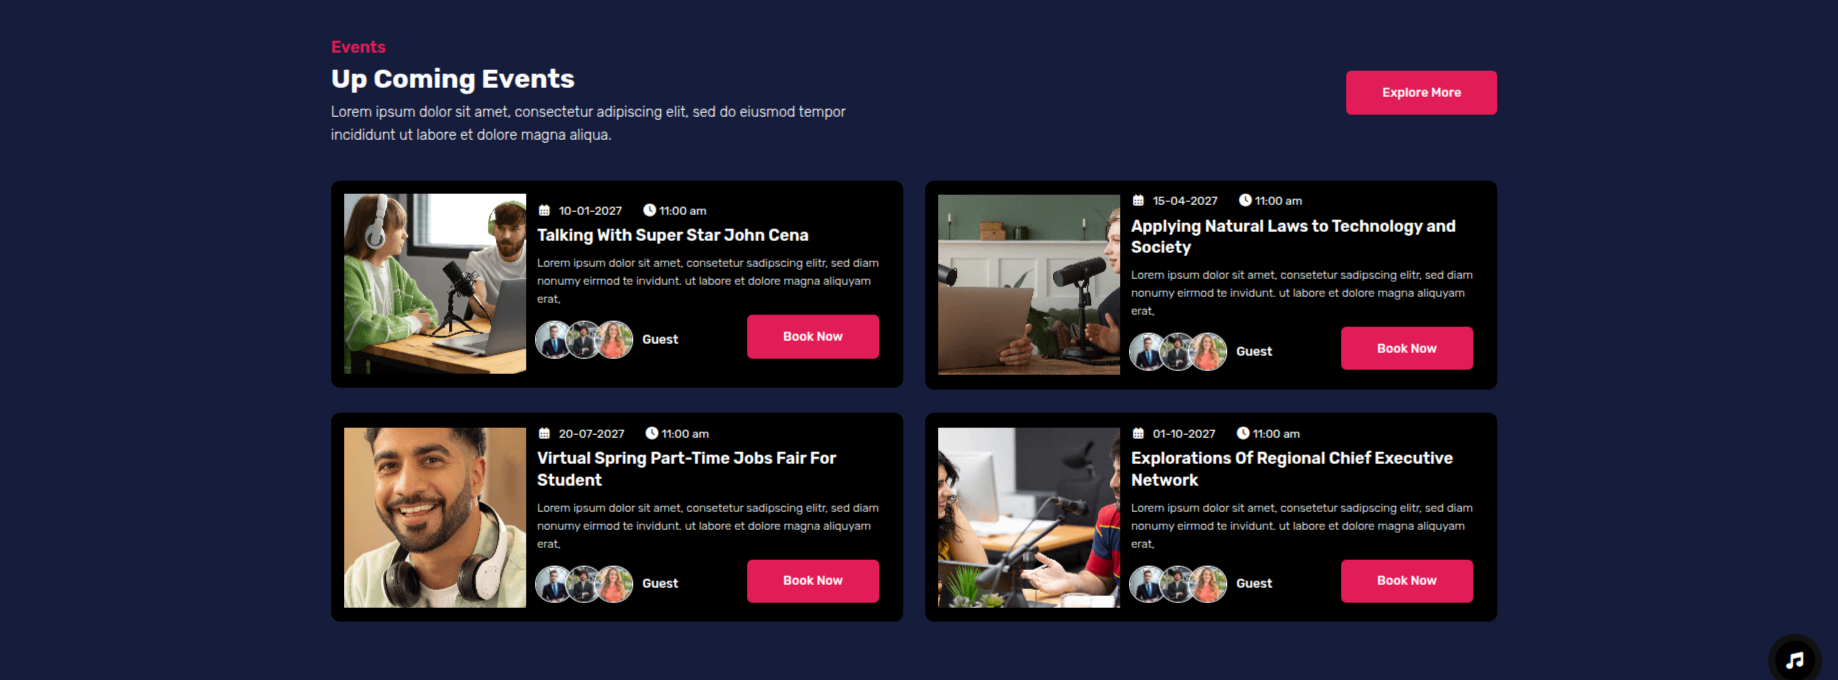
This is how Events section will display it.
Section on Developing Advertisement Section
Regarding Advertisement Configuration.
To modify your theme options open"Appearance" By going to "Customizing" Head over to "Theme Settings" Proceed to " Advertisement Section" .
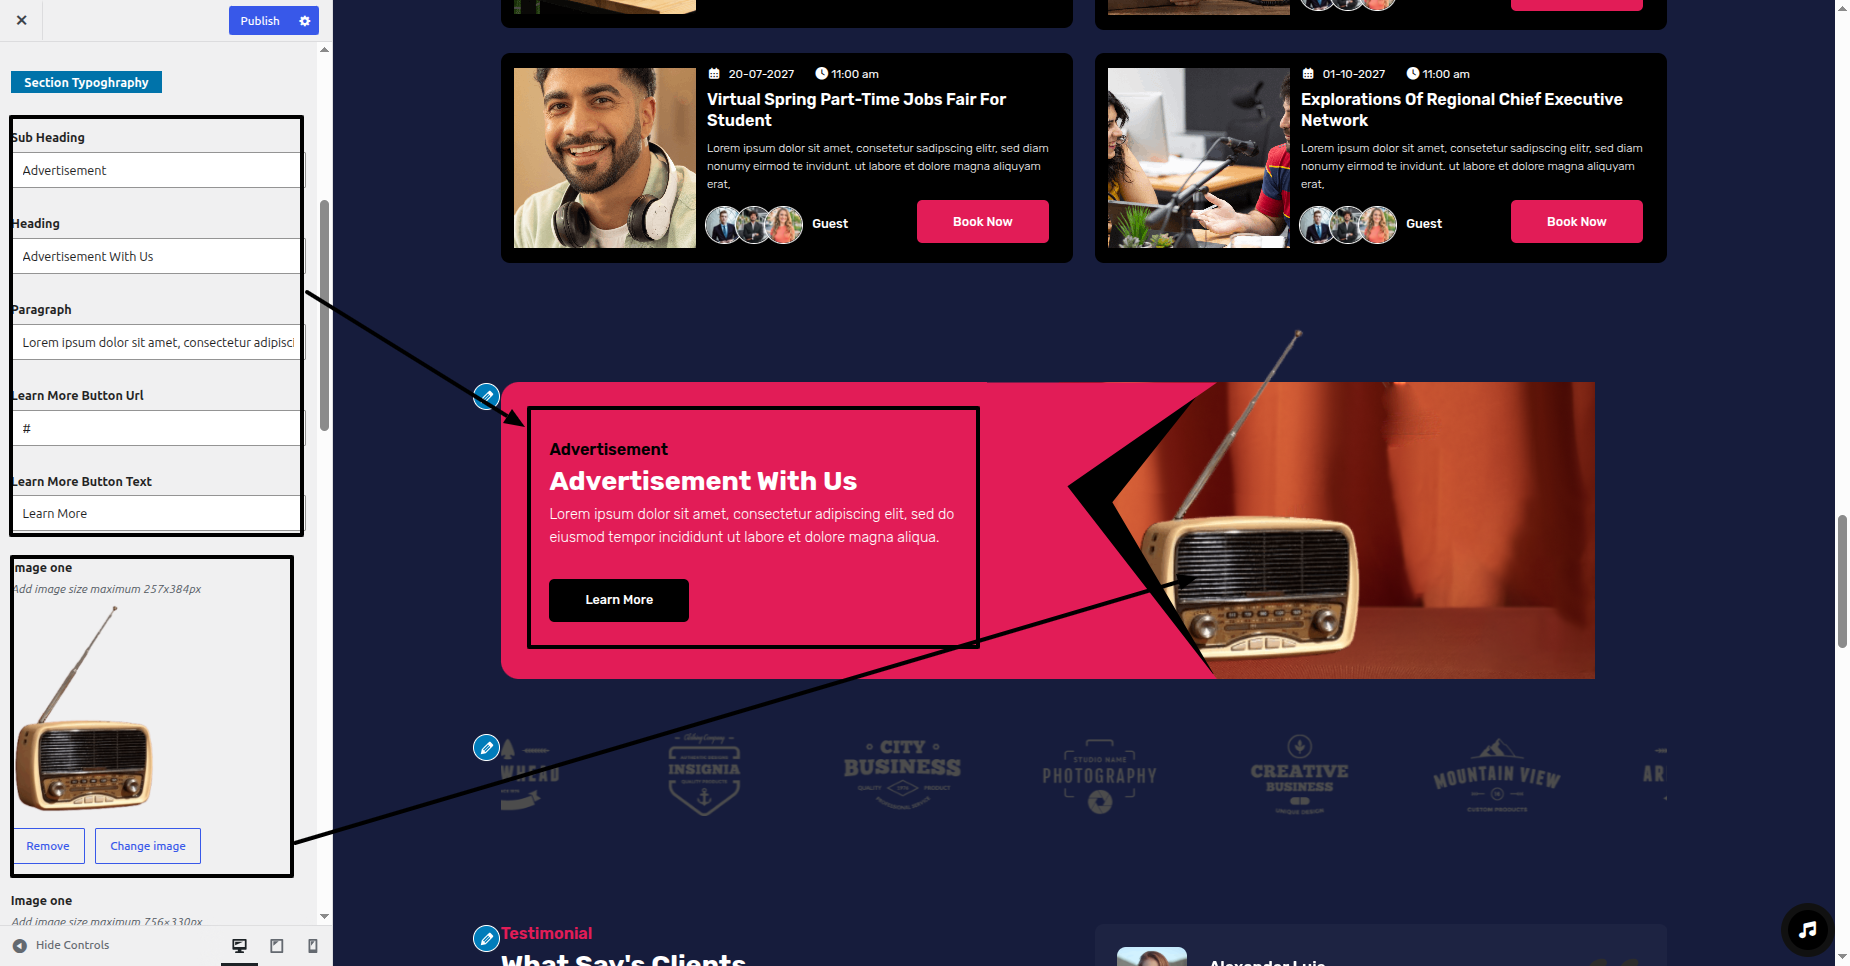
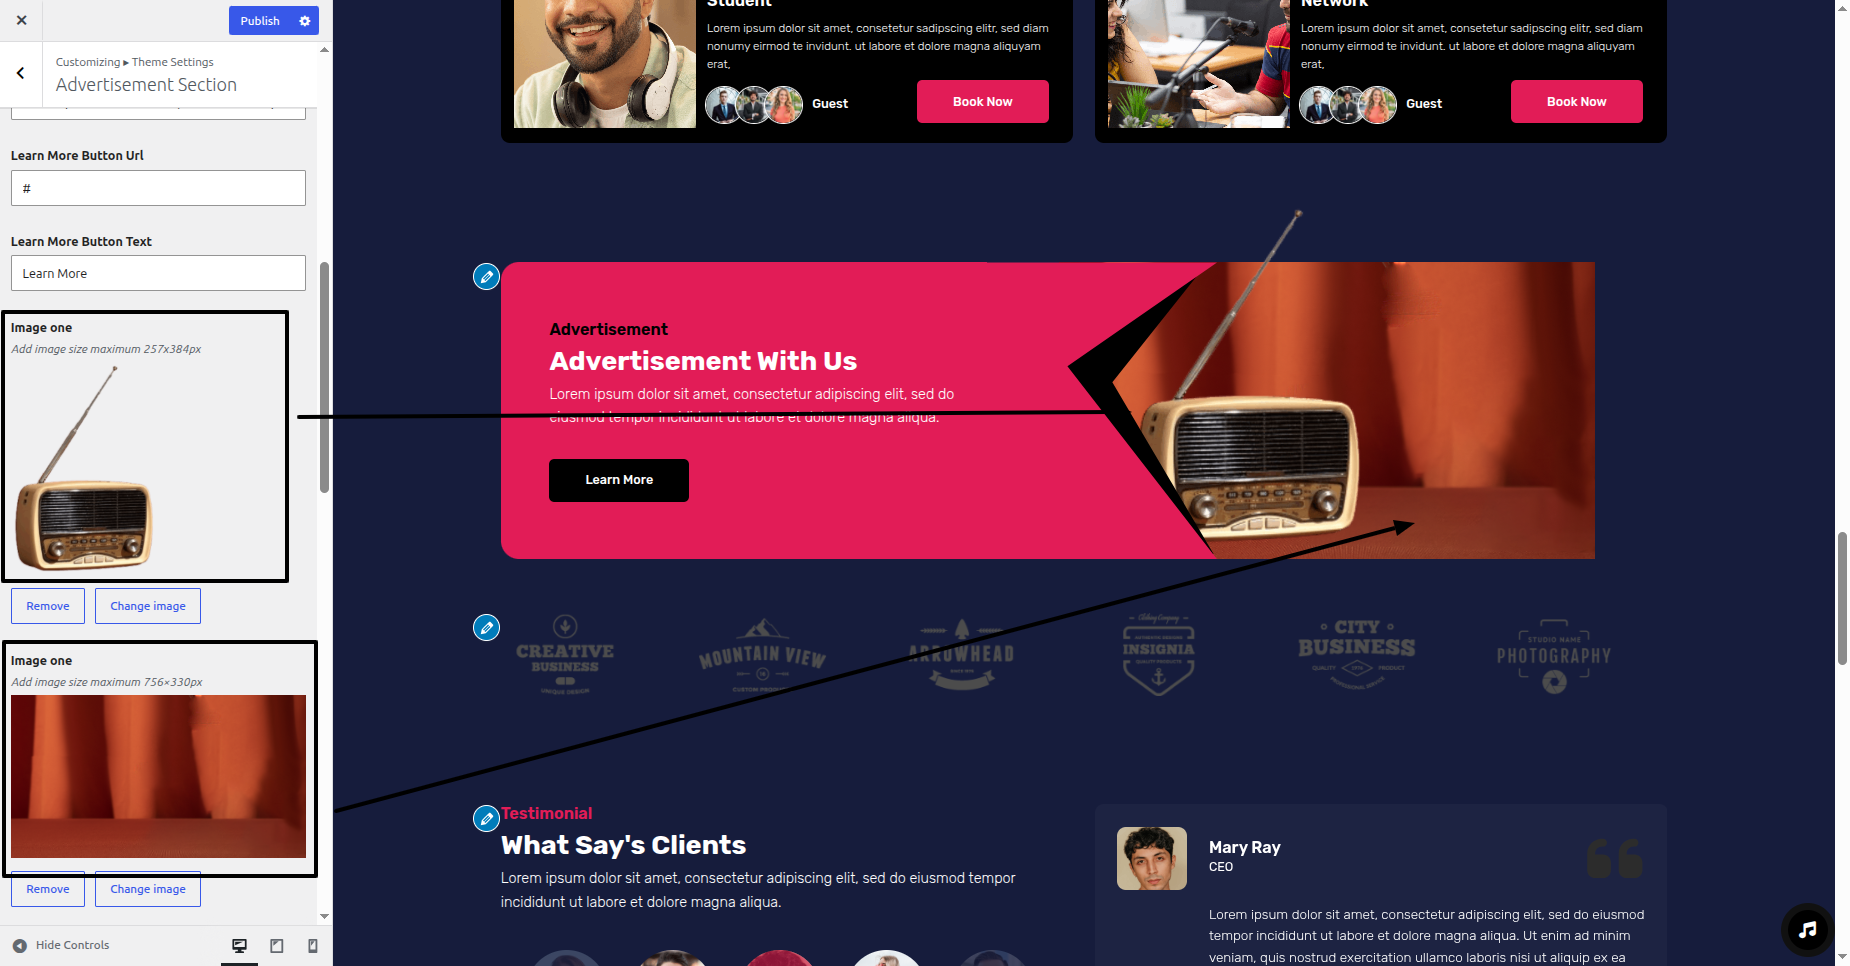
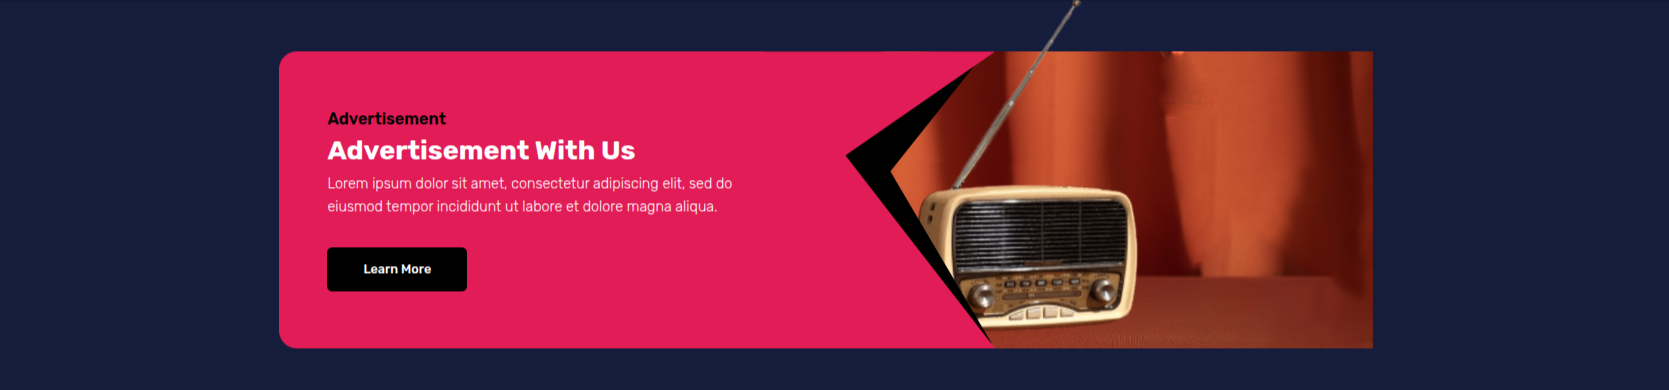
This is how the Advertisement section will display it.
Section on Developing Partner
Regarding Partner Configuration.
To modify your theme options open"Appearance" By going to "Customizing" Head over to "Theme Settings" Proceed to "Partner".
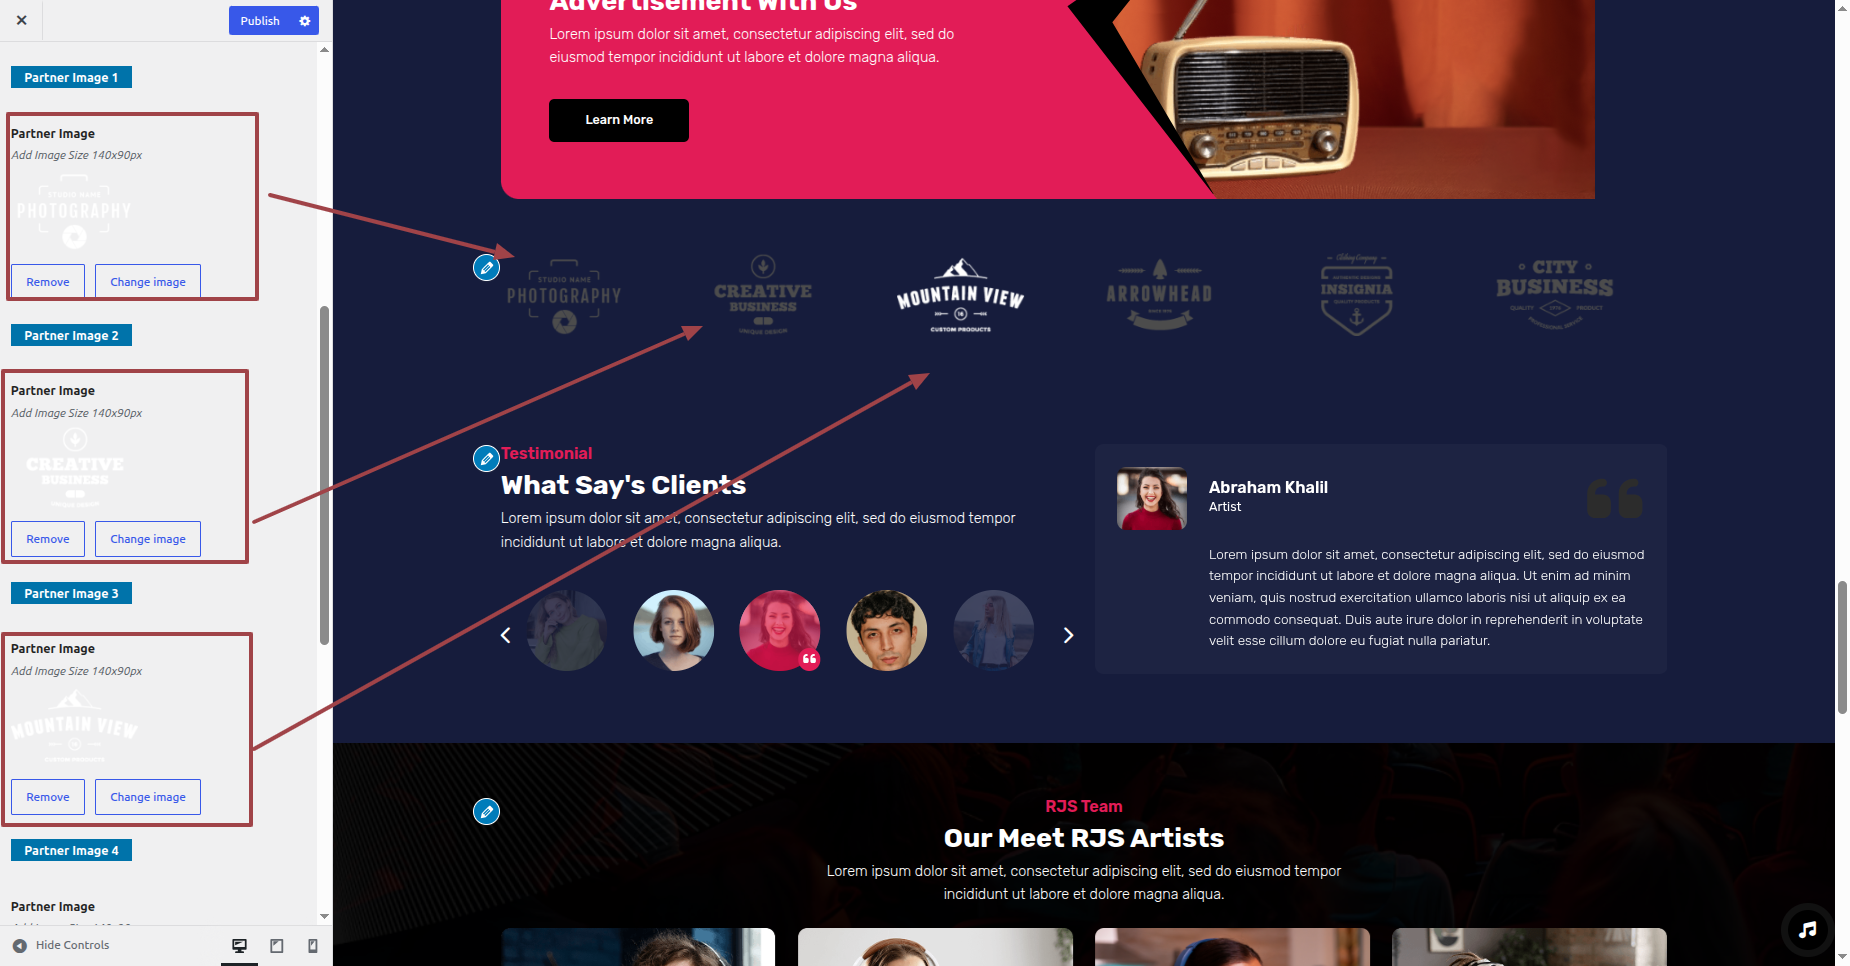
This is how the Partner section will display it.

Section on Developing Testimonial section
Regarding Testimonial section Configuration.
Radio Jockey Pro Postype Plugin installation and activation are prerequisites, Your dashboard will have a Testimonial once the plugin has been enabled.
To modify your theme options open"Dashboard" By going to "Testimonial" Head over to "Add New".
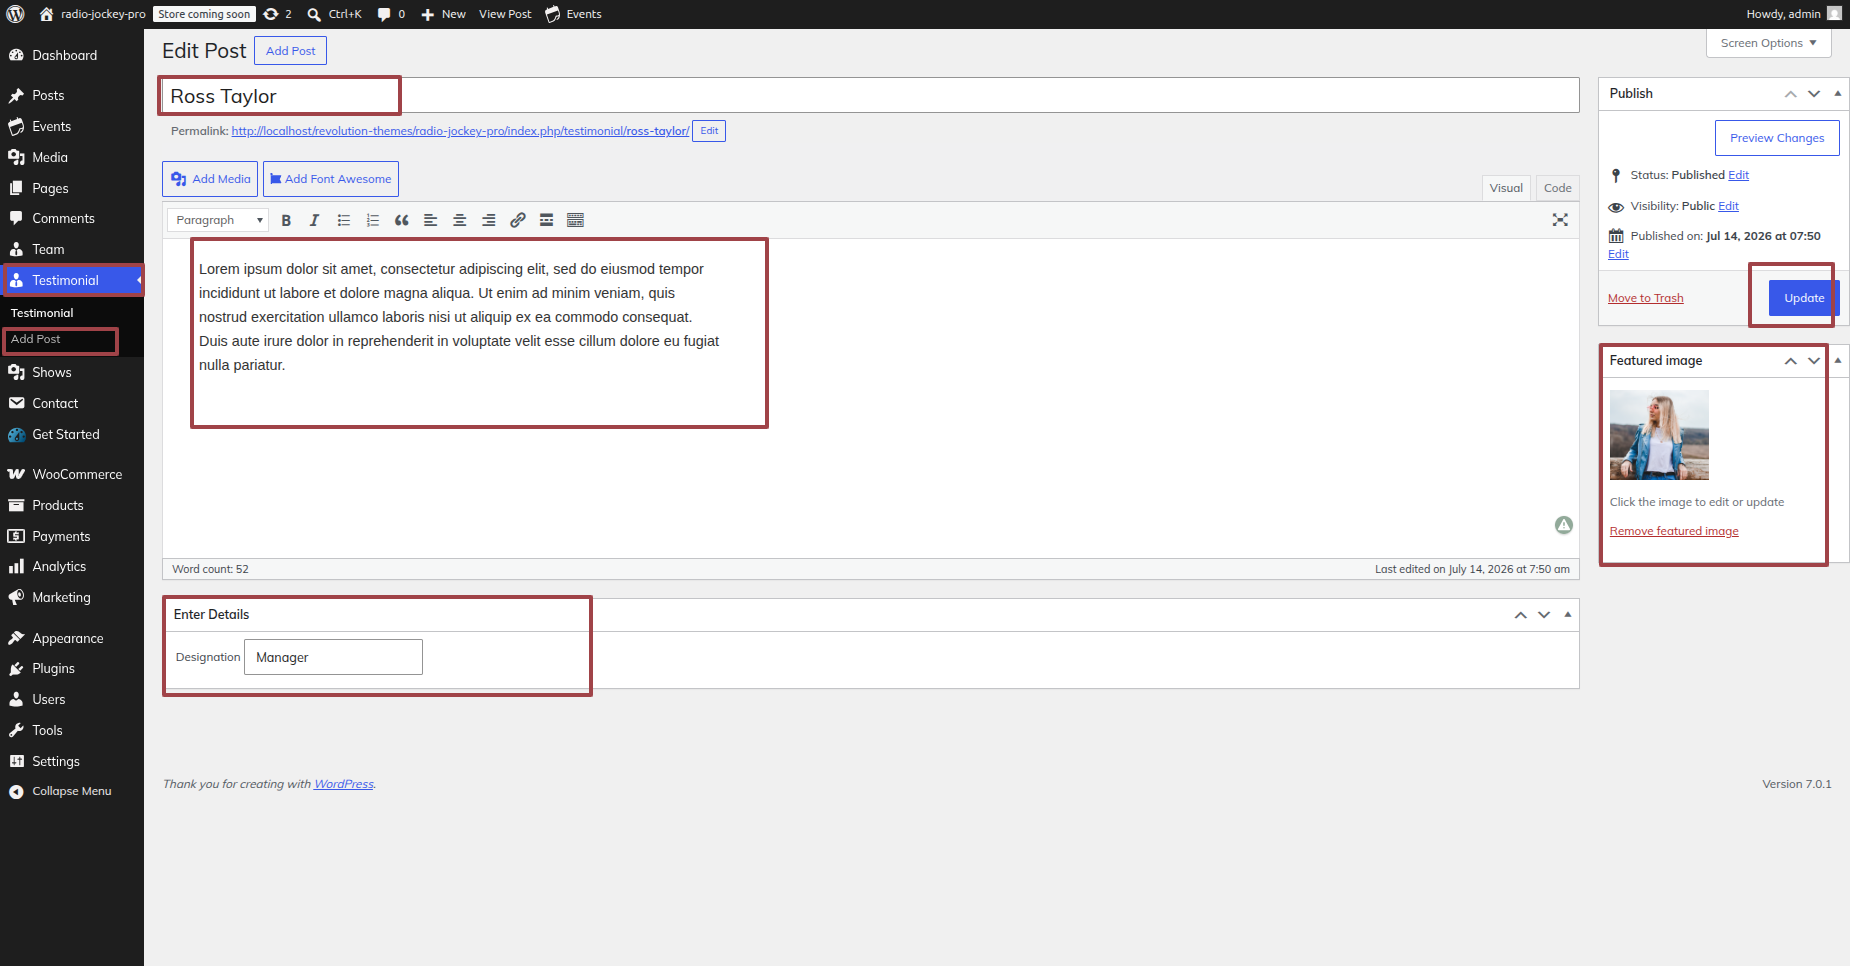
To modify your theme options open"Appearance" By going to "Customizing" Head over to "Theme Settings" Proceed to "Testimonial" .
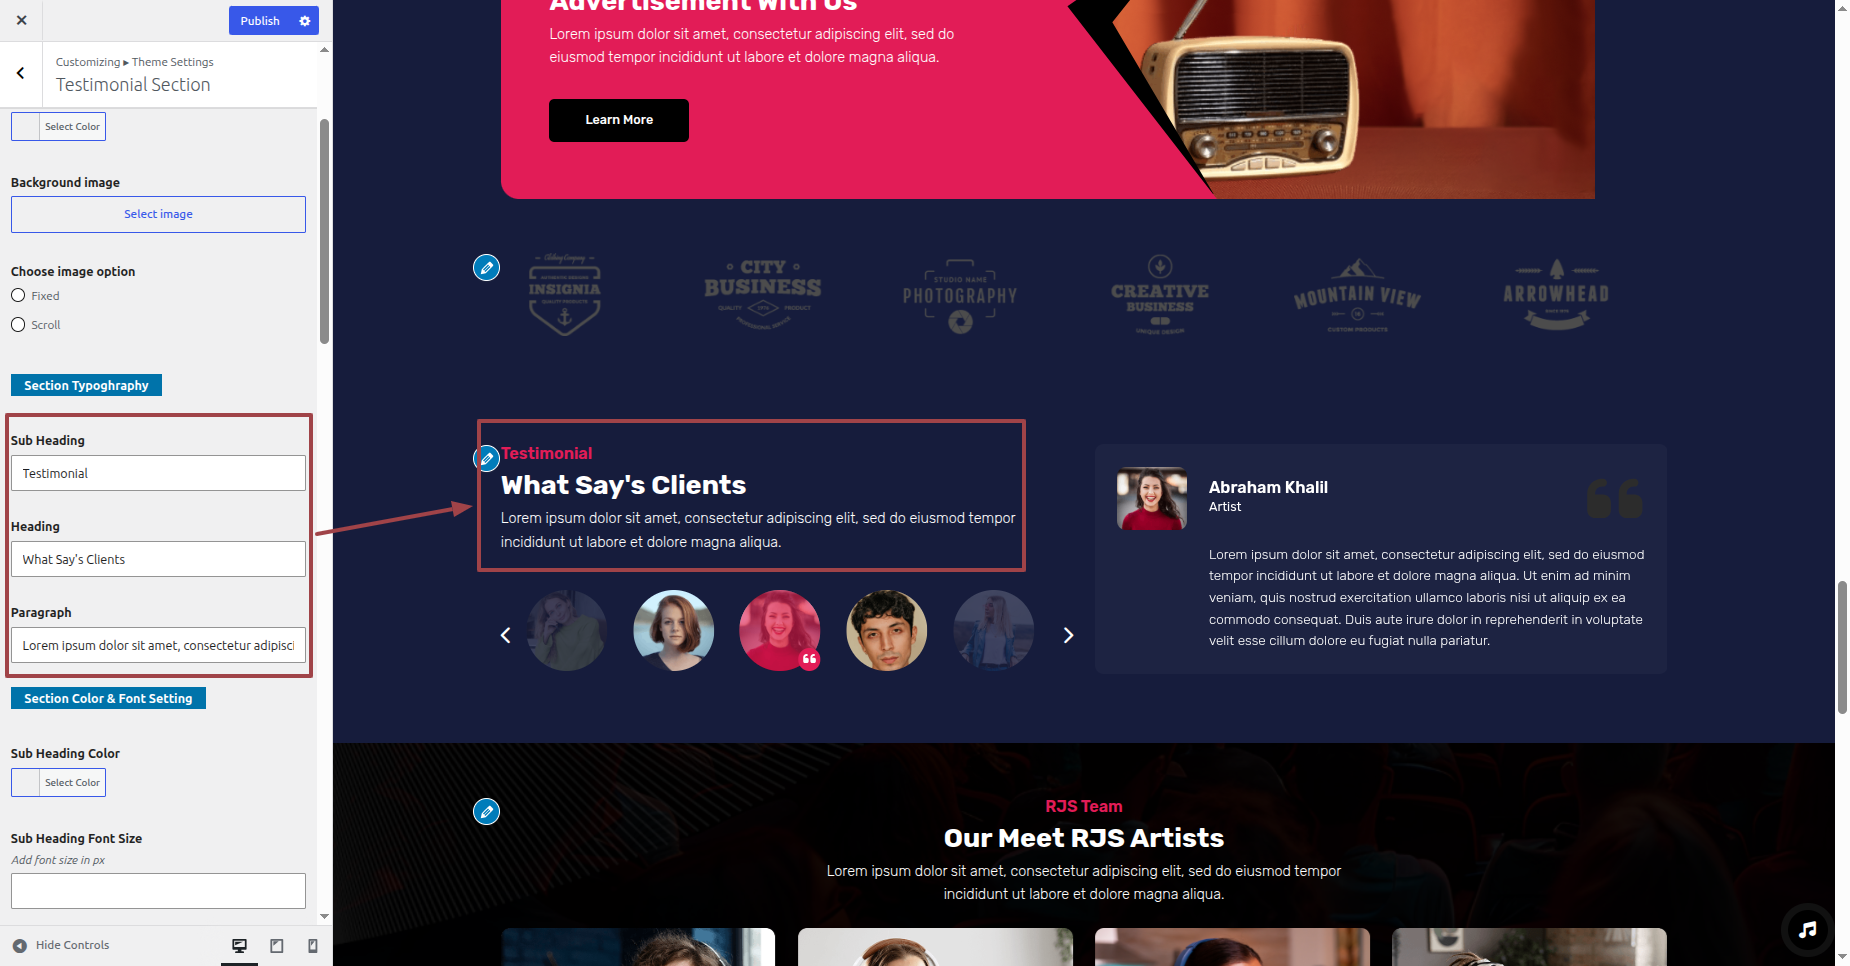
This is how the Testimonial section will display it.

Section on Developing Rj Team
Regarding Rj Team Configuration.
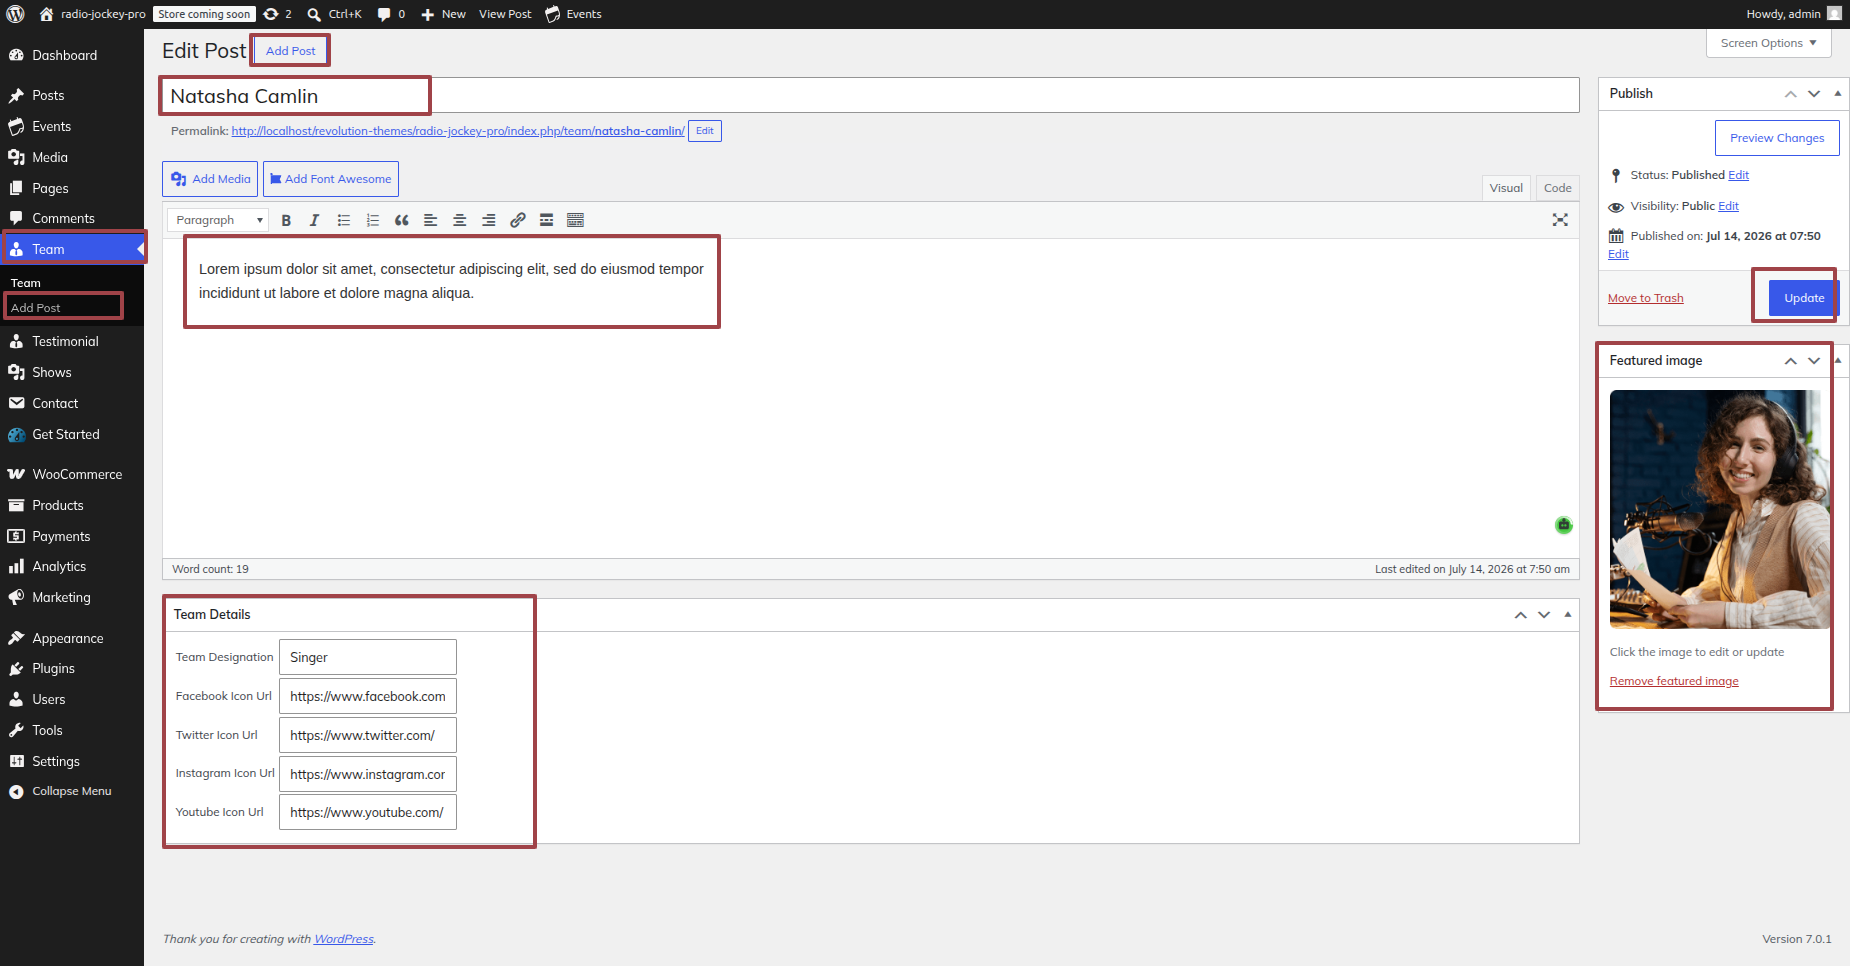
Radio Jockey Pro Postype Plugin installation and activation are prerequisites, Your dashboard will have a Team Section once the plugin has been enabled.
To modify your theme options open"Dashboard" By going to "Team" Head over to "Add New".
To modify your theme options open"Appearance" By going to "Customizing" Head over to "Theme Settings" Proceed to "RJ Team" .
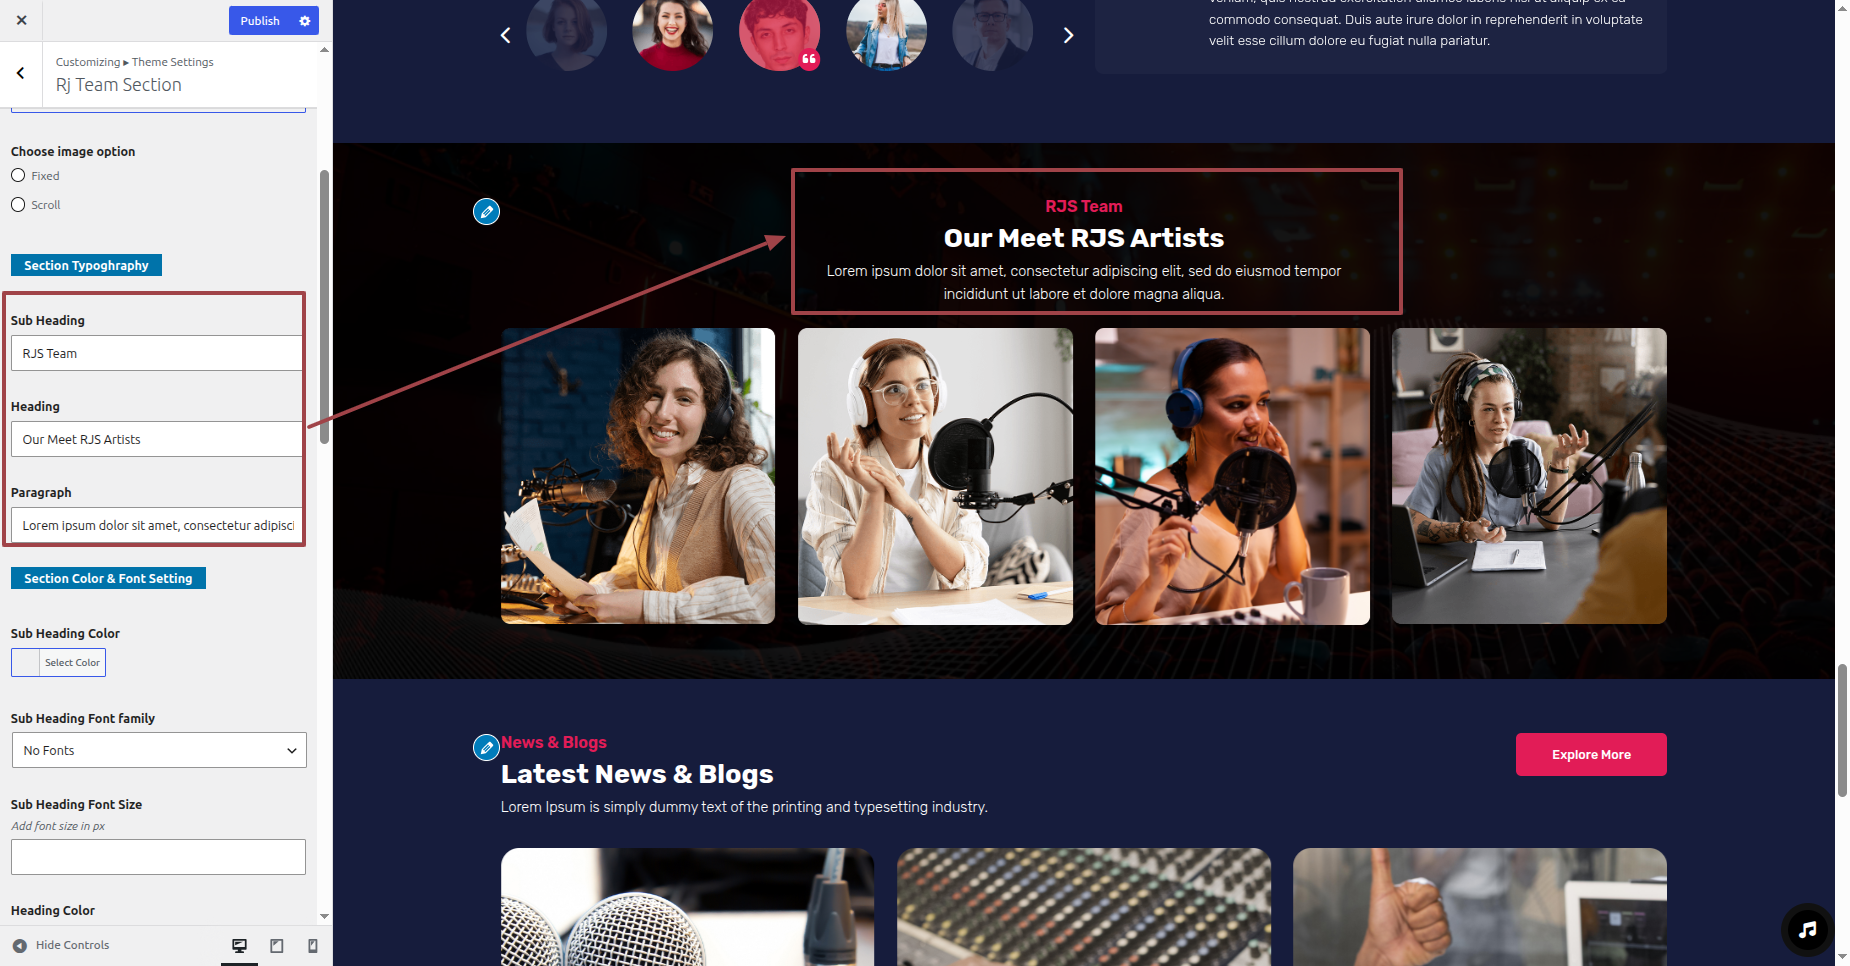
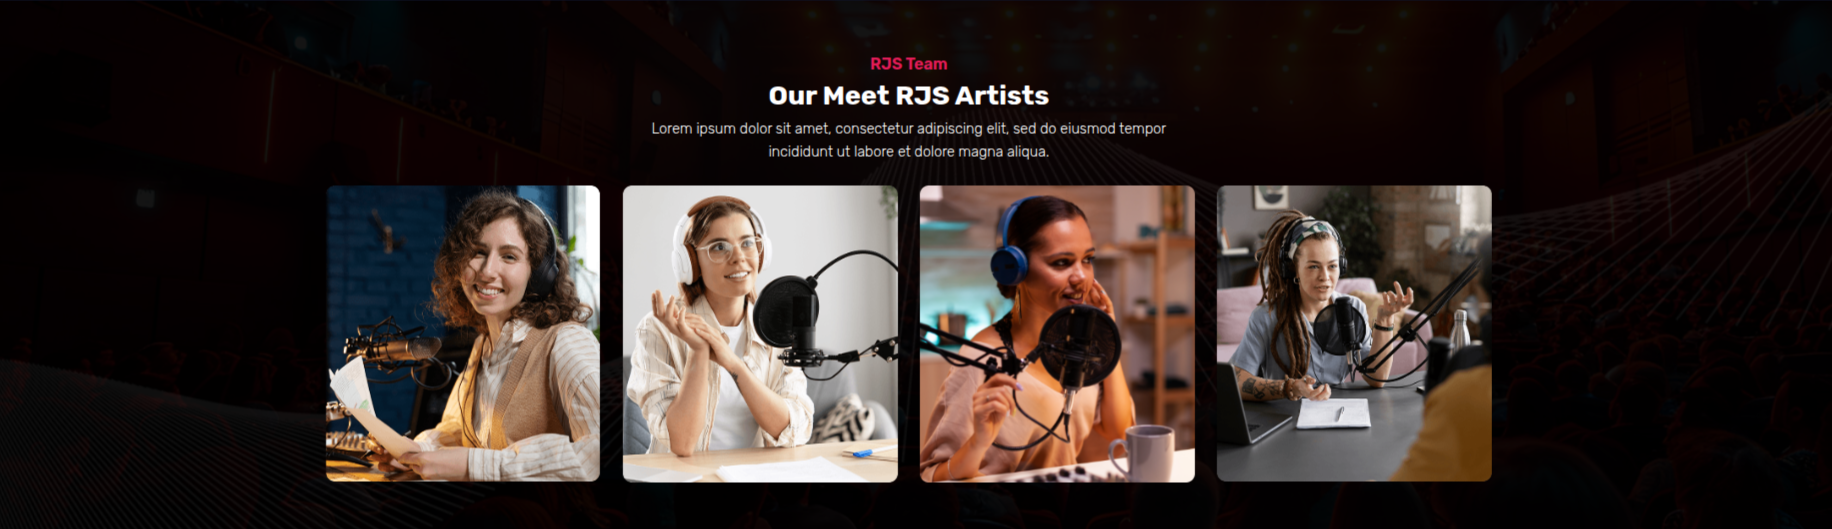
This is how the RJ Team section will display it.
Section on Developing Blog
Regarding Blog Configuration.
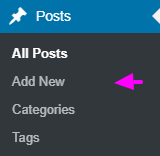
To modify your theme options open"Dashboard" By going to "Post" Head over to "Add New".
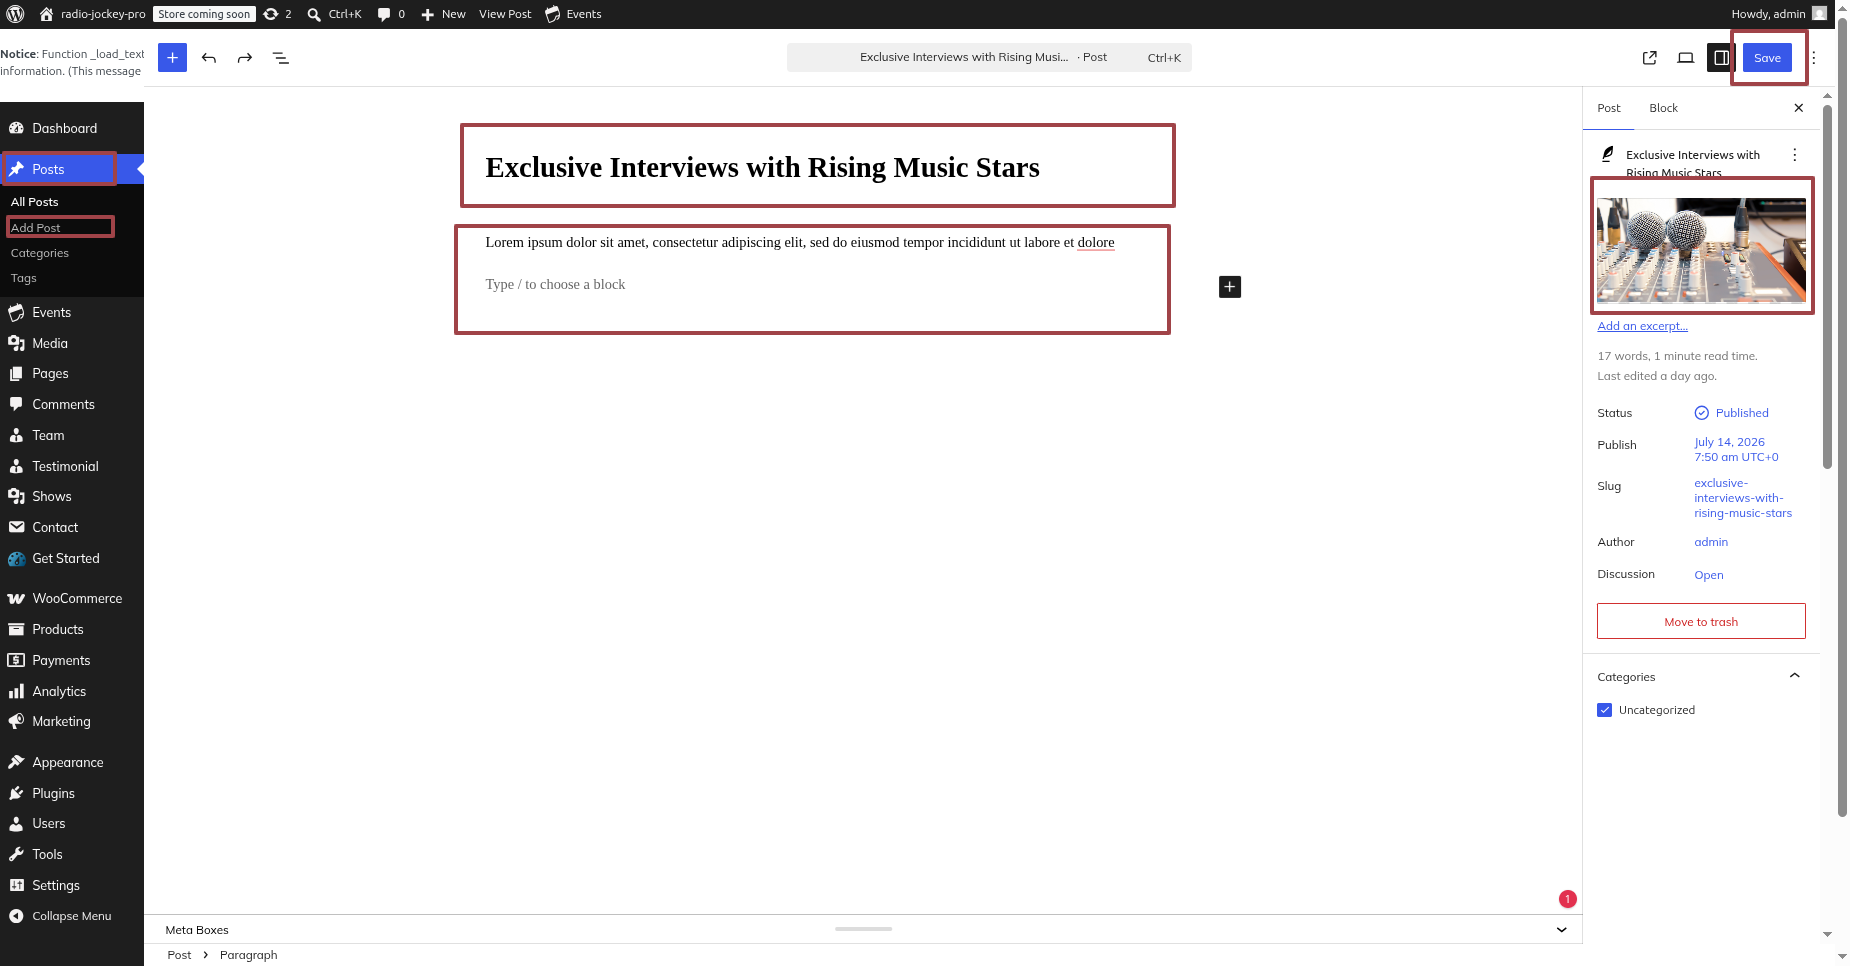
To modify your theme options open"Appearance" By going to "Customizing" Head over to "Theme Settings" Proceed to "Latest News & Blog" .
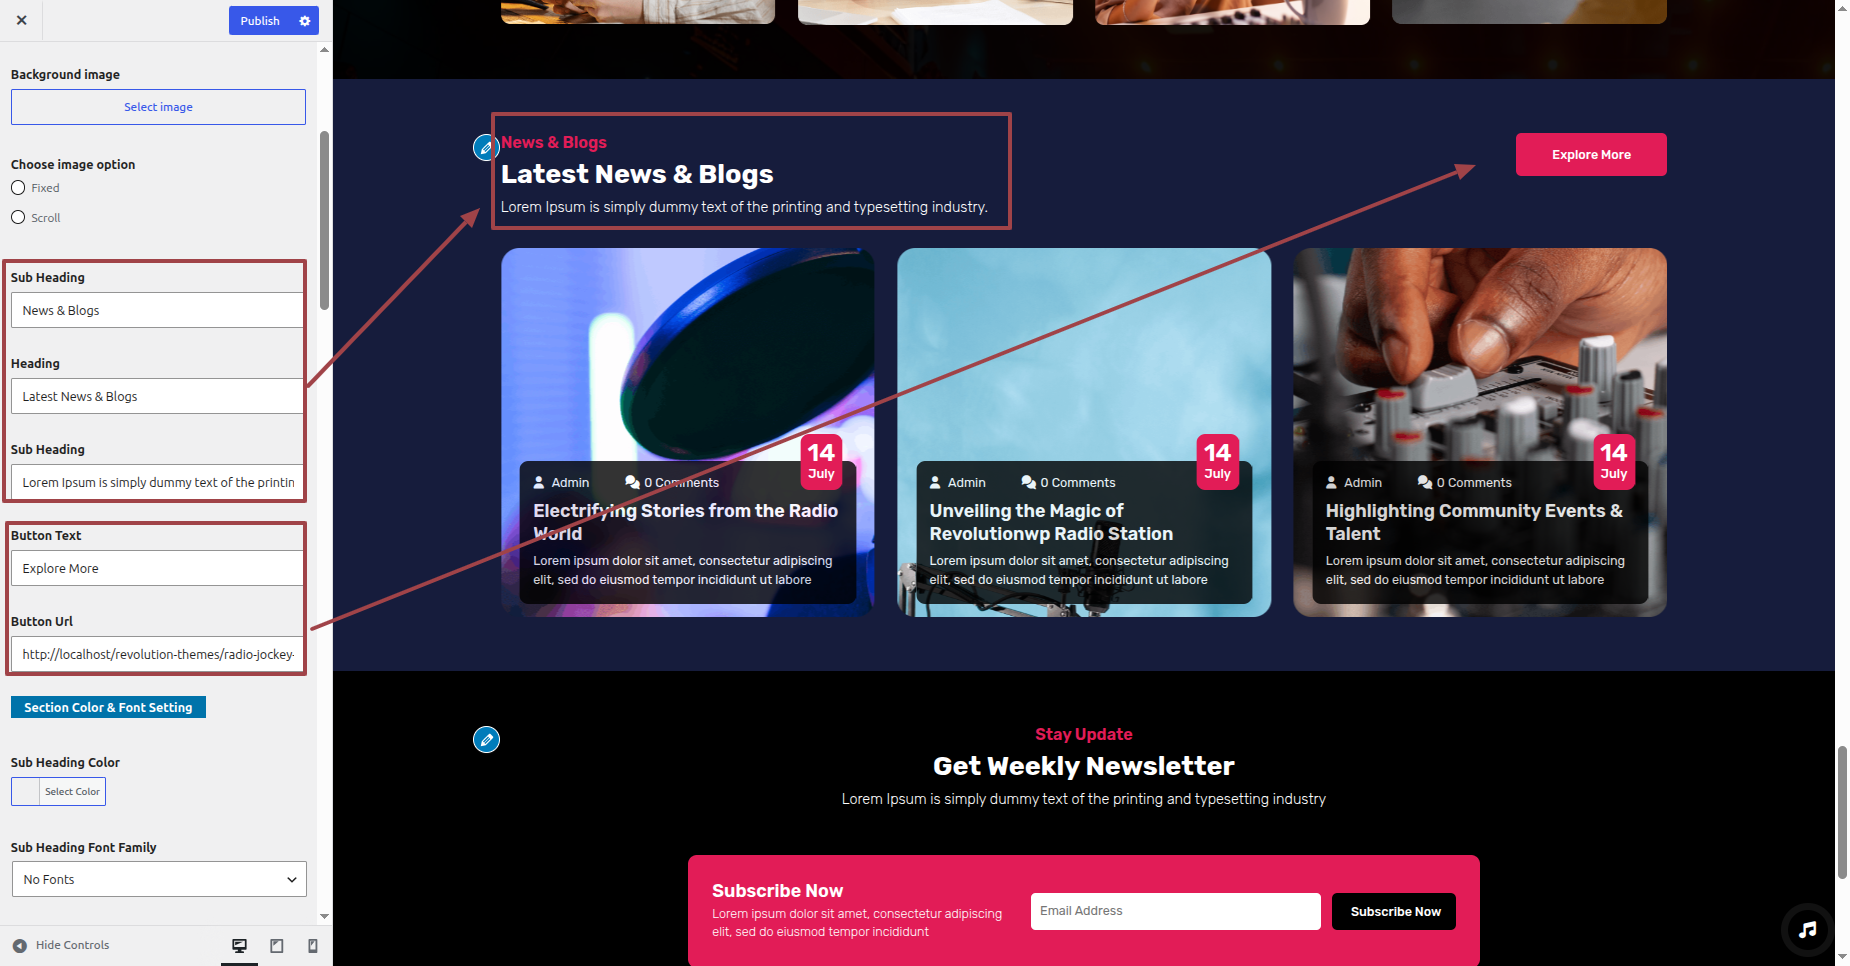
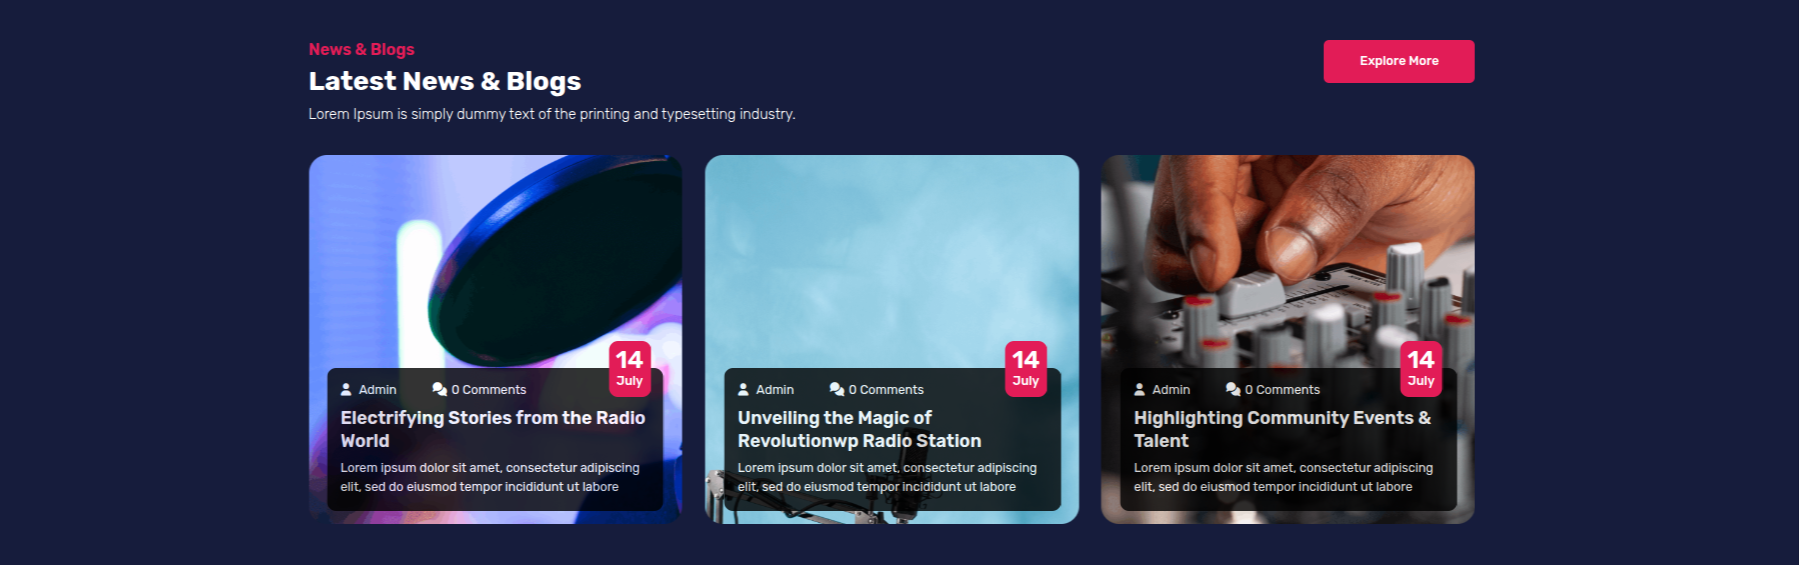
This is how the Blog section will display it.
Section on Developing Newsletter Section
Regarding Newsletter Section Configuration.
Contact Form 7 Plugin installation and activation are prerequisites, Your dashboard will have a Contact once the plugin has been enabled.
To modify your form options open"Dashboard" By going to "Contact" Head over to "Add Contact Form".
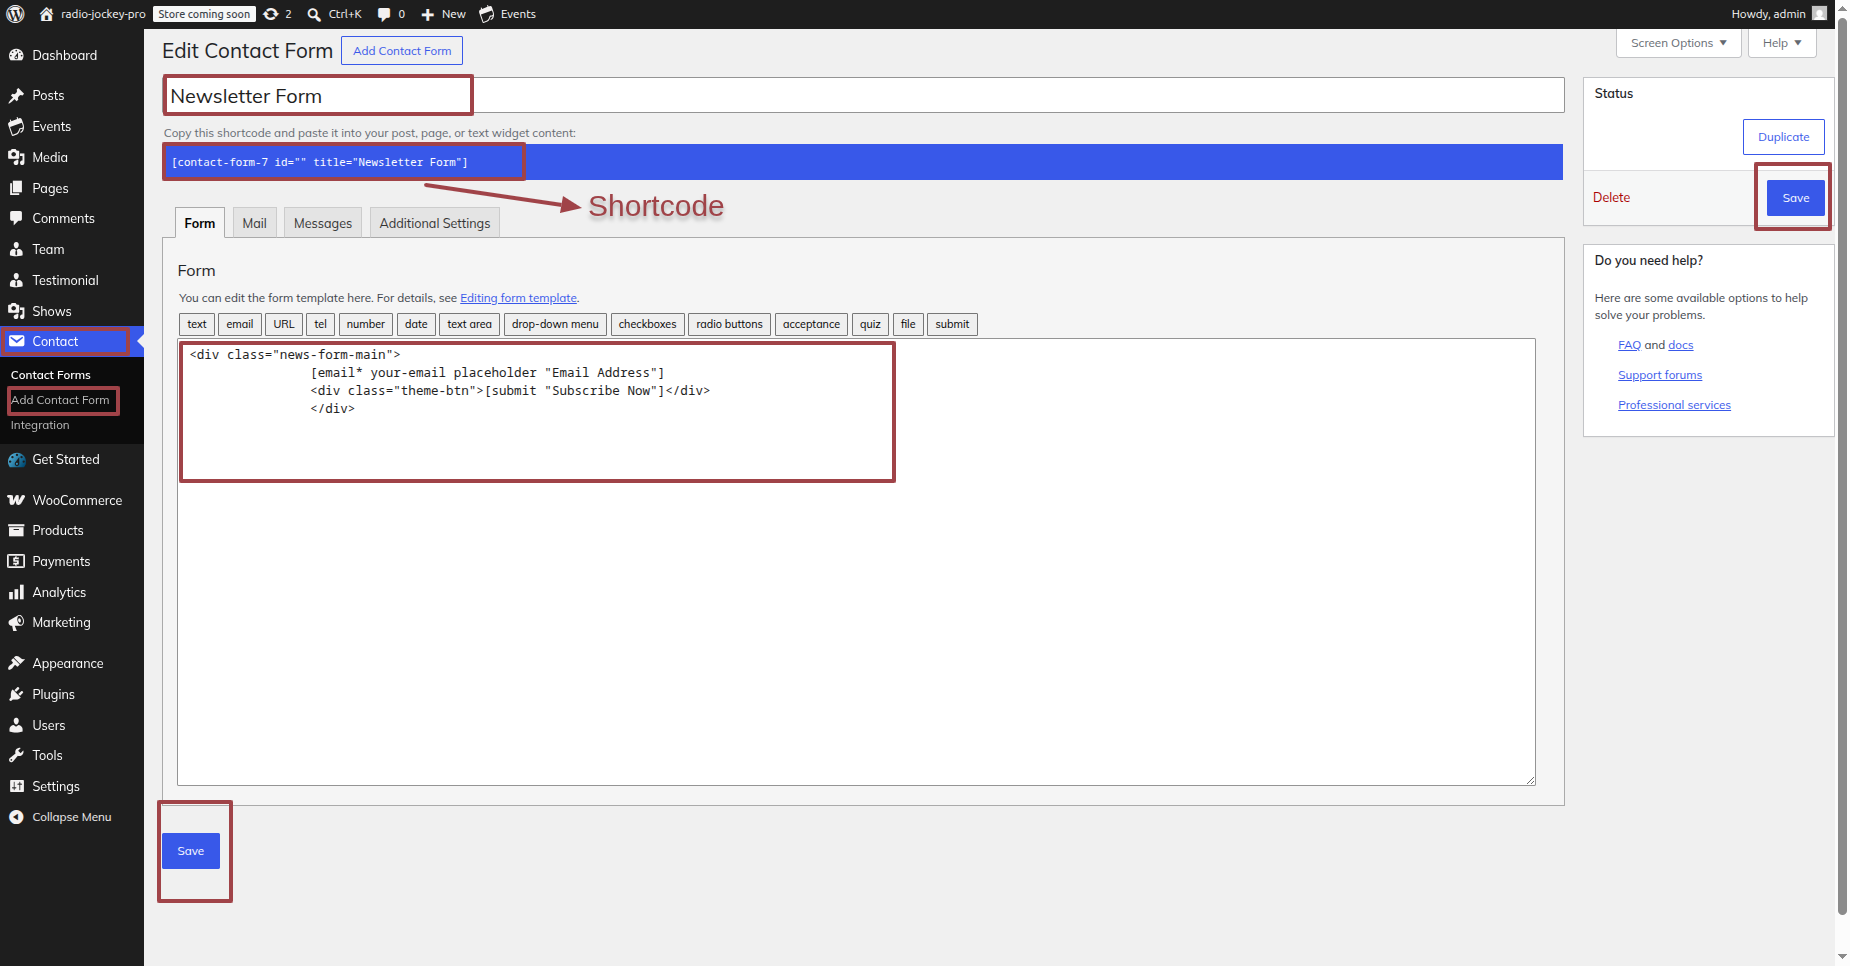
To modify your theme options open"Appearance" By going to "Customizing" Head over to "Theme Settings" Proceed to " Newsletter Section" .
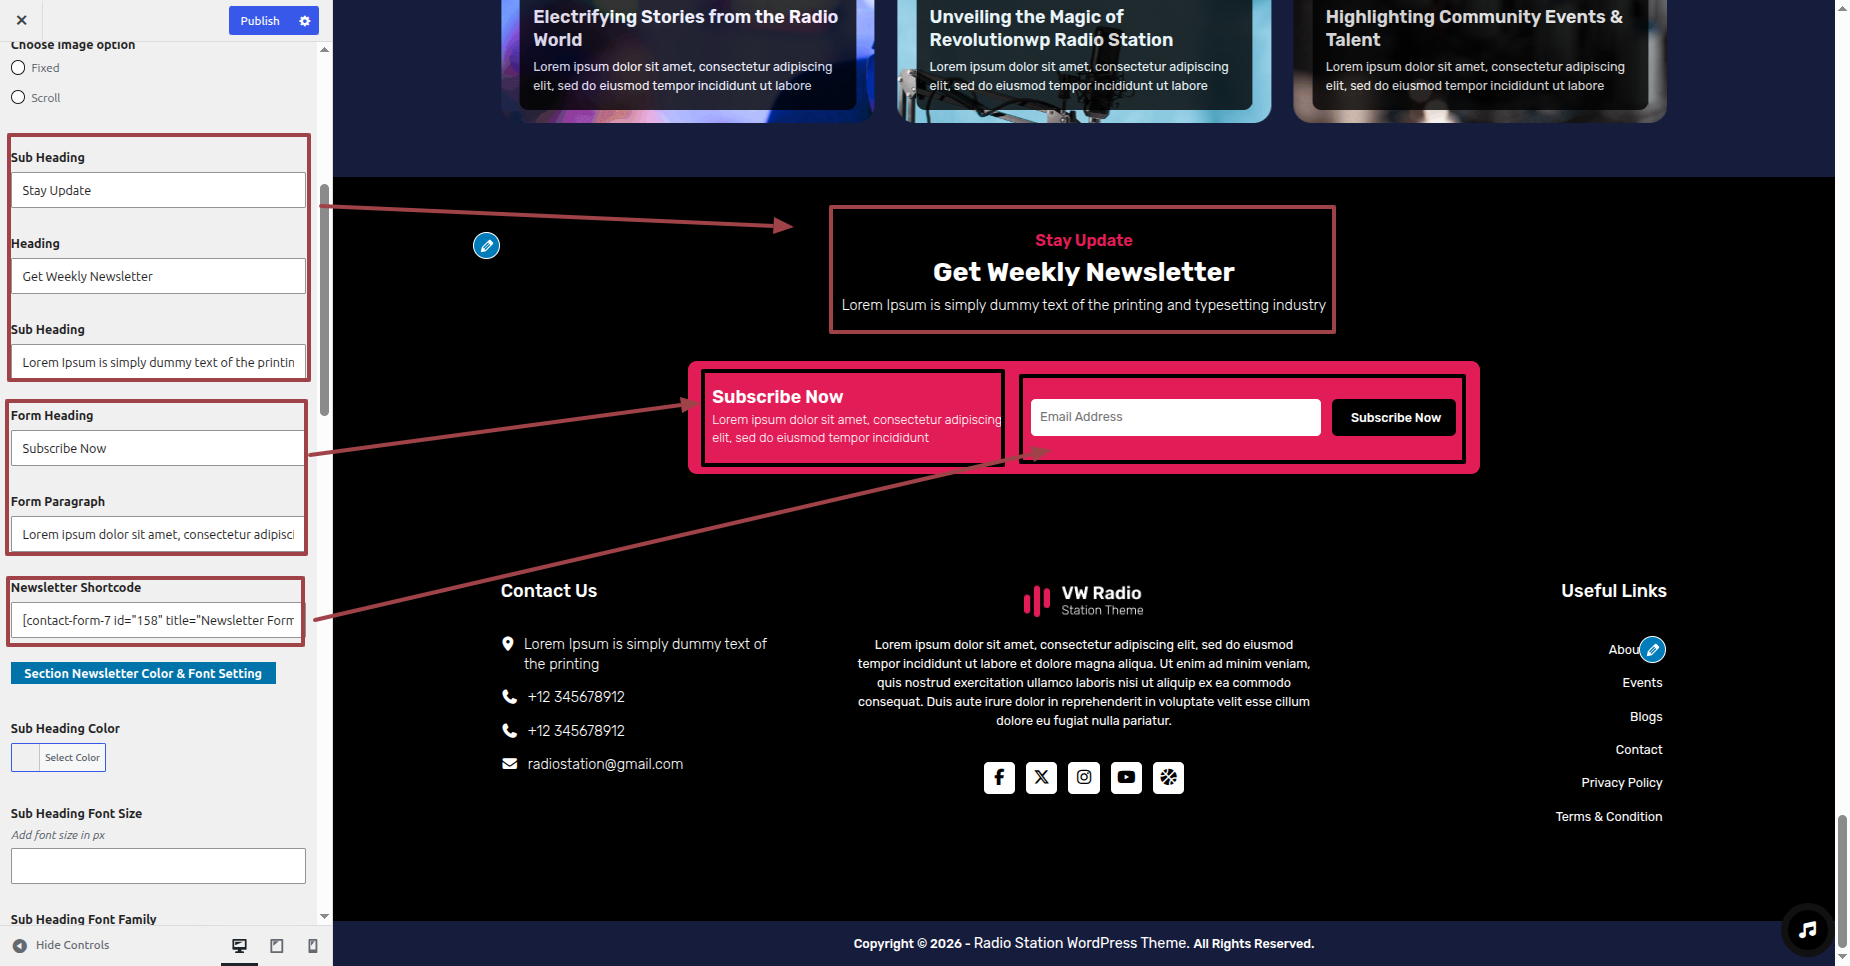
This is how the Newsletter Section will display it.

Section on Developing Footer Widgets
Regarding Footer Widgets Configuration.
To modify your theme options open"Appearance" By going to "Customizing" Head over to "Theme Settings" Proceed to "Footer Widgets" .
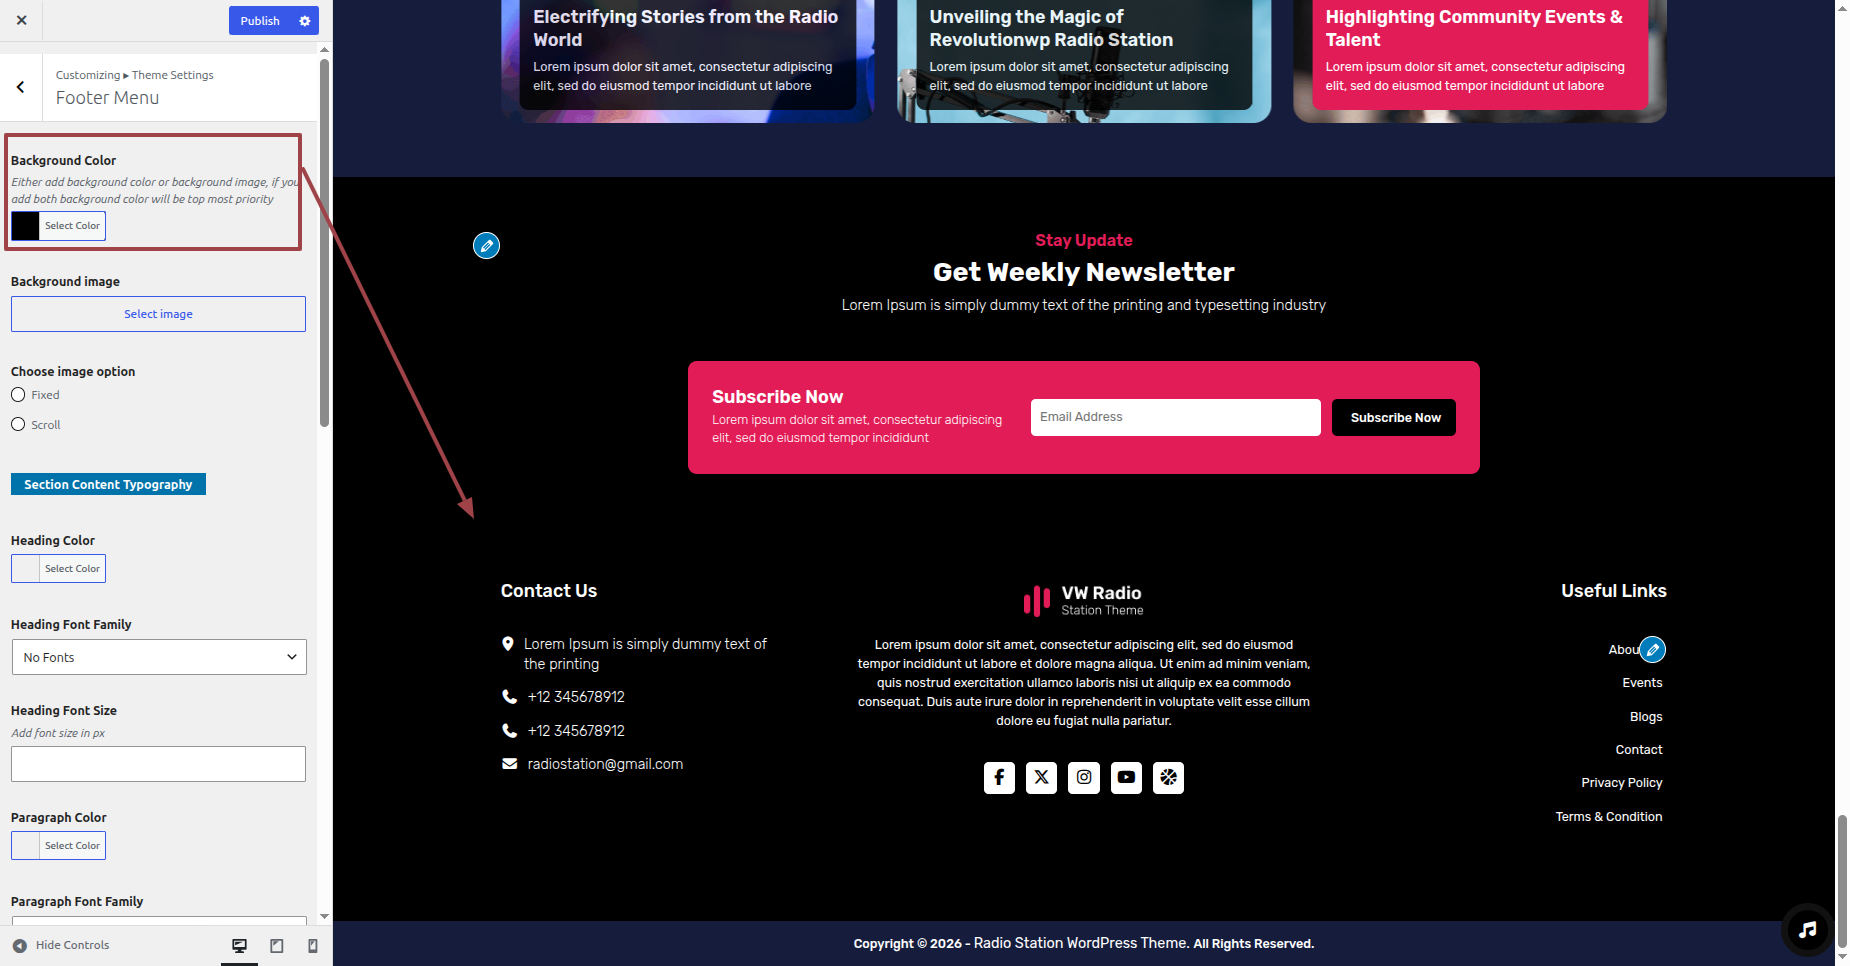
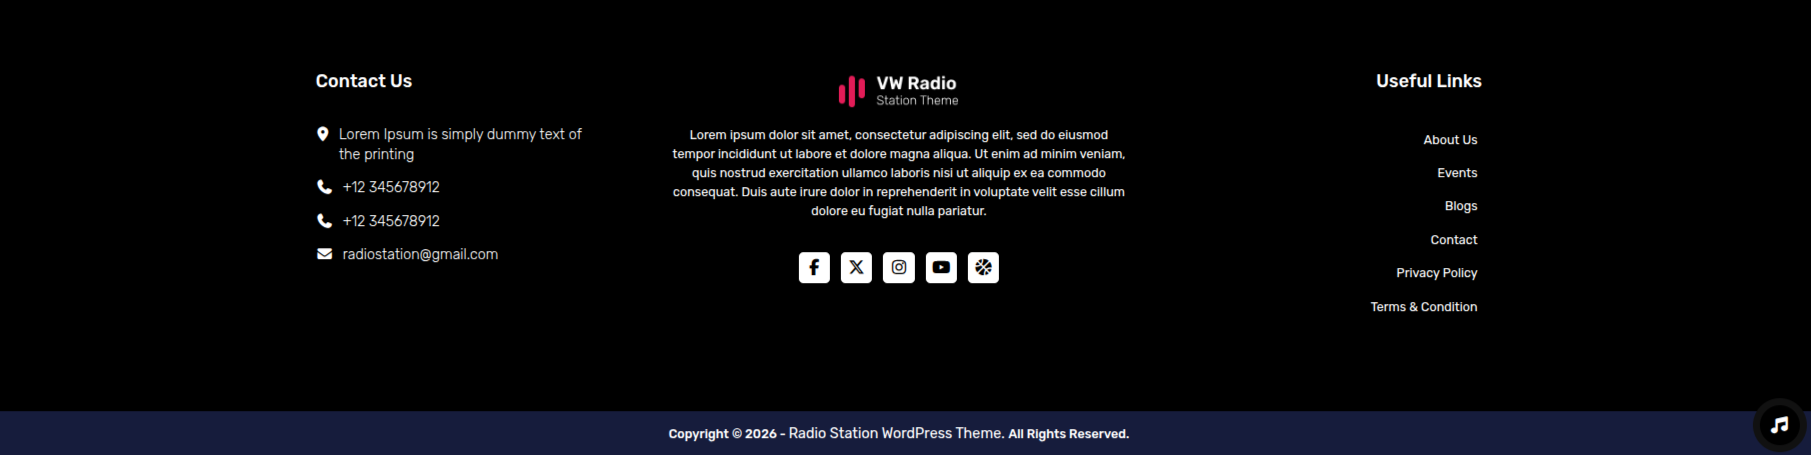
This is how the Footer Widgets section will display it.
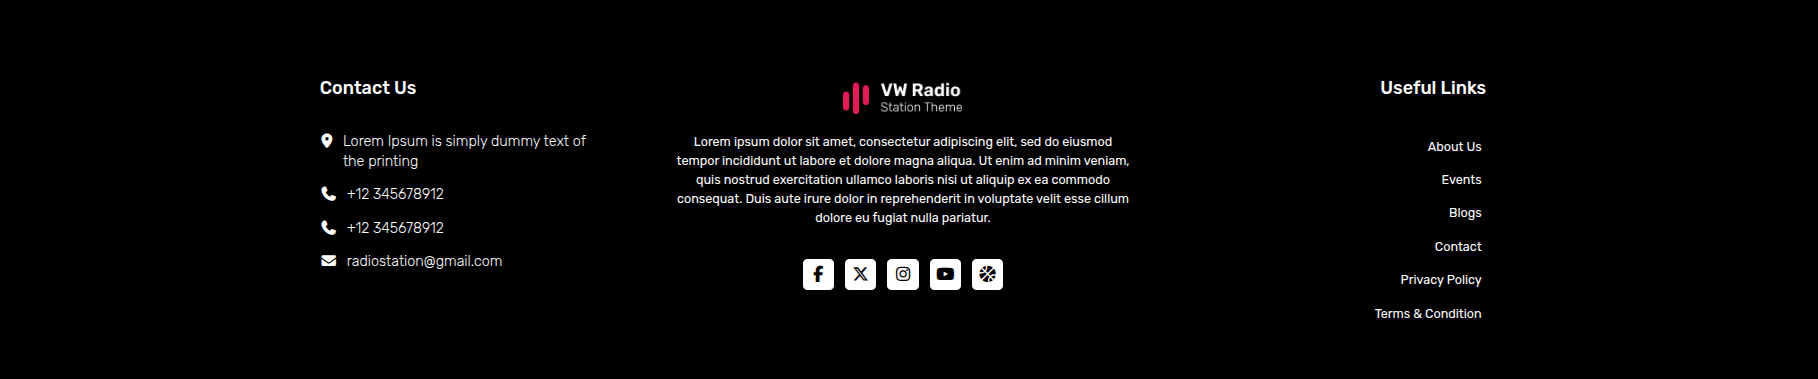
Section on Developing The Footer Text
Regarding Footer Text Configuration.
To modify your theme options open"Appearance" By going to "Customizing" Head over to "Theme Settings" Proceed to "Footer Text Setting" .
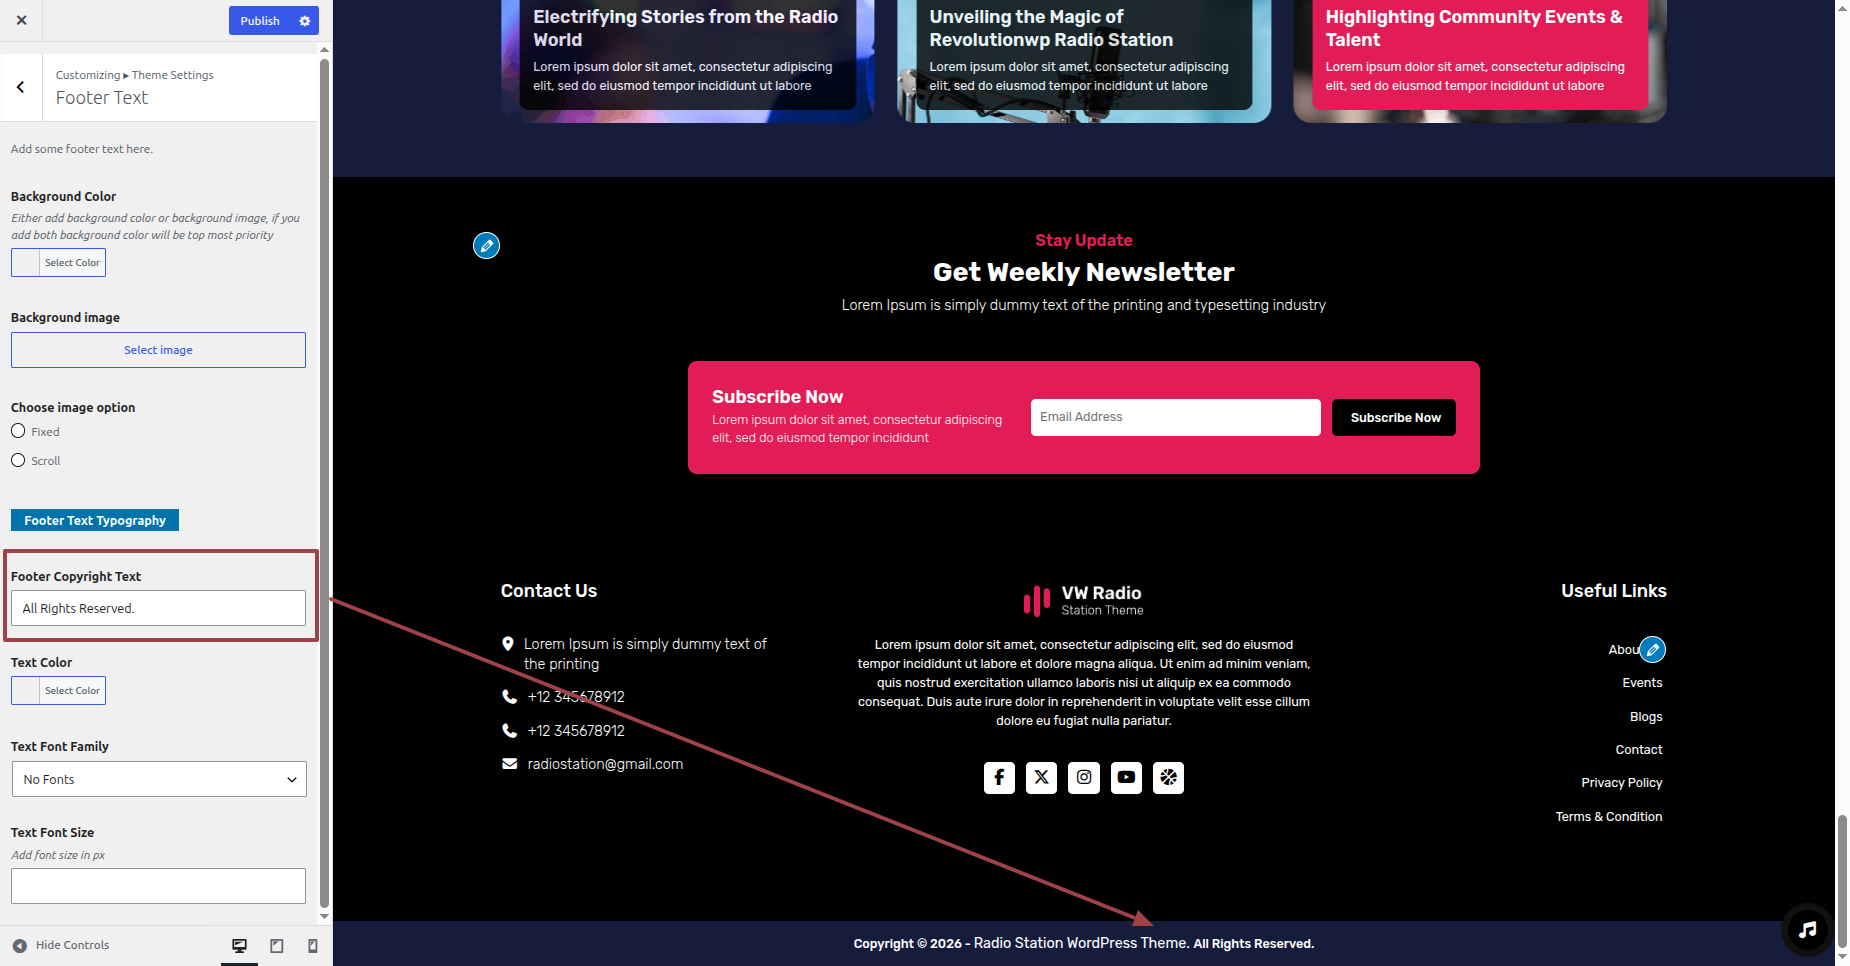
This is how the Footer Text section will display it.
Post and category knowledge
Ways to Include a Category.
- Enter your login information to access your WordPress dashboard.
- Select Posts from the tab.
- Pick Categories for Organic Posts once you've finished that.
- Your new category's name in the text field
- Next, select Add New Category from the menu.
- From the menu, pick Publish.